A few years ago, a conversation between a cyclist and a friend or family member could very easily go like this:
Friend: “How much did your bike cost?”
Cyclist: [Responds with a number between £2000 and £4000]
Friend: “You could buy a car for that!”
Cyclist: “Yea, but it would be a pretty naff car”.
At the time, a “superbike” would have a machine retailing over £7000. Times have changed. Now, you can easily spend that on a relatively mid-range bike, and it’s not uncommon to see top spec bikes hitting a jaw-dropping £15,000. Now, you actually could buy a pretty good car for that.

Glen’s an ex-racer who became a mechanic in 2002, working in shops and also for professional race teams. He built his first bespoke frame in 2013, and now designs, tests and sells new frames and bike builds at ÆIGHT bike.
Of course that’s not the point, because your modern day high end bike is more like the F1 end of the sport rather than the family run-around, but for someone who is new to our sport, where and how do you even get started? And if you’re working to a budget, is it possible to end up with the bike of your dreams by upgrading parts in a calculated way over time?
The practice of upgrading a bike over time has become a little lost over the years. But, it’s something I do a lot for customers at ÆIGHT bike, where we create custom builds and help riders looking to overhaul their existing machines to create their dream ride. If it’s something you want to try, here’s how you can build a superbike out of a ‘normal bike’, for less money – if you’re willing to invest a little time into the project.
Step One: Buying the ‘base’ bike

Industry turbulence means there are deals to be had on complete bikes
(Image credit: PedalHeaven)
If you’re going to start with a bike which you want to upgrade to superbike status over time, you’d be well advised to begin the process with a carbon frame. The frame is the most expensive component in almost all builds, and many brands use the same chassis throughout a bike family, simply changing components in line with the increasing RRP.
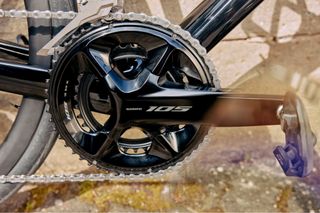
When it comes to groupsets, the quality of how they work doesn’t often alter that much, they simply weigh less as you increase your spend – therefore I’d recommend looking for a bike with Shimano 105 or SRAM Rival because, as you’re saving up for more bling, these groupsets will not let you down. At this point don’t worry too much about what wheels and tyres the bike comes with because they’re first on the upgrade list.
Building a custom bike on a budget is almost always going to cost more, so it’s worth beginning your journey with a complete bike.
Due to various factors affecting the bike industry at present, many shops are desperate to shift stock and so there are plenty of deals to be had. Focusing on UK deals, I found a Specialized Tarmac SL7 Sport 105 that was £3250 on sale for £2350. A Cannondale SuperSix Evo 105 was £2850, but I’ve seen them for £2565. And the Liv Langma Advanced Disc 2 Pro Compact was £2700, but they’re available for £2159 at the time of writing. So, if you’re careful you can grab a bike from most brands for around 20% off.
Step two: Start the weight saving process

Start with the wheels and tyres for rapid increases in performance
(Image credit: Future)
The first candidates for an upgrade are the tyres and/or wheels.
If you’re looking at initially improving the ride, fit a premium set of the best tyres – shop for a deal, and £100 can easily save you some valuable grams. More importantly, good tyres vastly improve the way your bike functions.
However, if you’re serious about turning your bike into a superbike, then the first step is to upgrade the entire wheelset. This may not be as expensive as you may think – there are many small scale wheel builders out there creating carbon wheels that more than rival the big brands, at a fraction of the price; £1200-1500 spent with a precision wheel builder can easily save you 800g to a kilo on a standard budget wheelset [for more on what to ask your wheel builder for, check out this piece – Ed].
If we assume we started with a bike that weighed around 8kg and set you back around £2300, we’re now down to around 7.2kg, having spent £3800. More importantly – especially if this is where the budget runs out – you’ll have significantly improved the way your bike functions. Lighter wheels don’t just accelerate better, but they’ll brake and change direction more easily. At this stage, you’ll have spent a similar amount to many mid-range bikes, but your bike will be superior.
Step three: Get a Bikefit and upgrade the finishing kit

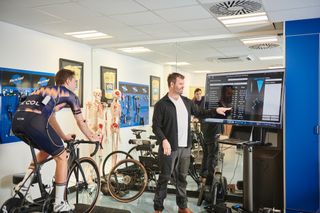
A bike fit is a good place to start, one with legend Phil Burt is an excellent place to start
(Image credit: Future)
At around £200 a bikefit is pretty pricey, but it may be the best money you’ve ever spent. In the right position, you will be faster, more comfortable, and able to take the guesswork out of future component investments.
If you’re going to upgrade your seatpost, stem, handlebars, saddle and bar tape, it’s critical to know precisely what measurements you’ll need for these bits. You can easily save the best part of 500 grams by upgrading your basic alloy parts for some lighter weight/higher performance carbon versions.
A one-piece bar and stem will make the biggest difference in terms of weight, but it’ll also make you more aerodynamic, without impacting comfort. Again a lightweight seatpost will save you crucial grams, and in tandem with a good bike fit, will infinitely improve comfort.
Result – by spending around about another £1k (£4800 total) you’ll have a 6.7kg bike (approx). In terms of performance, you’ll have a high end frame, precision lightweight wheels and a superlight finishing kit. This would be a brilliant way to get a race-ready road bike, below the UCI weight limit.
Step four: Upgrade the groupset

Pounds saved per pounds invested diminish once we get to the groupset
(Image credit: Shimano`)
Mechanically, all modern groupsets work well. Spending more won’t improve the way your bike functions. What you pay for are weight savings.
As per the wheel upgrade, a lighter bike will be more agile and easier to ride. However, the weight difference is around 500g when you make the leap from Shimano 105 to SRAM Red AXS, for example. This is why I recommend making this change further down the line, as there’s now a significant investment required for much smaller gains. A SRAM Red AXS groupset, depending upon where you shop, could set you back around £2000. Whilst 500g is a big saving, when we compare it to losing a kilo via your £1500 wheels, the weight weenie tax has multiplied. It’s smarter to upgrade the groupset later on, once you’ve got some use out of the orignal.
Our hypothetical bike now weighs around 6.2kg, for less than £7000. This is obviously a big spend, but when you compare this to most other ready-made 6kg superbikes with carbon components and a high-end groupset, it’s actually a bit of a bargain.
You now have a pretty high spec bike, but can we go further?
Step five: Get creative

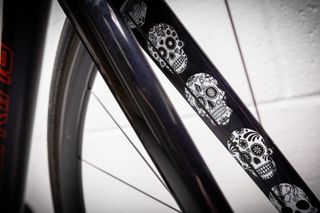
Custom paint applied to CW digital editor Michelle’s Werking, by Velo Atelier
(Image credit: Future)
Get it sprayed – the world is your oyster in terms of paint.
There are loads of great options and if you talk to your local mechanic or bike shop, and most can sort the whole thing, including an efficiency saving rebuild.
My favourite way of doing this is to ask the rider to create a mood-board of creations that they like, and then leave the painter to add their own mark via a meeting of ideas. This won’t add any performance and won’t save you any weight, but for around £1000 you’ll get something truly unique – it’ll be personal to you and win you points at the coffee stop.
Step six: The cherry on top

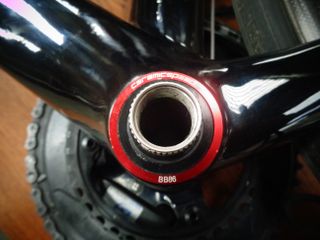
Ceraminc bearings are far from necessary, but they are nice to have
(Image credit: Glen Whittington)
The final stage of turning your now-custom bike into a superbike would be a full set of high end bearings, including hub, bottom bracket, pulley wheels and a headset. Add a waxed chain for maximum performance!
This step is all about performance, rather than any real weight saving. If you upgrade all of these bearings and add a waxed chain you will save yourself some crucial watts (up to 16 according to Ceramicspeed), which means you’ll travel faster for less effort.
However, going this far definitely enters the realms of diminishing returns. These upgrades could easily set you back £1000, and they won’t drop any grams, they’re really more about slotting in that final piece of the performance jigsaw.
Can you really get a £15,000 superbike, for less?
Yes. If you don’t want to shell out £15,000 in one hit on a custom superbike, you can very easily get the full real deal for around £9000 by shopping around and upgrading one step at a time.
Personally I think the biggest bang-for-you-buck are steps one to four, especially in terms of pure performance. Step five will turn your bike into something really special, and would represent a sensible place to draw the line for most aspiring racers or keen club riders.

