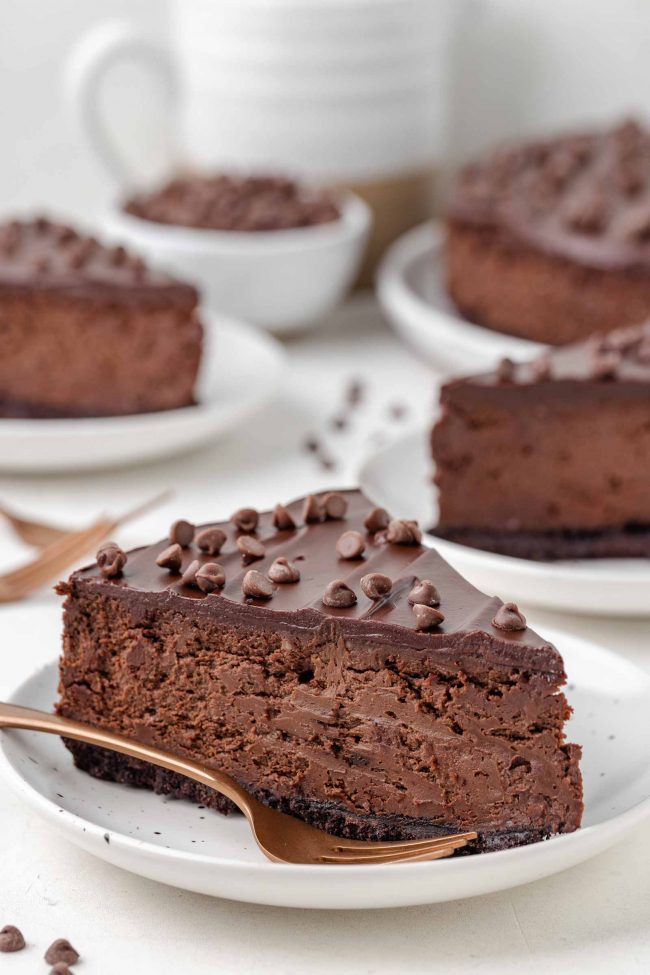
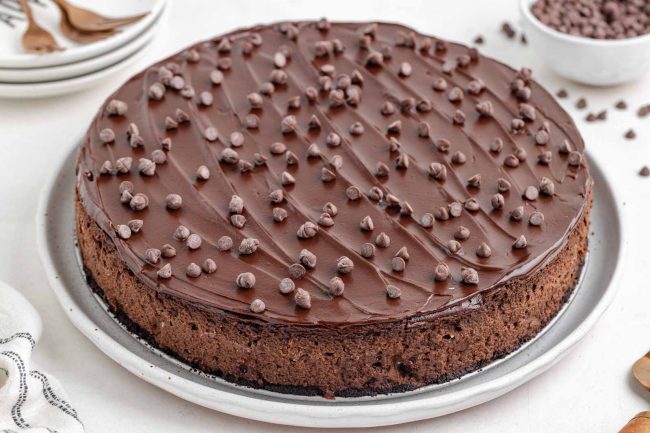
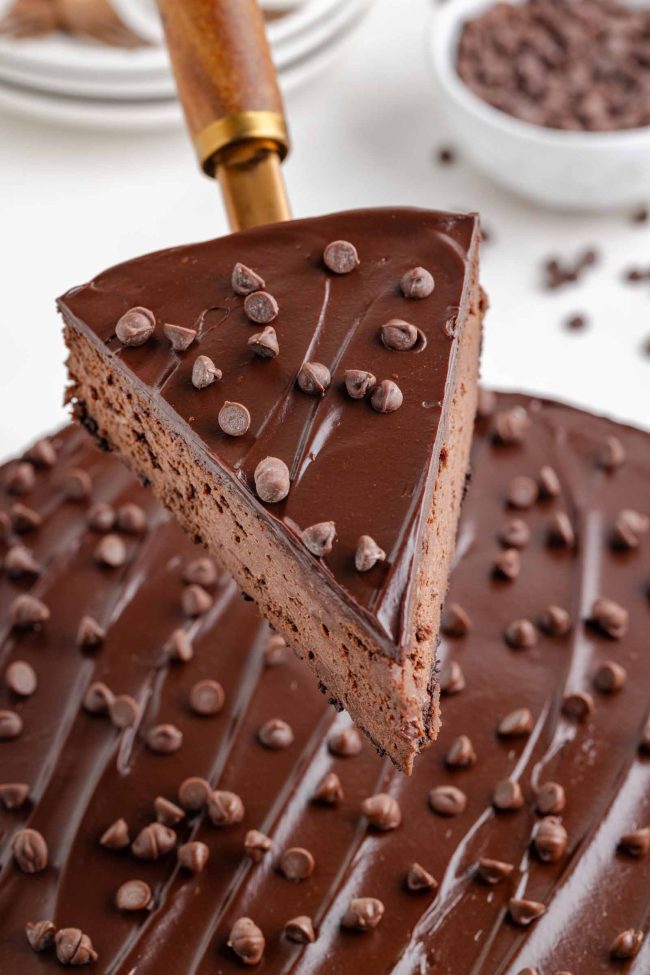
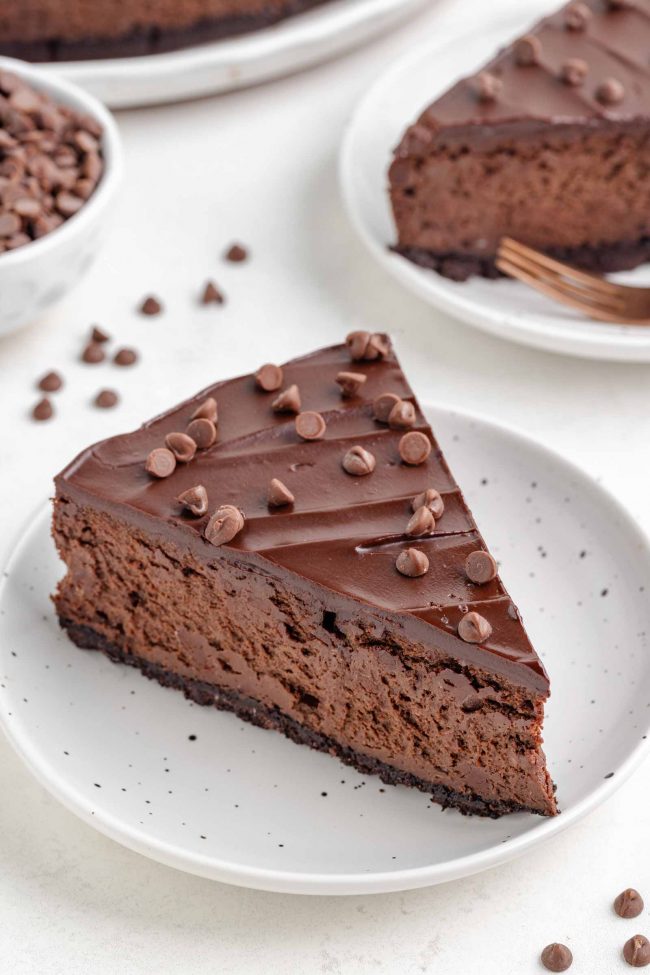
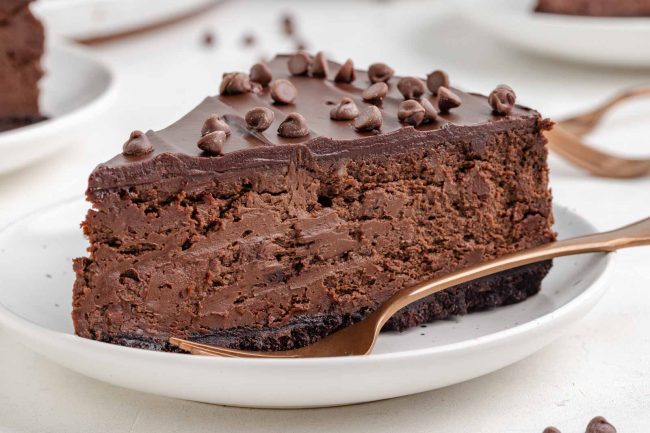
This triple chocolate cheesecake is the ultimate dessert for chocolate lovers. With its rich, creamy filling, decadent ganache topping, and chocolatey crust, it’s a show-stopping treat for any occasion.
Whether you’re making it for Christmas, Valentine’s Day or a casual dinner party, this chocolate chocolate chip cheesecake will have everyone coming back for seconds. Each layer adds its own unique texture and flavor, making it a dessert that’s truly unforgettable.
You can make it with a quick and easy totally homemade cookie crust or with an Oreo crust, and it can be made traditionally or gluten-free.
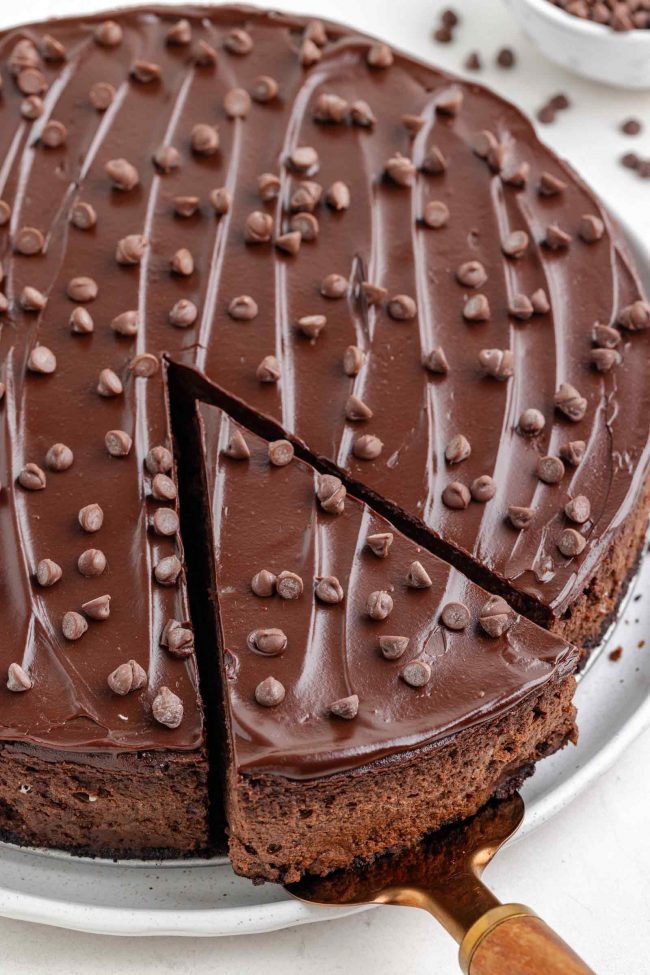
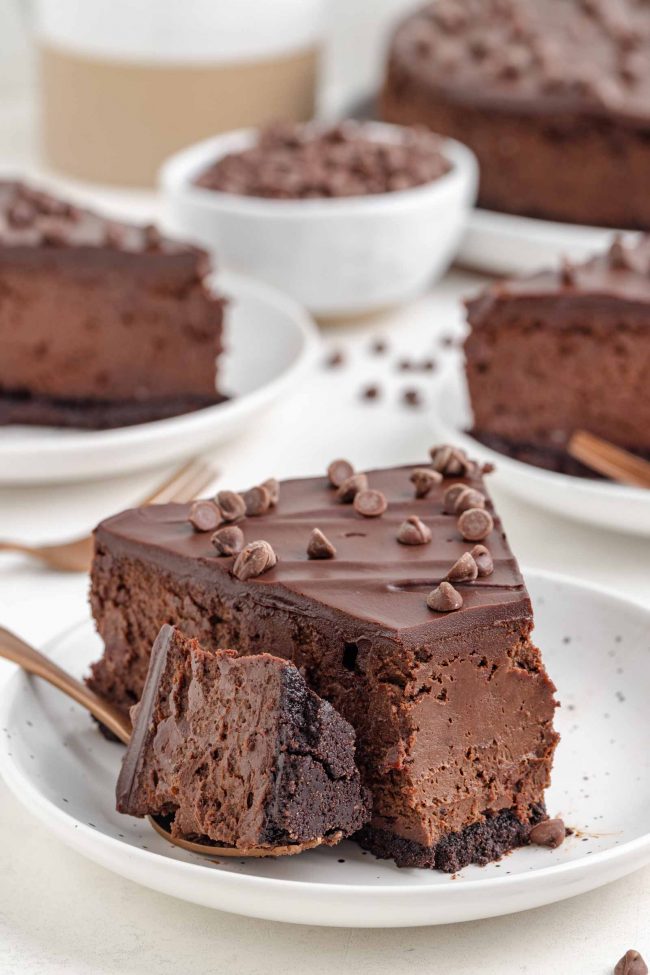
The texture is a luxurious combination of creamy and velvety smoothness. The filling is rich and dense yet melts in your mouth with every bite. And the ganache topping adds a silky, luscious layer, while the crust provides a slightly crumbly and chocolatey contrast.
If you’re looking for a light, fluffy cheesecake, this isn’t it. This is the ultimate indulgence for chocolate lovers, offering a rich, decadent experience that’s unapologetically dense and satisfying.
Ingredients
Here’s what you’ll need to make this cheesecake.
You can use an Oreo crust instead of the homemade Oreo-like crust. I’ve included both options in the recipe.
I’ve used the same crust in my Baileys Cheesecakes, Mint Chocolate Tart and Strawberry White Chocolate Cheesecake Bars. It always comes out great, and it’s only a few ingredients!
If you choose the Oreo crust, the flour you see in the photo can be replaced by Oreos.
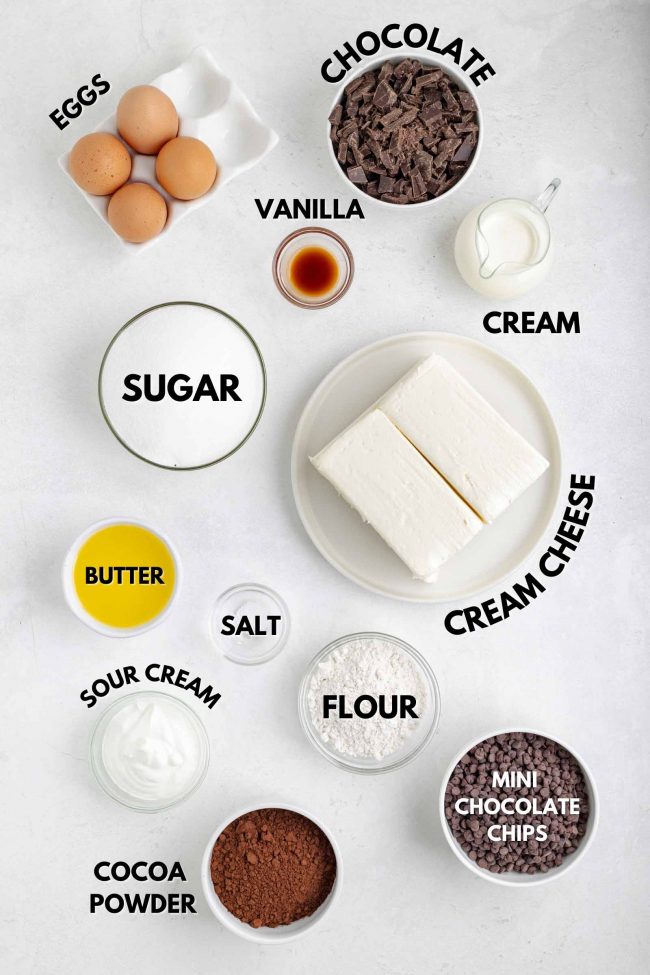
The mini chocolate chips that go in the batter and on top of the ganache are both optional. The ones on top are just decoration – you really don’t need to add more chocolate.
The ones in the batter melt a bit, but not completely, and create these little bursts of chocolate throughout the batter. But you can absolutely omit them, or use regular chocolate chips or chopped chocolate if you want proper chunks of chocolate in the cheesecake.
I haven’t tried it, but I’m assuming they’d stay more whole.
How to make it
The full recipe can be found at the bottom of this page.
The process of making this triple chocolate cheesecake does involve a few steps. But that’s how cheesecakes are.

They take more time than cookies (but not these Austrian Linzer Cookies!) or brownies, but the payoff is huge! You’ll be rewarded with this glorious triple chocolate cheesecake.
Cheesecakes often don’t call for lining the bottom of the springform pan with parchment paper. But there are good reasons to do so!
It prevents the crust from sticking, making it easier to remove slices cleanly and maintain the integrity of the crust.
It also facilitates a smooth transfer to your serving plate and protects your springform pan from scratches if you cut the cheesecake directly in the pan.
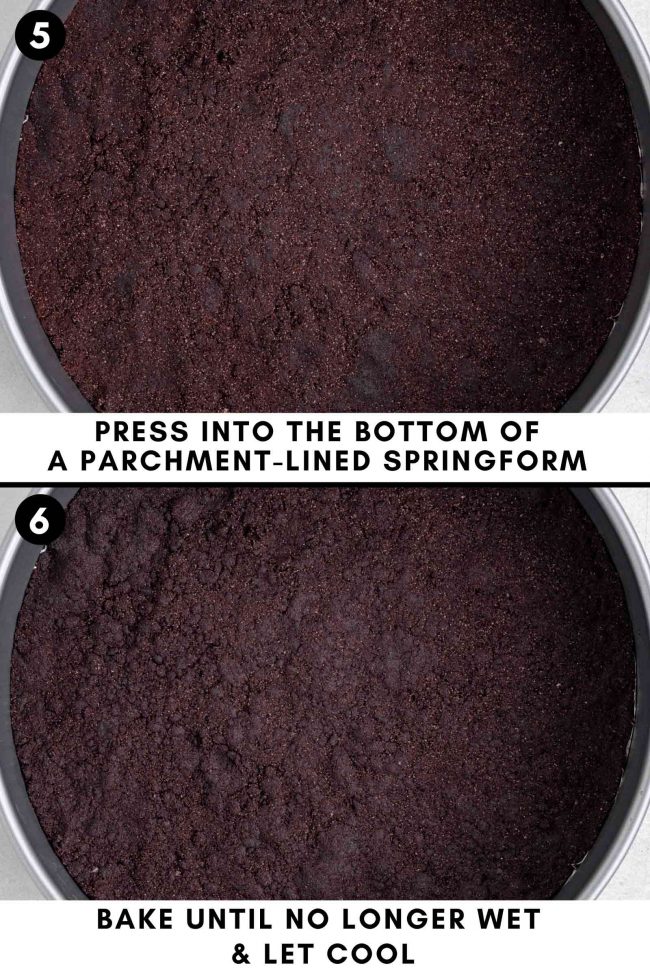
If you’re making the Oreo crust instead of the homemade one, all you do is process Oreos in a food processor until you have fine crumbs. Then transfer to a bowl, add butter, stir, and pat onto the bottom and a little bit up the sides of the pan.

But like I said, this is all written up in detail below.
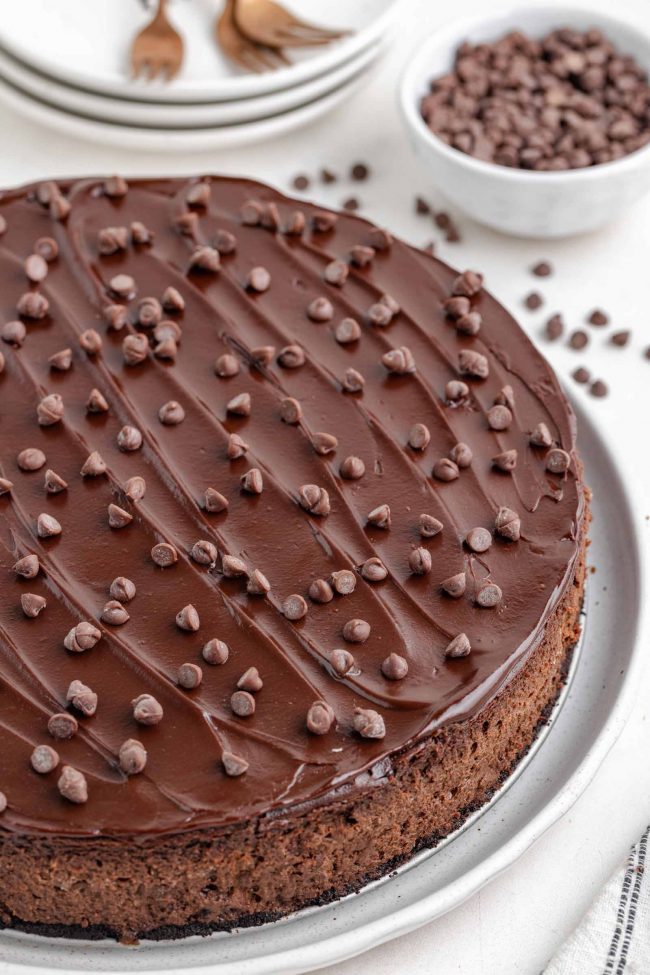
Don’t worry if your cheesecake looks weird or overbaked when it comes out of the oven. It’s a weird-looking cheesecake.
Especially around the edges! It almost looked like a souffle. I might have even tasted it, and it was… not good.
I was SO disappointed the first time I made it and figured I’d ruined it. It really looked overbaked.
But all it needed to was chill overnight. The sides and top look different than a regular vanilla cheesecake, and chilling doesn’t change that.
That’s what the ganache is for! You can omit it if you don’t care about looks.
Why don’t you grease the pan?
You shouldn’t grease the sides of the springform pan when making a cheesecake because the cheesecake batter needs to cling to the sides as it bakes. If you grease the sides, the batter may slide down, which can result in an uneven texture or cracks in the cheesecake.
The sides of the pan help the cheesecake hold its shape and create the smooth, firm texture typical of a well-baked cheesecake. When the batter sticks to the pan, it helps the cheesecake rise evenly as it bakes, and it also allows the cheesecake to cool and set properly.
If the batter doesn’t stick, it can also cause the cheesecake to shrink away from the sides during cooling, which might result in cracks on the top.
Do I have to use a water bath?
I used to groan and even roll my eyes at the thought of using a water bath for cheesecakes. I never bothered with them until I made this Gluten-free Pumpkin Cheesecake recipe a few years ago.
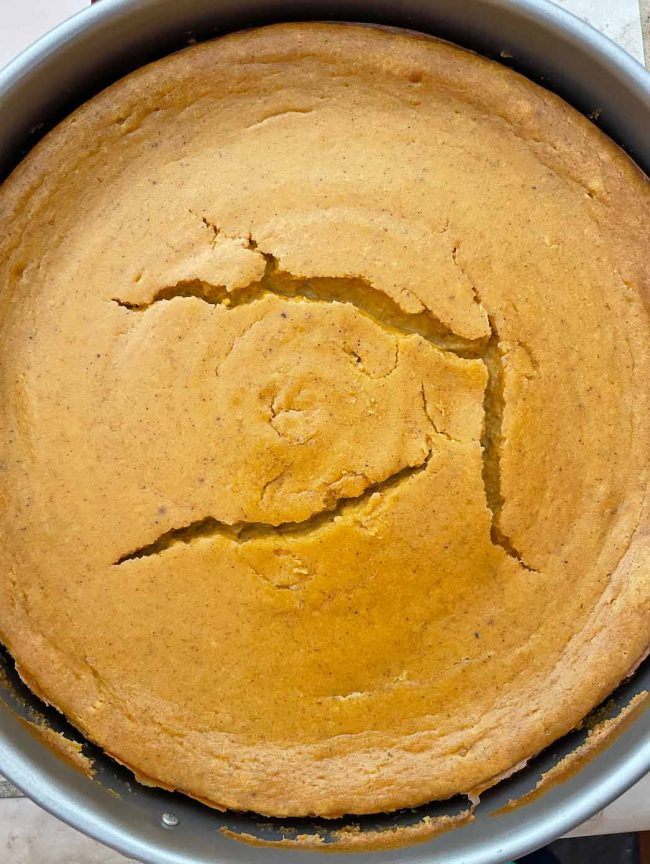
If you don’t mind your cheesecake having cracks like the one shown below in the non-water-bathed pumpkin cheesecake, you can skip the water bath.
I even let it cool slowly in the oven with the door cracked open.
If you’d prefer your cheesecake to look like the photos in this post, you’ll need to use a water bath.
This is a great post all about water baths with comparison photos. Once you see pictures of a cheesecake baked with and without a water bath, I think you’ll be convinced that it’s a good idea. 🙂
After using a water bath for the first time, I realized it’s not scary at all. It’s one of those things you do once, and then it’s no big deal. It adds only about 5 minutes of prep time.
Why bother with a water bath
A water bath involves a pan of hot water surrounding your cheesecake pan. It helps buffer the heat so the cheesecake bakes evenly without drying out or cracking.
Cheesecake batter is like custard. Without the extra moisture from the water bath, your cheesecake can become rubbery. Not always, but sometimes.
The water surrounding the pan won’t get hotter than 212 °F (100 °C), allowing the cheesecake to bake slowly and evenly without burning the top.
Sometimes cheesecakes work just fine without one, but sometimes not. My Keto Cheesecake and Keto Pumpkin Cheesecake both came out beautifully without it, but they also used keto sweeteners.
I have no idea if that played a role or was just luck, but I’m not chancing it anymore.
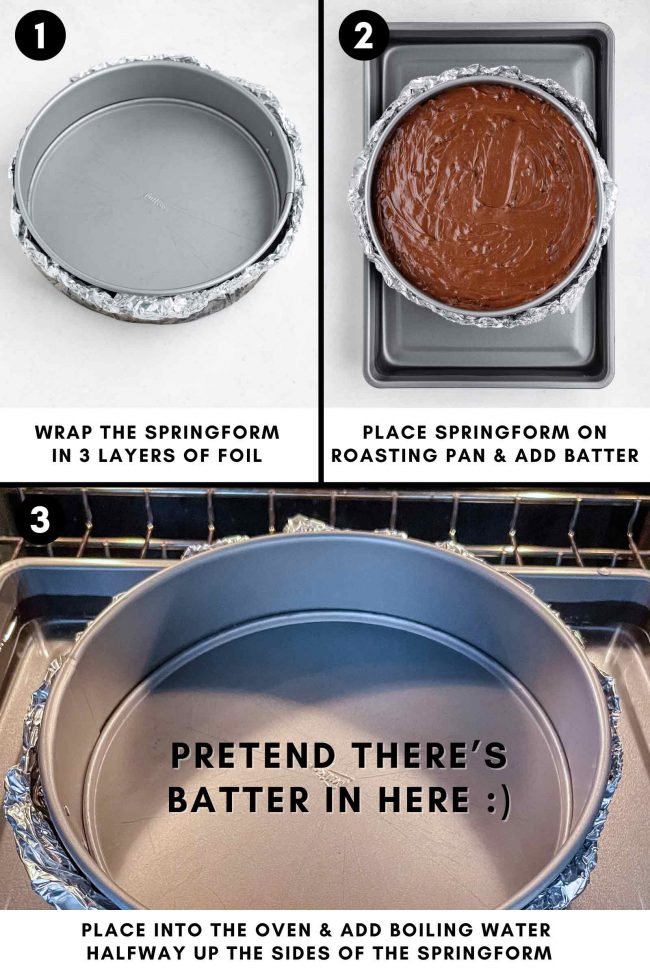
Here’s how you do it. Very detailed instructions are down below in the recipe.
The reason why you see the text saying “Pretend there’s batter here” is because when you put the cheesecake in the oven, it’s important to close the door immediately. So standing in front of the oven with the door open, trying to get photos, is a very bad idea.
Water bath tips
- Ensure your roasting pan is deep and wide enough to hold the cheesecake pan.
- To prevent water from seeping into a springform pan, wrap it in heavy-duty foil to keep it from leaking.
- Always use hot water for the water bath. Cold water is a bad idea, as it would affect the oven temperature and bake time.
- Don’t add too much water. The cheesecake pan will disperse the water, and you don’t want it to overflow.
- Be careful not to splash the water! You don’t want any water getting into the cheesecake batter, so handle the pan carefully when filling the bath and placing the cheesecake inside.
Troubleshooting
- Cracks in the cheesecake – often caused by overbeating, overbaking or sudden temperature changes. Use a water bath and allow the cheesecake to cool gradually.
- Leaking water bath – ensure the foil is wrapped securely around the pan. Use multiple layers if needed.
- Ganache too runny – refrigerate it for 5-10 minutes before pouring it over the cheesecake.
How to make ahead, store and freeze
The crust can be prepared and baked up to 2 days in advance. Cover and store at room temperature.
The baked cheesecake, with or without the ganache, can be stored in the refrigerator for up to 4 days. Cover to prevent drying out.
Both can be wrapped tightly in plastic wrap and aluminum foil and frozen for up to 3 months. The crust just needs to be defrosted for about 10 minutes at room temp.
Thaw the cheesecake overnight in the refrigerator before serving.
Variations
- Use dark chocolate for a richer flavor in the filling and ganache.
- Swap mini chocolate chips for chopped nuts or caramel bits for added texture.
- Add a teaspoon of espresso powder to the filling for a mocha twist.
Live outside the US?
If you’re outside the US, you probably use a different type of cream cheese than what’s available in the US. US cream cheese is firmer and designed for baking, unlike the type commonly found in Europe, which is meant for spreading on toast.
For 8 ounces (225 grams) of cream cheese, buy a 300-gram package (the cream cheese from Aldi, Lidl, etc., works just as well as Philadelphia in Europe) and place it in the center of a clean tea towel. Squeeze out the liquid until you have 225 grams of cream cheese.
So for this cheesecake recipe, you’ll need 1200 grams of cream cheese. Drain the liquid until you’re left with 900 grams of cream cheese.
If you don’t do this and use the cream cheese as it comes, your cheesecake will turn out too watery and may not bake properly.
It will require extra baking time, but then it’ll dry out and likely crack, resulting in a disappointing cheesecake.
I’ve tried it. It’s a waste of time and money. Just drain it!
If you’re in the EU, use medium eggs instead of large eggs. If you’re not in the EU, you can weigh out the eggs. You’ll need 200 grams total without the shells.
As an Amazon Associate, I earn from qualifying purchases. For more info, see my disclosure.
Gluten-free version
This cheesecake can easily be made gluten-free by using gluten-free all-purpose flour, oat flour or light buckwheat flour in the crust. They all work equally as well.
The only gluten-free all-purpose flour I’ve tested it with is Bob’s Red Mill 1-to-1 Gluten-free Baking Flour. I have no idea how the crust would come out with different brands.
I suggest using the other 2 options if you don’t have Bob’s on hand. And make sure your oat or buckwheat flour is labeled as gluten-free!
Both oats and buckwheat are naturally gluten-free but can get contaminated during the manufacturing process. So make sure that “gluten-free” is written somewhere on the package.
For more info, check out Is Buckwheat Gluten-free? as well as Are Oats Gluten-free?
If you’re making the Oreo crust option, just use gluten-free chocolate cream sandwich cookies. Here are some good options.
Everything else in this recipe is naturally gluten-free.
No vegan version?
Vegan cream cheese doesn’t behave the same way as regular cream cheese in cheesecakes.
But hey! I’ve already got you covered with this Paleo Vegan Chocolate Cheesecake.
You can use the ganache in this recipe, but replace the cream with canned coconut milk. It’ll have a bit of coconut flavor to it, but it’s not strong.
I hope you’ll enjoy this triple chocolate cheesecake! If you try it out, I’d love to hear your thoughts below in the comments. Thanks! 🙂
❀
- Prep Time:
- Cook Time:
- Ready in:
- Yield: 16 slices
Ingredients
- 1/2 cup (62 grams) flour
- 3/4 cup (150 grams) granulated sugar or (125 grams) coconut sugar
- 1/2 cup + 1 tablespoon (65 grams) Dutch-process cocoa powder
- 1/8 teaspoon salt
- 5 tablespoons (70 grams) unsalted butter, melted
- 24 (275 grams) regular or gluten-free Oreo cookies
- 1/4 cup (56 grams) unsalted butter, melted
- 4 (8-ounce) packages (907 grams total) full-fat cream cheese, room temperature
- 1 2/3 cups (333 grams) granulated sugar or (275 grams) coconut sugar
- 1/2 cup (57 grams) Dutch-process cocoa powder
- 1/3 cup (80 ml) sour cream
- 1 teaspoon vanilla extract
- 1/4 teaspoon salt
- 4 large eggs (50 grams each, out of shell), room temp
- 8 ounces (225 grams) semi-sweet chocolate, chopped
- 1 cup (225 grams) mini semi-sweet chocolate chips, optional
- 4 ounces (125 grams) semi-sweet chocolate, finely chopped
- 1/3 cup (80 ml) heavy cream
- 1/4 to 1/2 cup (56 to 112 grams) mini chocolate chips, optional
If making the homemade chocolate cookie crust:
If making an Oreo crust:
For the filling:
For the topping:
Directions
- Preheat the oven to 350 °F (175 °C). Position the oven rack to the lower-third section of your oven.
- Get out a 9” (23 cm) springform pan and line just the bottom with a round of parchment paper. Do not grease it.
- In a large mixing bowl, mix together all the crust ingredients except for the butter until well combined.
- Stir in the butter until combined.
- Pat onto the bottom of the prepared springform pan. Use the bottom of a measuring cup, a glass or your hands to firmly press the mixture into the pan.
- Bake for 9-12 minutes or until it no longer appears wet. It’s still going to be soft but shouldn’t be wet. If it already has holes in it and looks like it’s bubbling, remove it immediately. If it happens, it’s fine, but ideally, you want to remove it before that happens. Let cool for at least 15 minutes while preparing the filling.
- In a food processor fitted with an S-blade, pulse the Oreos until you have fine crumbs.
- Transfer to a medium mixing bowl and stir in the melted butter.
- Mix with a fork until thoroughly combined.
- Spread the crumbs evenly over the bottom and just a bit up the sides. Use the bottom of a measuring cup, a glass or your hands to firmly press the mixture into the pan.
- Bake for 7-10 minutes or until fragrant and firm to touch.
- Let cool for at least 15 minutes while preparing the filling.
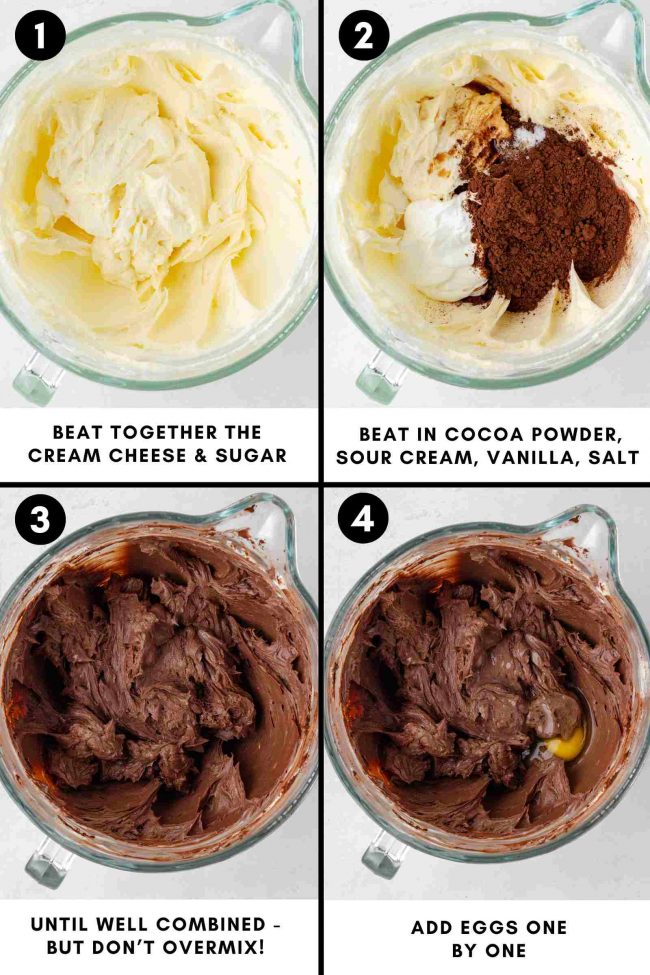
- In a large mixing bowl using an electric hand mixer or a stand mixer, beat together the cream cheese and sugar until well combined.
- Add the cocoa powder, sour cream, vanilla and salt and beat on low until combined.
- Add in the eggs, one by one, until combined. Be sure not to overmix.
- Melt the chocolate in a small saucepan over low heat or in a microwave-safe bowl at half power in 30-second increments, stirring after every 30 seconds. Set aside.
- Right before you pour the batter into the pan (in a few minutes), fold in the melted chocolate. If you do it now, the chocolate may firm up in the batter while you prepare the water bath.
- Do this once your cheesecake crust has cooled enough for you to handle the pan (after about 10 minutes of cooling). Using heavy-duty, extra-wide foil, cut three pieces that are at least 14″ (36 cm) long for your 9″ (23 cm) springform pan.
- Place the foil pieces on top of each other on a flat surface and put the cheesecake pan in the center of the foil pieces.
- Fold the foil up and around the outer edge, but it shouldn’t be attached to the upper rim of the pan.
- Get out a roasting pan large enough for your foiled-wrapped cheesecake pan.
- Bring a kettle of water to a boil. How much you’ll need depends on the size of your roasting pan. It’s better to boil too much than to boil too little, and then have to boil more. Should you not have a kettle, then bring water to a boil and then pour it into something shatter-resistant that has a spout, which allows for easy pouring and will prevent water from splashing into the cheesecake. If you think you’ll need 2 kettles of water, then boil 1, pour the boiling water into something shatter-resistant, and boil another kettle. Then when the 2nd kettle is ready, you’re ready to pour all the water in the roasting pan and don’t have to open the oven door twice.
- Place the foil-covered pan into the empty roasting pan.
- Fold the melted chocolate into the batter and stir in the mini chocolate chips, if using.
- Pour the cheesecake batter over the top of the pre-baked crust. Use a silicone spatula to smooth out the top.
- Right as the water starts boiling, move the waterless roasting pan with the cheesecake in it onto the oven rack.
- Very, very carefully pour the just boiled water into the roasting pan, pouring only about halfway up the sides of the cheesecake pan. Be careful that it doesn’t splash onto the cheesecake batter.
- Bake at 350 °F (175 °C) for 55 minutes. When you tap the pan, it won’t be totally set but won’t be super jiggly. It’ll look a bit strange and not like normal cheesecake. It’ll probably also look dry and maybe a little overdone (but should definitely not look burned!).
- Tilt open the oven door and let cool for 1 hour.
- Remove the roasting pan from the oven and carefully remove the cheesecake to a cooling rack. Use a knife that won’t scratch up your pan to very gently run around the edge of the cheesecake. This will make it easier to separate the cheesecake from the pan once it’s cooled (if you don’t do this, it comes off, but a little of the cheesecake sticks to the pan).
- Cool for 2 hours on a cooling rack or until room temp before chilling for 8+ hours.
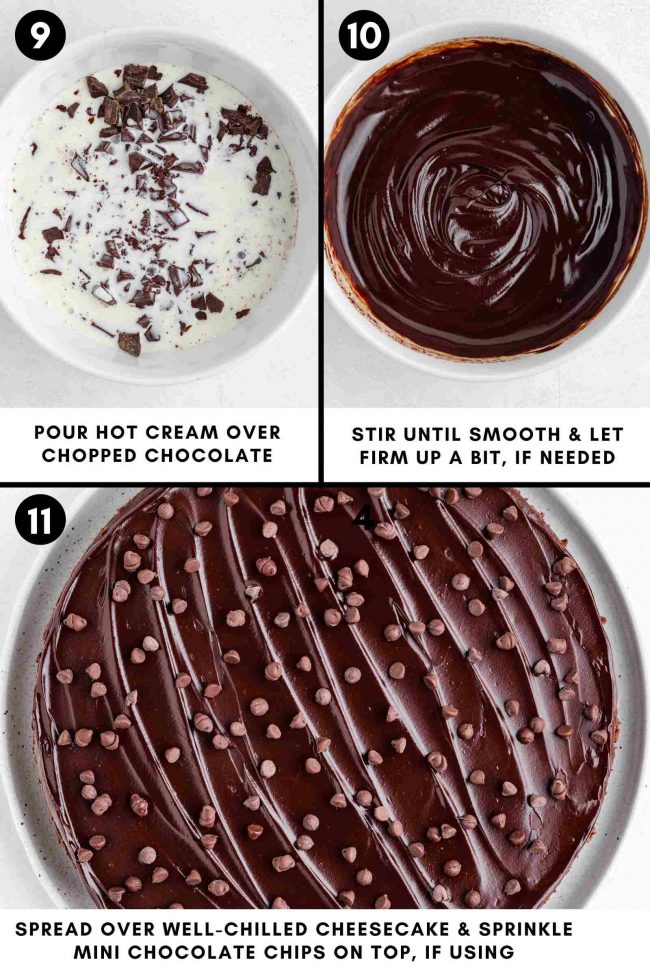
- Place the chopped chocolate in a small bowl.
- Heat the cream in a small saucepan over medium heat until hot and steamy.
- Pour the cream over the chocolate and stir until the chocolate is totally melted. If it’s very runny, you may want to stick it in the fridge for about 5 minutes.
- Pour over the chilled cheesecake.
- Sprinkle mini chocolate chips over the top, if using.
- The baked cheesecake, with or without the ganache, can be stored in the refrigerator for up to 4 days. Cover to prevent drying out. You can also tightly wrap it in plastic wrap and aluminum foil and freeze for up to 3 months. Thaw the cheesecake overnight in the refrigerator before serving.
Homemade crust option:
Oreo crust option:
Prepare the filling:
Prepare the water bath pan:
Prepare the water bath:
Bake:
Make the topping:
How to store:
Notes
- If making the homemade cookie crust, for the flour, you can use 1/2 cup (62 grams) all-purpose flour, whole wheat flour or white whole wheat flour. For gluten-free, you can use 1/2 cup + 1 tablespoon (70 grams) buckwheat flour or 1/2 cup (68 grams) Bob’s Red Mill 1-to-1 Gluten-free Baking Flour
- If you live outside of the US – you likely have a different type of cream cheese than in the US. US cream cheese is firmer and meant for baking, rather than the kind for toast, like in Europe. For 8 ounces (225 grams) of cream cheese, buy a 300-gram package (the stuff at Aldi, Lidl, etc. works just as well as Philadelphia), put it in the center of a clean tea towel or cheesecloth, and squeeze out the liquid until you have 225 grams of cream cheese. So for this recipe, buy 1200 grams of cream cheese and squeeze out the liquid until you have 907 grams of cream cheese left.

