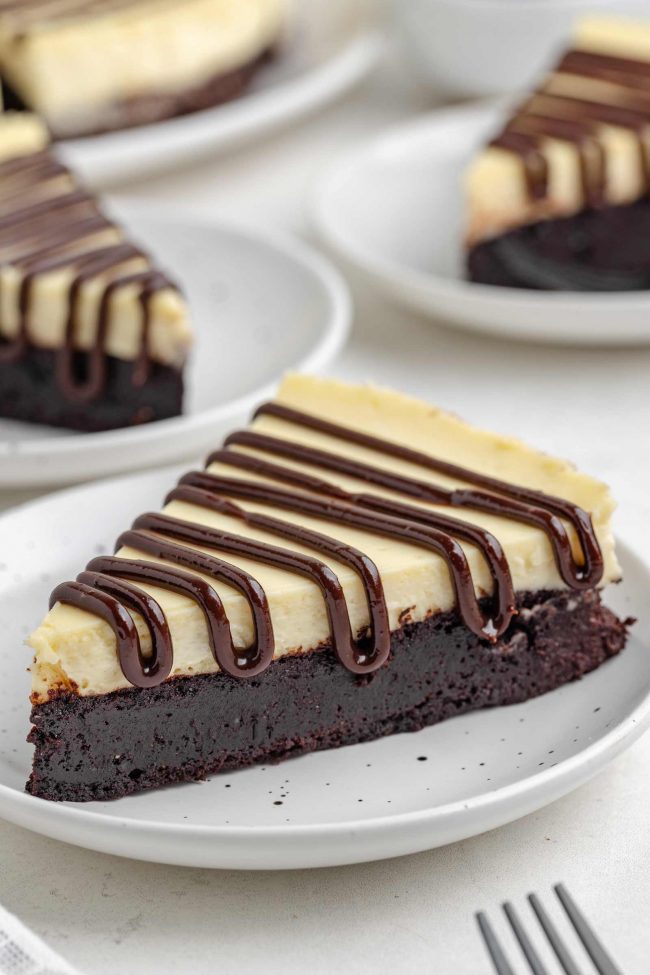
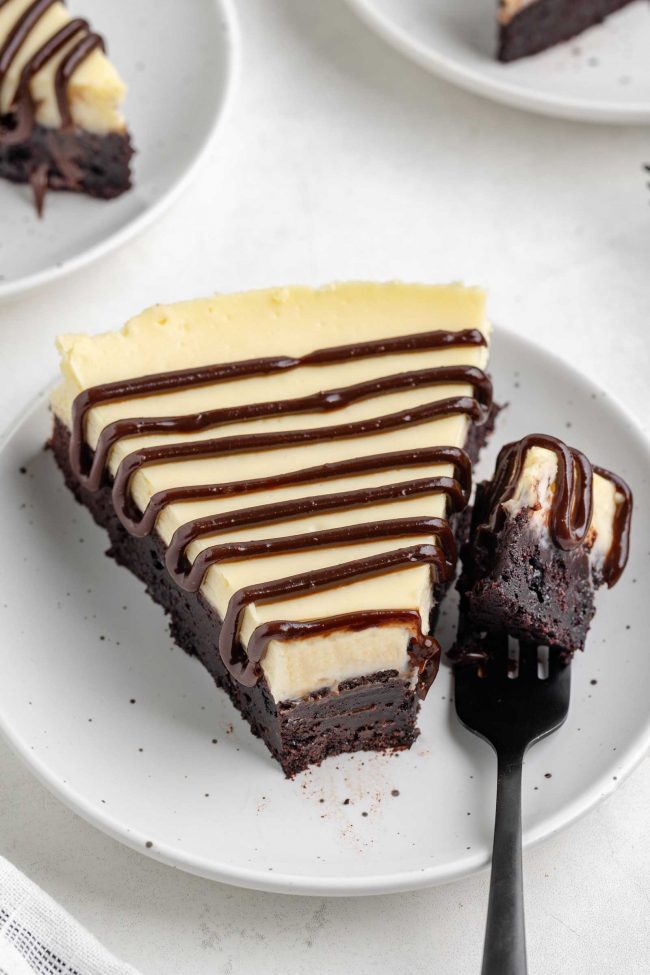
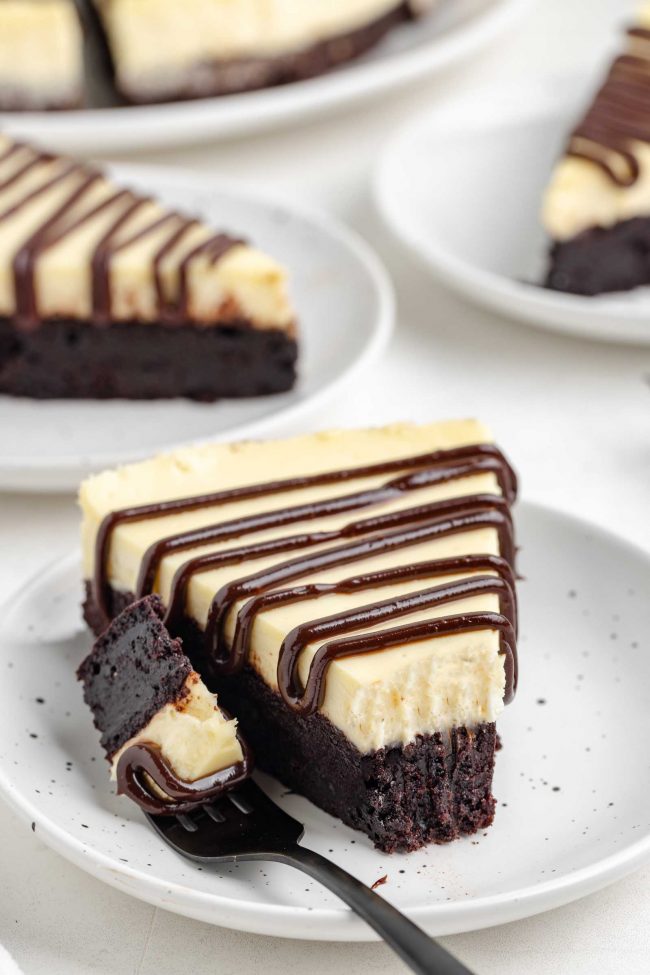
This brownie cheesecake cake has a fudgy brownie base, a cheesecake layer and ganache topping and is surprisingly simple to make. Whether you make it traditionally, whole wheat, or gluten-free, this recipe is guaranteed to impress.
I’ve had a stash of Christmas recipes ready since summer, yet here I am again — just like before Thanksgiving —
scrambling to post daily as the holiday approaches. I wish I’d found time to share them earlier! Apologies to my newsletter subscribers for the sudden burst of updates. Thank you for sticking with me!
The Triple Chocolate Cheesecake I posted 2 weeks ago is a very large, rich dessert. It calls for 2 pounds (907 grams) of cream cheese and has 1 1/3 pounds (600 grams) of chocolate.
That’s a great dessert if serving a crowd. For those of us who don’t have family nearby, it’s a bit too much.
So I’m here today with a smaller, more manageable dessert that’s less rich but still full of flavor and just as enjoyable.
The brownie layer is undeniably rich, but it’s balanced perfectly by the creamy vanilla cheesecake layer on top. Unlike the chocolate cheesecake, this layer is lighter and less dense, providing a delicious contrast to the intense chocolaty base.
Ingredients
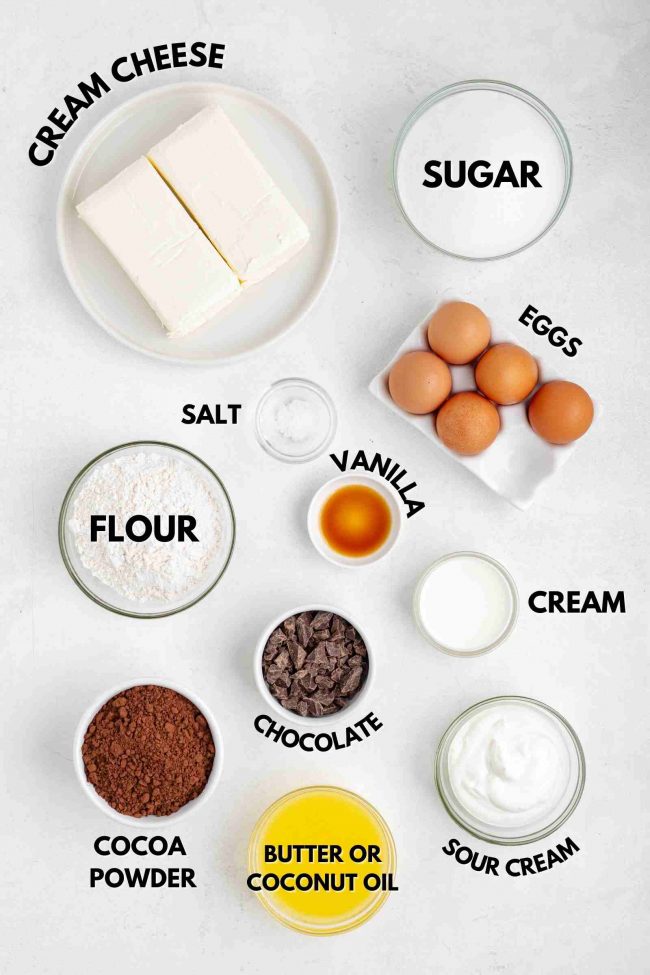
Here’s an overview of what you’ll need to make this brownie bottom cheesecake.
- Flour – you can use all-purpose flour, whole wheat, buckwheat, teff, or a gluten-free 1:1 baking blend for the brownie base.
- Cocoa powder – Dutch-process cocoa powder adds a rich, deep chocolate flavor to the brownie base.
- Butter or refined coconut oil – you can alternatively use coconut oil, but the brownies are really, really gooey when using canola, vegetable or another liquid oil. So I’d stick with butter or coconut oil.
- Granulated sugar – you can use coconut sugar in the brownie base, but not the filling.
- Eggs – no subs for these.
- Cream cheese – make sure it’s softened to avoid lumps and overbeating.
- Sour cream – adds tanginess and a silky texture to the cheesecake.
- Heavy cream – used in the ganache for a smooth and luscious topping. You can use milk, half-and-half or whipping cream in its place. The ganache would then be slightly less rich and creamy, but it shouldn’t really matter for this recipe where it’s just a topping.
- Semi-sweet chocolate – finely chopped and melted for the ganache. Use high-quality chocolate for the best results. Chocolate chips also work.
- Vanilla and salt
How to make it
The full recipe can be found at the bottom of this page. This is just here to give you a quick overview.
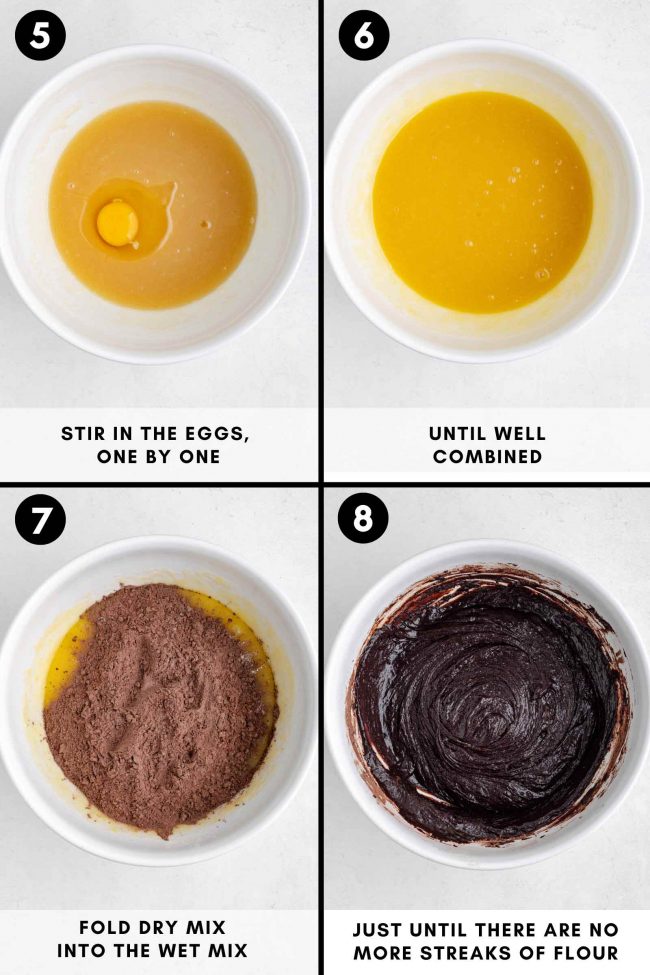
I’m adding the text that’s on the collages for the folks using text readers.
Mix together the dry ingredients. Mix together wet ingredients, minus eggs.

Stir in the eggs, one by one.
Fold dry mix into the wet mix, just until there are no more streaks of flour.
Spread into the prepared pan. Bake and let fully cool.
Beat cream cheese and sugar until well combined.
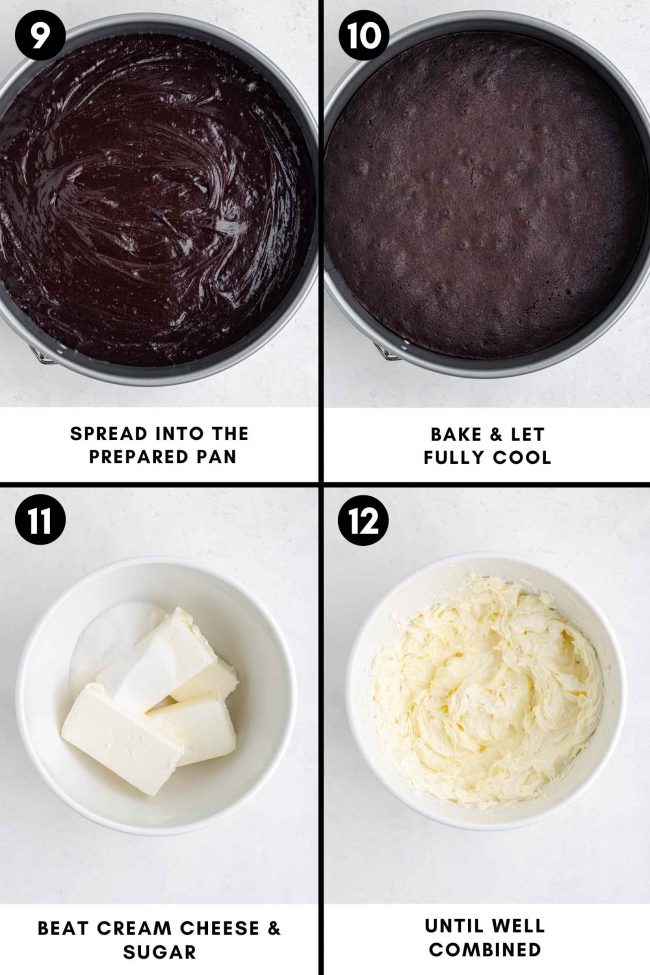
Beat in vanilla, salt and sour cream on low until well combined.
Beat in the eggs, one by one. Don’t overmix! They just need to be combined.
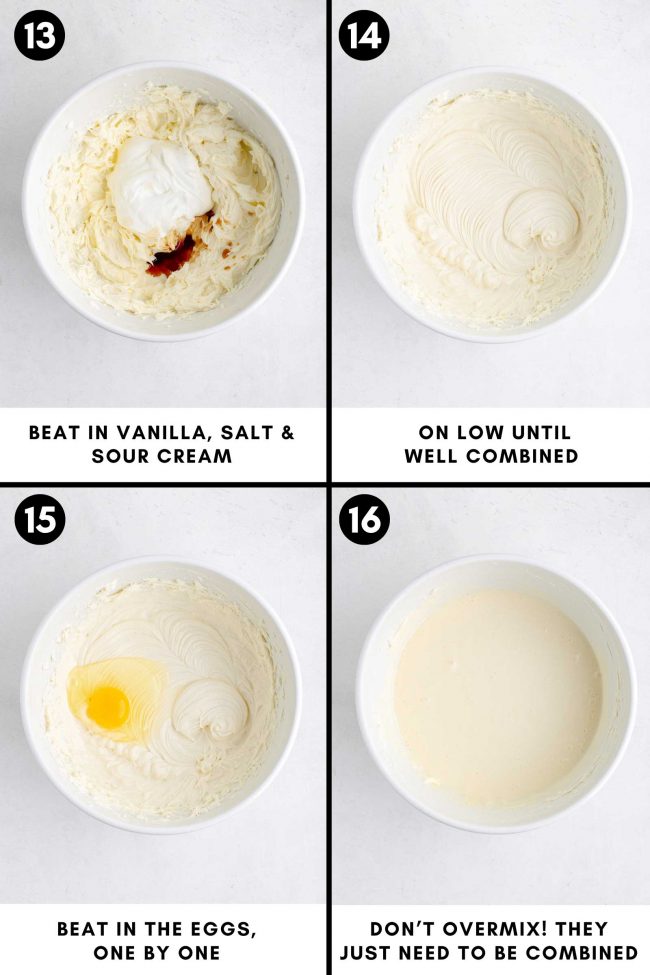
Pour over the cooled brownie. Bake and let cool partially in oven.
Pour steamy cream over chopped chocolate. Stir until totally smooth.
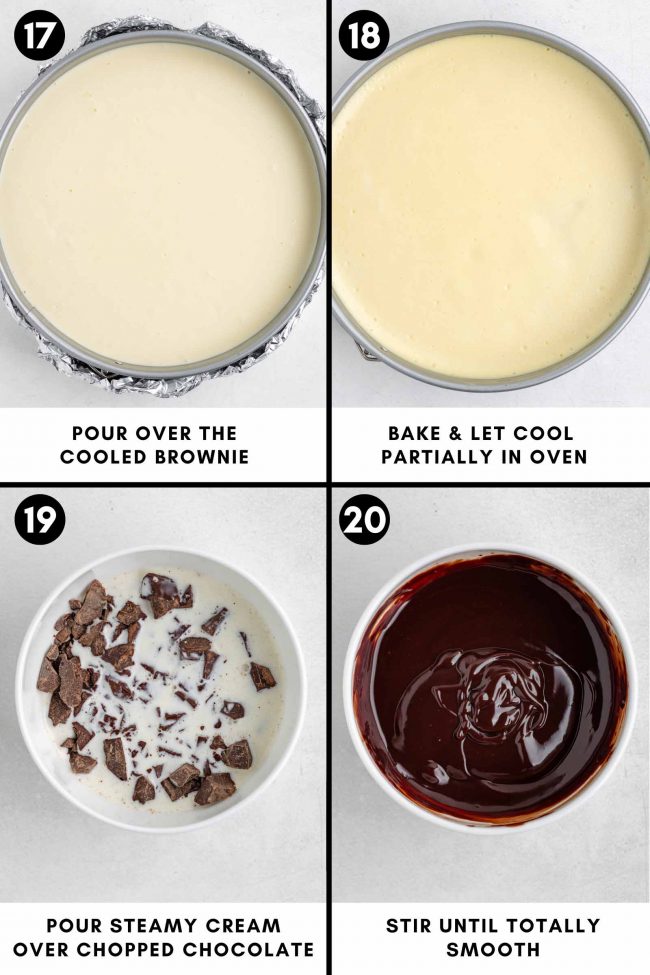
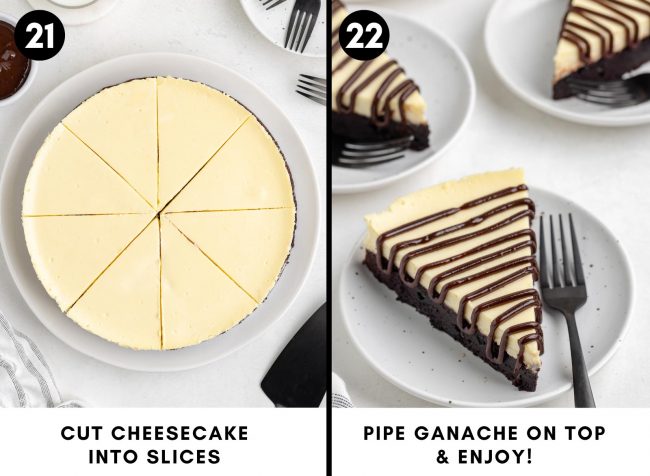
Cut cheesecake into slices. Pipe ganache on top and enjoy!
Tips
Here are some helpful tips to ensure your brownie cheesecake cake turns out perfectly.
- Line the pan – always line the bottom of your springform pan with parchment paper to make removing the cheesecake easier and to prevent scratching up your pan.
- Cool between layers – let the brownie base cool completely before adding the cheesecake layer to prevent it from saturating the brownie layer or overbaking.
- Check for doneness – the cheesecake should have a slight jiggle in the center when baked. Overbaking can result in cracks.
- Let the ganache thicken – allow the ganache to cool for 20–30 minutes before piping to get the perfect texture.
Why don’t you grease the pan?
You should avoid greasing the sides of a springform pan when making cheesecake because the batter needs to cling to the sides as it bakes. Greasing the sides can cause the batter to slide down, leading to an uneven texture or cracks in the cheesecake.
The sides of the pan support the cheesecake as it bakes, helping it maintain its shape and develop the smooth, firm texture characteristic of a well-baked cheesecake. When the batter sticks, it rises evenly and cools properly, ensuring a flawless finish.
If the batter doesn’t adhere to the pan, the cheesecake might shrink away from the edges during cooling, which could result in cracks on the surface.
For this recipe, grease only the bottom inch of the pan. This prevents the brownies from sticking while allowing the cheesecake batter to adhere to the sides, ensuring it bakes evenly and remains unaffected.
Do I have to use a water bath?
I used to groan at the thought of using a water bath for cheesecakes. For years, I skipped it until I had a disaster with the Gluten-Free Pumpkin Cheesecake you see below.
If you’re okay with big ugly cracks, you can skip the water bath. On that first attempt, I even let it cool slowly in the oven with the door cracked open.
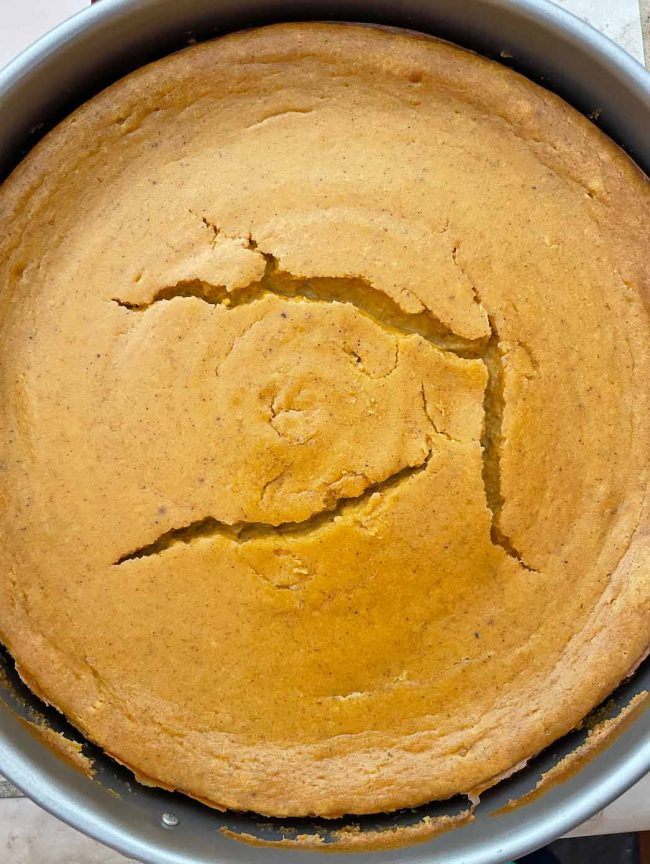
However, if you want your cheesecake to look like the other photos in this post, you’ll need to use a water bath. This post has great side-by-side comparison photos that will probably convince you it’s worth the extra step. 🙂
Once I tried a water bath, I realized it’s not intimidating at all. It only adds about five minutes of prep time and makes a big difference in the outcome.
If you’re still not convinced to use a water bath, don’t worry. Cracks on the top of your cheesecake can easily be hidden with a layer of berries or ganache.
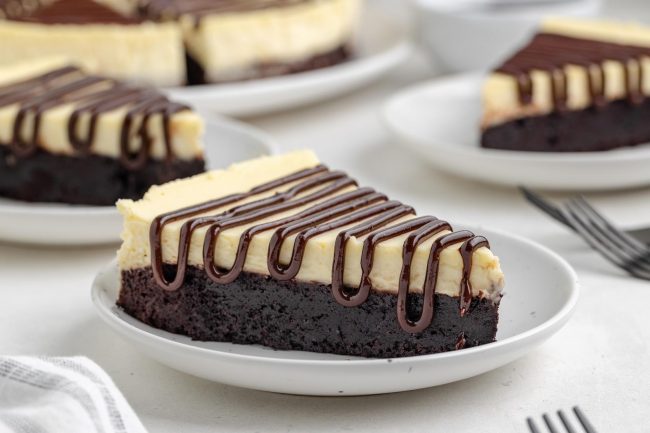
Why bother with a water bath?
A water bath involves surrounding your cheesecake pan with hot water to buffer the heat. This ensures the cheesecake bakes evenly without cracking or drying out.
Cheesecake batter behaves like custard. It needs the extra moisture from the water bath to maintain a smooth, creamy texture. Without it, the cheesecake can sometimes become rubbery.
The water keeps the temperature around the cheesecake steady, never exceeding 212 °F (100 °C). This slow, even baking prevents the top from burning and helps the cheesecake set perfectly.
While some cheesecakes might bake fine without a water bath, others won’t. For instance, my Keto Cheesecake and Keto Pumpkin Cheesecake turned out beautifully without it, but I’m not taking chances anymore!
Detailed instructions are included in the recipe below.
The reason why I wrote a text saying “Pretend there’s batter here” is because when you put the cheesecake in the oven, it’s important to close the door right away. So standing in front of the oven with the door wide open, trying to get photos, isn’t going to work.
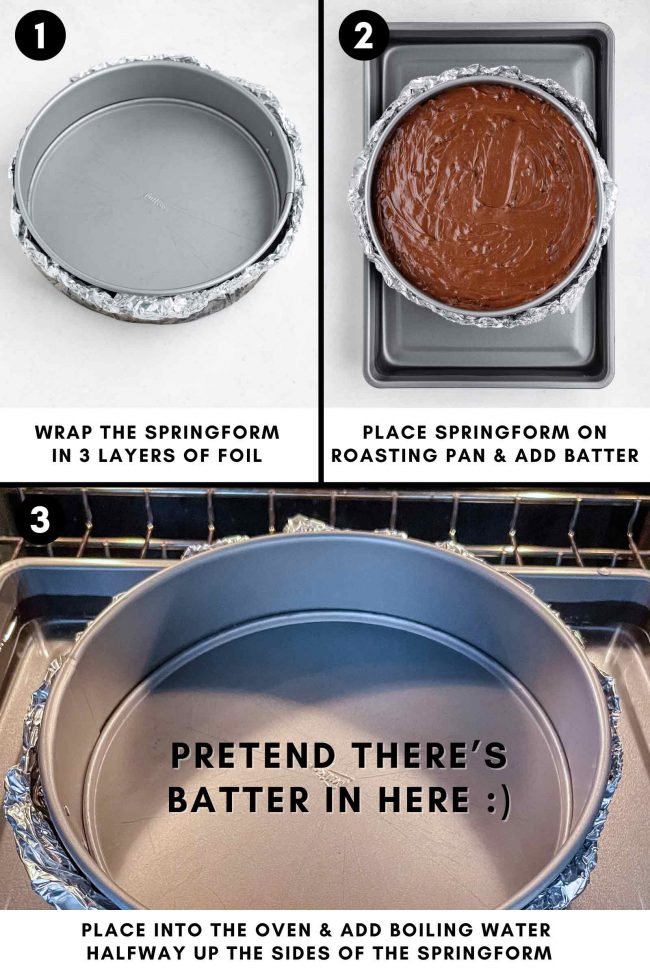
Water bath tips
- Make sure your roasting pan is deep and wide enough to hold the cheesecake pan comfortably.
- Wrap the springform pan tightly in heavy-duty foil to prevent water from seeping in.
- Always use hot water in the bath. Cold water can lower the oven temperature and affect bake time.
- Don’t overfill the water bath. The cheesecake pan will displace some water, and you don’t want it to overflow.
- Be careful not to splash water when placing the pan in the oven. Even a small amount of water in the batter can ruin the cheesecake’s texture.
Why pipe ganache over individual slices?
The first time I made this cheesecake cake, I piped ganache over the entire thing, just like I did for my Turtle Chocolate Brownies.
I think it looked great on the brownies, but on this brownie cheesecake? It looked incredibly stupid.
But the slices just looked so boring without something on top, so I went with piping it over each piece individually. If you don’t have time for that, you could just add some berries to the center.
You can also cover the entire surface with ganache if you prefer, but fair warning — once sliced, the cheesecake layer won’t look as pristine. The ganache will blend into it, creating a less defined appearance.
If you don’t care about looks – go for it! I’d probably double the ganache to make sure you have enough.
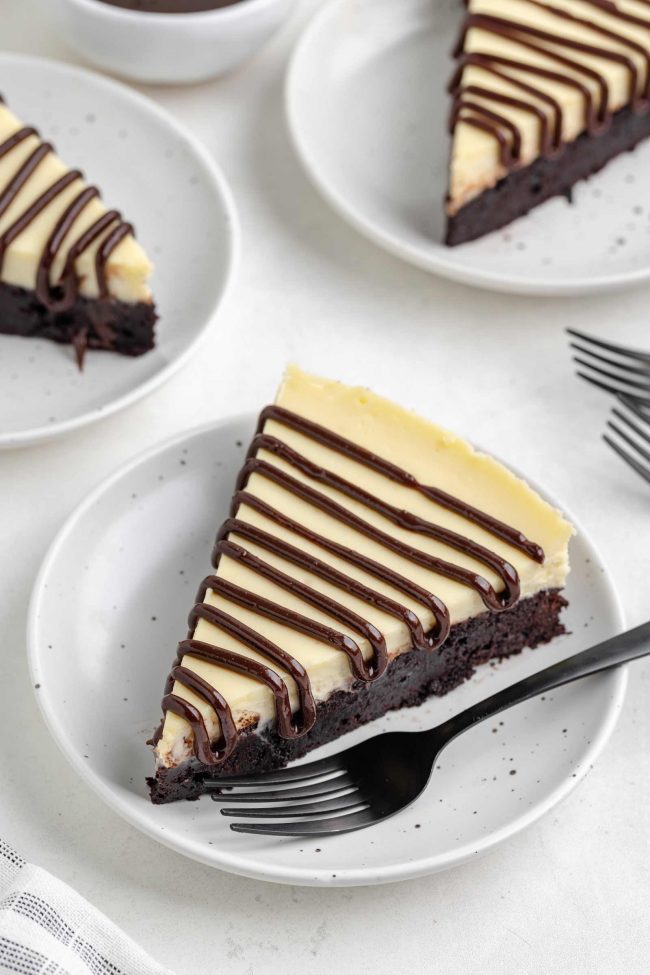
Troubleshooting
Even with the best preparation, things can go wrong. Here’s how to address some common issues!
- Cracked cheesecake – this is often caused by overbaking or skipping the water bath. Cover cracks with a layer of ganache to salvage the look.
- Soggy brownie base – ensure the foil around your springform pan is sealed tightly to prevent water from seeping in during the water bath.
- Runny ganache – if your ganache doesn’t thicken, try refrigerating it briefly or add more melted chocolate to stabilize it.
- Dense cheesecake layer – overmixing the batter can introduce too much air, leading to a dense texture. Mix on low speed until just combined.
How to make ahead, store and freeze
This dessert is perfect for making ahead of time. Here’s how you can prepare, store, and freeze the components:
- Brownie base – once baked, the brownie base can be tightly wrapped in plastic wrap and kept at room temperature for up to 3 days or refrigerated for up to 4 days. For longer storage, wrap the brownies in plastic wrap, place them in a Ziploc bag, and freeze for up to 3 months. Thaw at room temperature before assembling.
- Cheesecake layer – prepare and bake the cheesecake, then chill in the refrigerator for up to 4 days before serving. Wrap the fully baked and chilled cheesecake cake tightly in plastic wrap and freeze for up to 3 months. Thaw in the refrigerator overnight.
- Individual slices – slice the cake, wrap each piece individually in plastic wrap, and freeze in an airtight container. Thaw as needed.
Variations
Here are a few ideas to switch things up.
- Caramel swirl – drizzle caramel into the cheesecake batter before baking for a sweet twist.
- Peanut butter ganache – replace the chocolate ganache with a peanut butter version for a nutty flavor.
- Fruit toppings – add fresh berries, sliced bananas, or fruit preserves to the top of the ganache for a fresh touch.
I wish I would have added some fruit on the top, just because it’s quite boring and drab with just the ganache.
As an Amazon Associate, I earn from qualifying purchases. For more info, see my disclosure.
Gluten-free
The brownie base is the same as my Gluten-free Brownies recipe.
Light buckwheat flour is my top choice because it’s widely available in Germany and more budget-friendly than specialty gluten-free blends. Teff flour is another excellent option. Just ensure that they’re labeled gluten-free to guarantee it’s safe for those with gluten sensitivities.
That said, 1-to-1 gluten-free baking blends work great, too. My go-to options are Bob’s Red Mill 1-to-1 Gluten-free Baking Flour or King Arthur Flour Gluten-free Measure for Measure Flour. Both work perfectly in this recipe, and many readers have shared success using other brands as well.
If none of these sound good, check out the recipes below. They’re all adaptations of today’s brownie base but made with different gluten-free flour.
Simply follow the instructions for one of these bases (leaving out extra chocolate chips or frosting), then return here to complete the recipe with the cheesecake and ganache.
More Christmas cheesecake desserts
I hope you’ll enjoy this brownie cheesecake cake! If you try it out, I’d love to hear your thoughts below in the comments. Thanks! 🙂
❀
- Prep Time:
- Cook Time:
- Ready in:
- Yield: 8-12
Ingredients
- 1 cup (125 grams) flour
- 3/4 cup (86 grams) Dutch-process cocoa powder
- 1/4 teaspoon salt
- 3/4 cup + 2 tablespoons (196 grams) butter or refined coconut oil, melted and cooled slightly
- 1 1/2 cups (300 grams) granulated sugar or coconut sugar
- 1 tablespoon vanilla extract
- 3 large eggs (50 grams each, out of shell), room temp
- 1-pound (450 grams) full-fat cream cheese, room temp
- 1/2 cup (100 grams) granulated sugar
- 1 teaspoon vanilla extract
- 1/8 teaspoon salt
- 1/2 cup (115 grams) sour cream, room temp
- 2 large (50 grams each, out of shell) eggs, room temp
- 1/4 cup heavy cream
- 1/2 cup (85 grams) semi-sweet chocolate, finely chopped
For the brownie base:
For the cheesecake:
For the ganache:
Directions
- Preheat the oven to 350 °F (175 °C) and line the bottom of a 9” (23 cm) springform pan with parchment paper. Grease just about 1” up the sides. You don’t want to grease where the cheesecake will be – just the brownies. Position the oven rack to the lower-third section of your oven.
- In a medium mixing bowl, stir together the flour, cocoa powder, and salt. Set aside.
- In a large mixing bowl, stir together the melted butter, sugar, and vanilla extract. Once combined, add the eggs one at a time and stir just until combined.
- Add the dry mixture to the wet and stir just until almost no streaks of flour remain. Do not overmix!
- Pour into the prepared springform pan and bake for 15-20 minutes. You’re going to fully bake them and not just do a partial bake. So, a toothpick inserted into the center will come out wet. A toothpick inserted into the sides will come out with some moist crumbs on it, but not totally raw batter. The brownies will continue to bake as they sit in the pan. The top surface should not appear wet.
- Let cool for 20 minutes before topping with the cheesecake filling. While it’s cooling, prepare the filling and turn the heat down to 325 °F (167 °C).
- In a large mixing bowl using an electric hand mixer, beat together the cream cheese and sugar until well combined.
- Add the vanilla, salt and sour cream and beat on low until combined.
- Add in the eggs, one by one, until combined. Be sure not to overmix.
- Do this once your cheesecake crust has cooled enough for you to handle the pan (after about 15 minutes of cooling). Using heavy-duty, extra-wide foil, cut three pieces that are at least 14″ (35 cm) long for your 9″ springform pan.
- Place the foil pieces on top of each other on a flat surface and put the cheesecake pan in the center of the foil pieces.
- Fold the foil up and around the outer edge, but it shouldn’t be attached to the upper rim of the pan.
- Get out a roasting pan large enough for your foiled-wrapped cheesecake pan.
- Bring a kettle of water to a boil. How much you’ll need depends on the size of your roasting pan. It’s better to boil too much than to boil too little, and then have to boil more. Should you not have a kettle, then bring water to a boil and then pour it into something shatter-resistant that has a spout, which allows for easy pouring and will prevent water from splashing into the cheesecake. If you think you’ll need 2 kettles of water, then boil 1, pour the boiling water into something shatter-resistant, and boil another kettle. Then, when the 2nd kettle is ready, you’re ready to pour all the water in the roasting pan and don’t have to open the oven door twice.
- Place the foil-covered pan into the empty roasting pan. Pour the cheesecake batter over the top of the pre-baked brownie base. Use a silicone spatula to smooth out the top.
- Right as the water starts boiling, move the waterless roasting pan with the cheesecake in it onto the oven rack.
- Very, very carefully pour the just boiled water into the roasting pan, pouring only about halfway up the sides of the cheesecake pan. Be careful that it doesn’t splash onto the cheesecake batter.
- Bake at 325 °F (167 °C) for 35 minutes. When you tap the pan, it won’t be totally set but won’t be super jiggly.
- Tilt open the oven door and let cool for 1 hour.
- Remove the roasting pan from the oven and carefully remove the cheesecake to a cooling rack.
- Cool for 2 hours on a cooling rack or until room temp before chilling for 4+ hours. I let the cheesecake chill for 4 hours and then cover it to prevent condensation from building up and dropping back down onto it. Cover and keep refrigerated for up to 4 days. It can also be frozen for up to 3 months.
- Place the chocolate in a small bowl.
- Heat the cream in a small saucepan over medium heat until hot and steamy.
- Pour the cream over the chocolate and stir until the chocolate is totally melted.
- Let sit for about 20-30 minutes or until firm enough to put in a piping bag.
- Pipe the ganache over individual slices.
Make the brownie base:
Prepare the filling:
Prepare the water bath pan:
Prepare the water bath:
Bake:
Topping:
Notes
- For the flour, you can use 1 cup (125 grams) all-purpose flour, white whole wheat flour, whole wheat flour, or for gluten-free, use one of these:
– 1 cup (125 grams) King Arthur Flour Gluten-free Measure for Measure Flour
– 1 cup (138 grams) Bob’s Red Mill 1-to-1 Gluten-free Baking Flour
– 1 cup (125 grams) light buckwheat flour
– 1 cup (158 grams) teff flourYou’ll want to make sure whatever brand of buckwheat or teff you buy is labeled as gluten-free.
- If you’re outside the US or Canada, your cream cheese likely comes in small tubs meant for spreading on toast, rather than the brick-style blocks available in North America. To get the 1 pound (450 grams) required for this recipe, purchase two 300-gram tubs of cream cheese. Store brands like those from Aldi, Lidl, etc. work just as well as Philadelphia. Place the cream cheese in the middle of a clean tea towel or cheesecloth (avoid using paper towels), and gently press out the excess liquid until you’re left with 450 grams of cream cheese.
- The ganache is only enough to pipe over individual slices. If you want to cover the cheesecake with ganache, then double the recipe.

