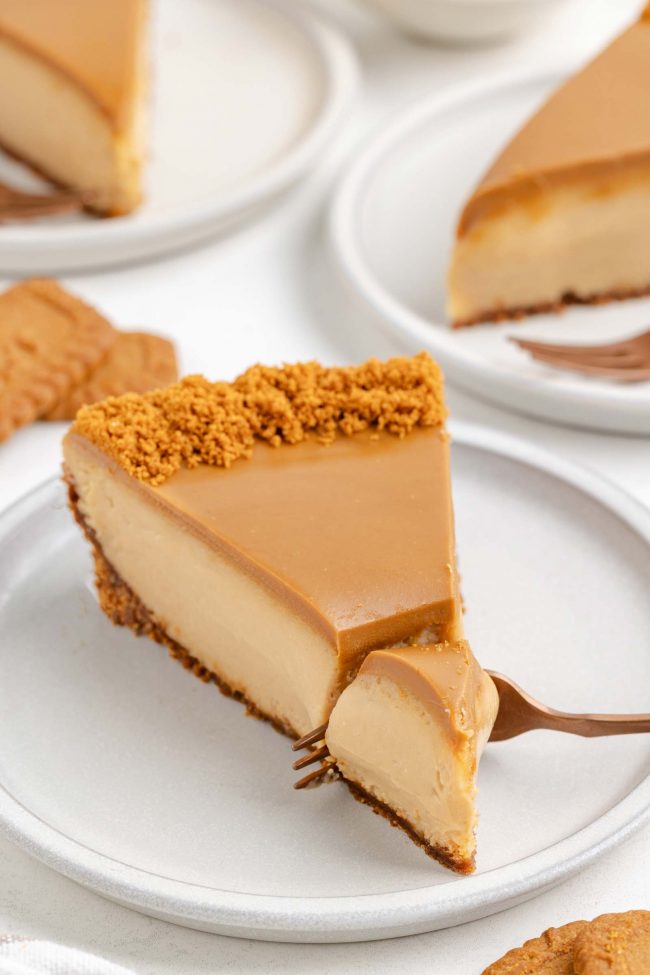
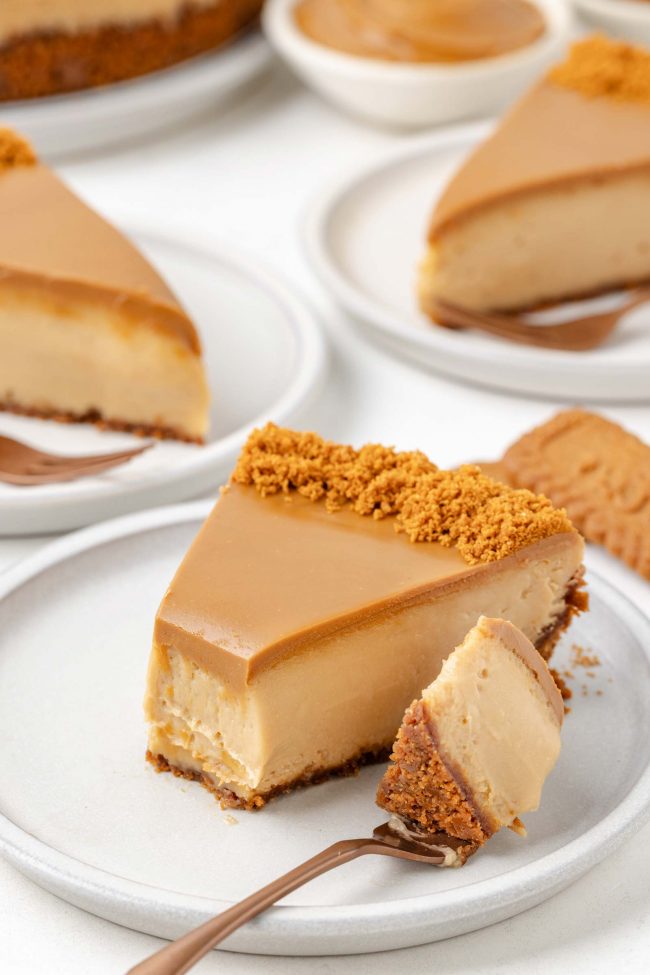
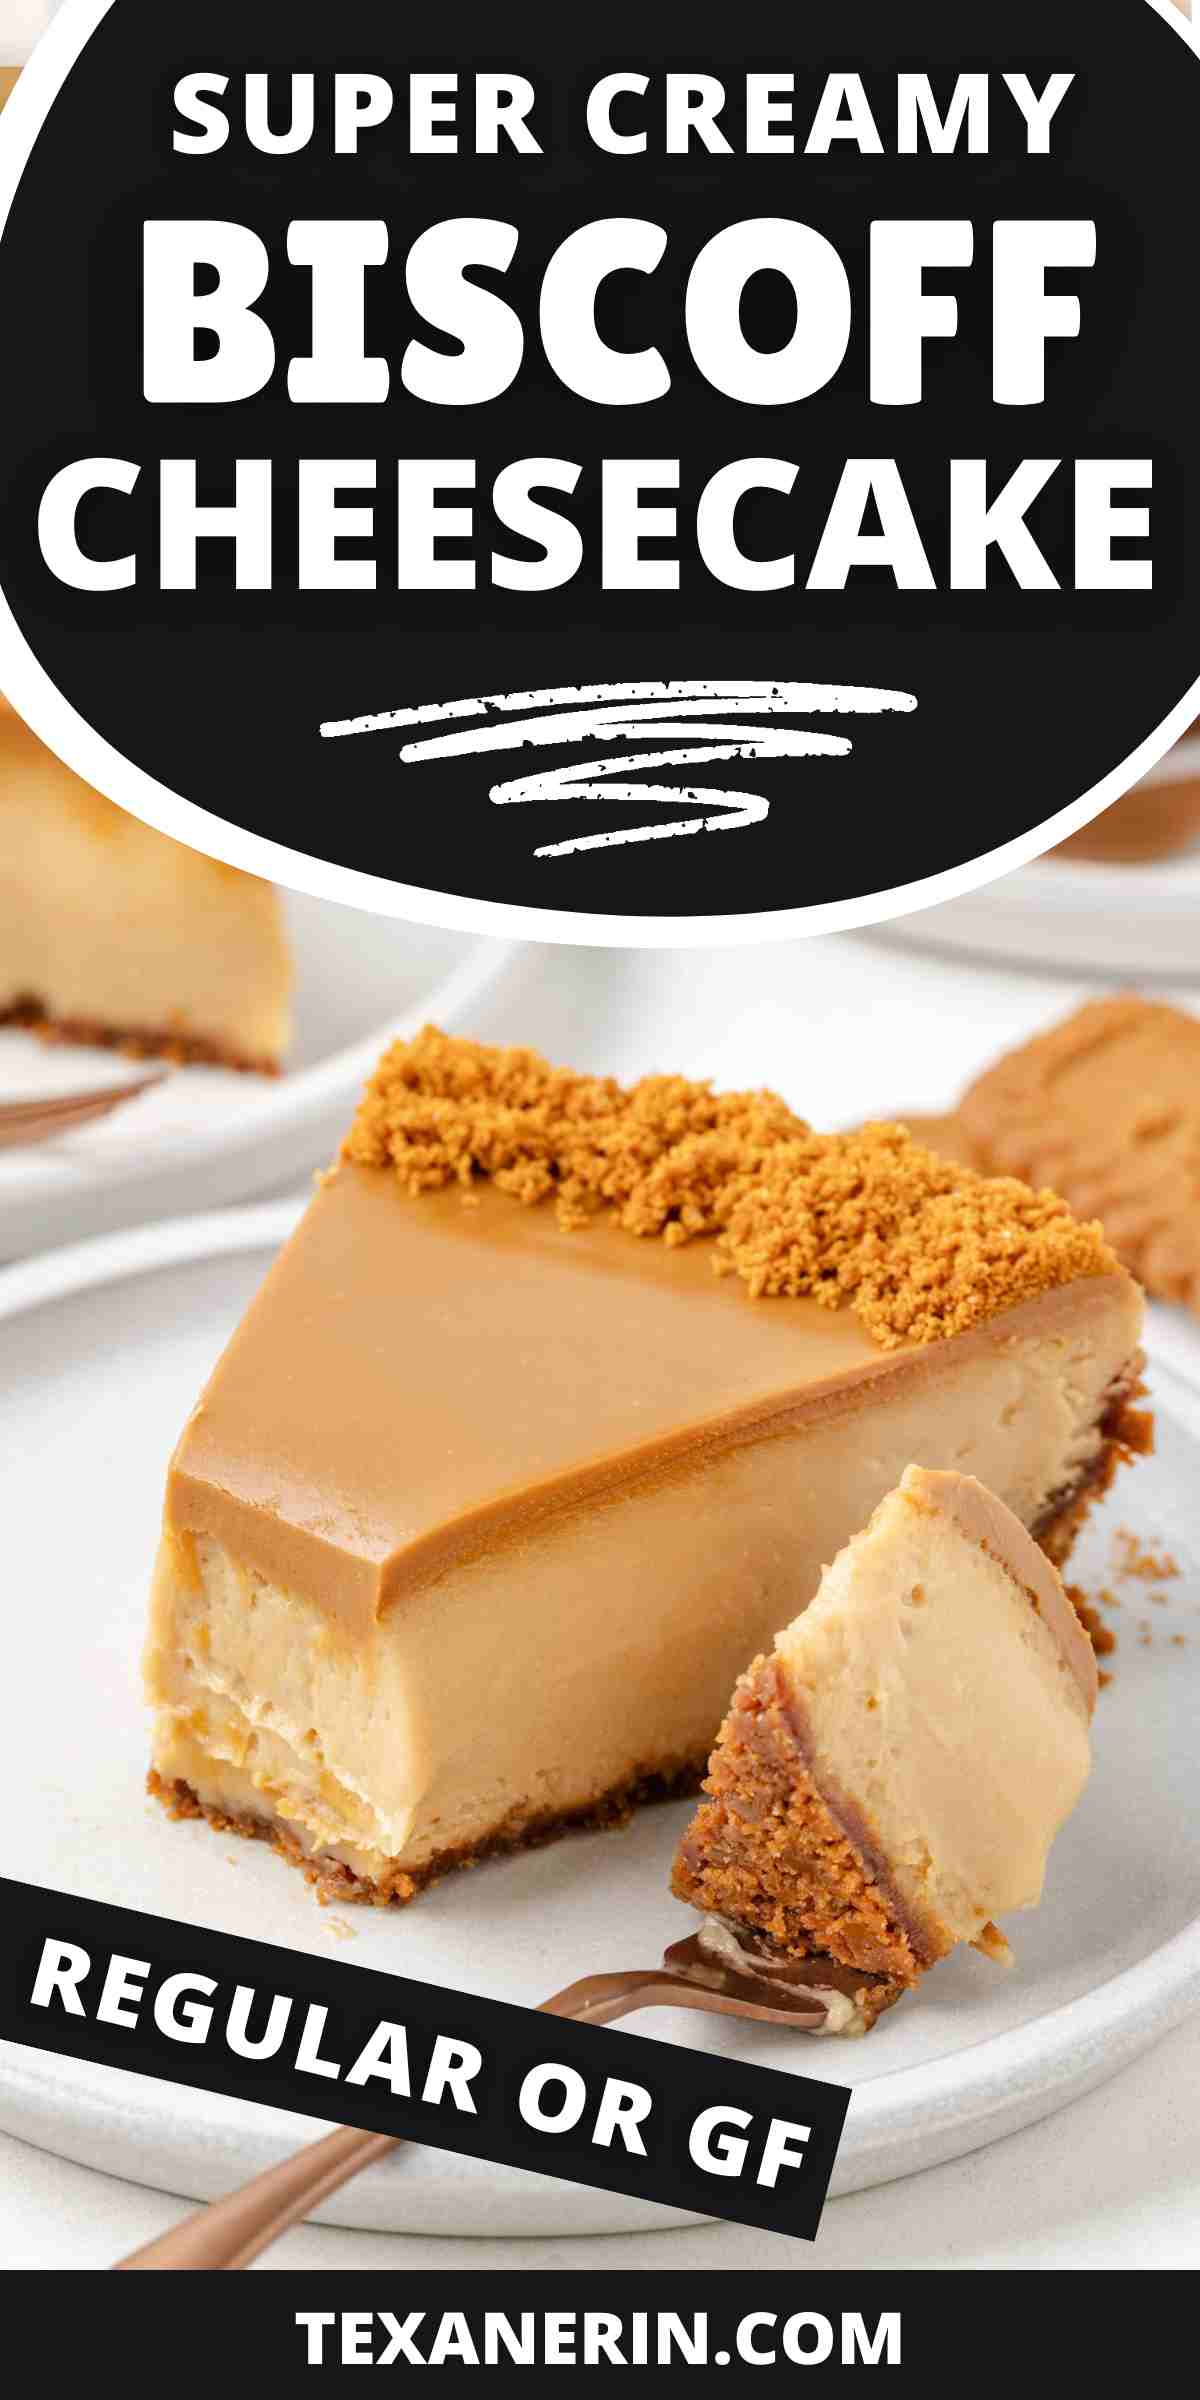
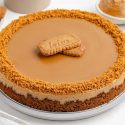
This Biscoff cheesecake is rich, creamy and so very dreamy with the caramelized flavor of Biscoff cookies. It has a Biscoff cookie crust, a filling made with Biscoff spread, and a topping of crushed Biscoff cookies. There’s also a gluten-free option!
This Biscoff cheesecake is the second recipe I ever posted. The original post had just been sitting there untouched since September 2011.
It was time for a makeover! I also changed the recipe a bit and tested a gluten-free option. I write about that at the bottom of the post.
Instead of an Oreo crust, I switched it to a Biscoff crust. I, for some reason, thought a Biscoff crust would be overkill in 2011. That was dumb of me.
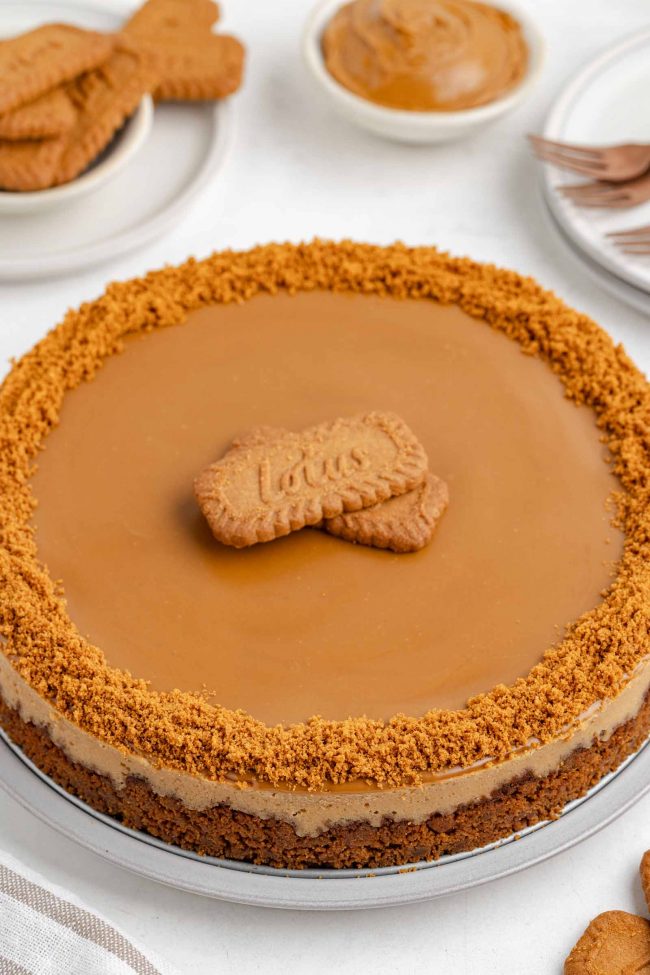
I also decreased the amount of Biscoff in the filling so that there’d be enough left over from a standard 14-ounce (400-gram) jar to spread over the top of the cheesecake.
I also added sour cream, since I’ve been adding that to all my cheesecake recipes over the past years, and an extra egg.
The result is even more delicious than the original! But I’ll include a link to the original recipe below the recipe box, just in case there’s someone out there who doesn’t want to try the new and improved version. 🙂
Out of the cheesecakes I’ve posted recently, this was everyone’s favorite. The flavor is incredible and has the perfect texture.
And while I was writing up this post, my photographer wrote to say that she was making this cheesecake and my Raspberry Tart (that my husband asked me never to make again 😅) for Christmas. They are both excellent choices!
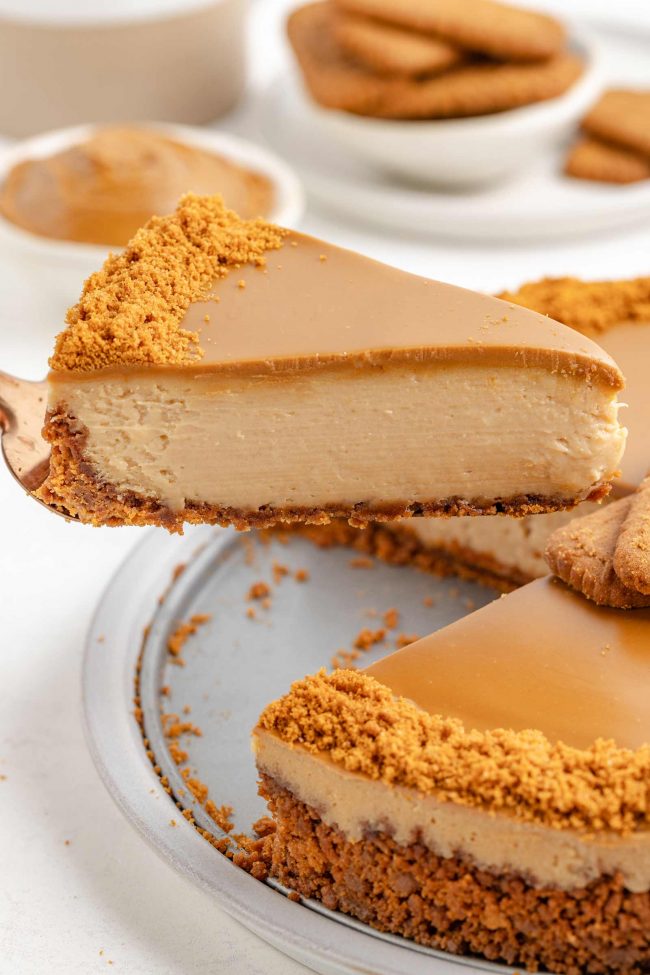
What is Biscoff?
Biscoff cookies, made with brown sugar and spices like cinnamon, nutmeg, and ginger, are known for their caramelized, slightly crunchy texture and unique flavor. They’re produced by Lotus Bakeries, a company founded in Lembeke, Belgium, in 1932. The cookies are also known as “speculoos,” a traditional shortcrust cookie popular in Belgium, the Netherlands and Germany.
Biscoff has gained popularity worldwide, with Biscoff spread (also called cookie butter) becoming a staple in many kitchens. It’s used in various recipes, from cakes to pies to milkshakes, and can even be spread on toast for a quick, indulgent snack.
The flavor of Biscoff cookies is deep and comforting, with notes of caramel and warm spices. This makes them the perfect addition to any dessert, and in this cheesecake, they bring a new level of richness and depth to the classic cheesecake flavor.
I first had Biscoff spread at a bed and breakfast in Belgium in 2010. It was the morning of our flight and we went on a mad hunt to find an open grocery store as it was Sunday. We finally found one and brought back our suitcase loaded with the stuff.
That discovery got me thinking about new ways to use Biscoff in desserts, and that’s how this cheesecake recipe came about. I was so excited when it hit the US a year later!
Everyone went crazy for it, and it was kind of funny to see so many Biscoff spread recipes popping up everywhere. After sharing this Biscoff cheesecake, I followed it up with another awesome recipe, this Biscoff Pie.
Ingredients
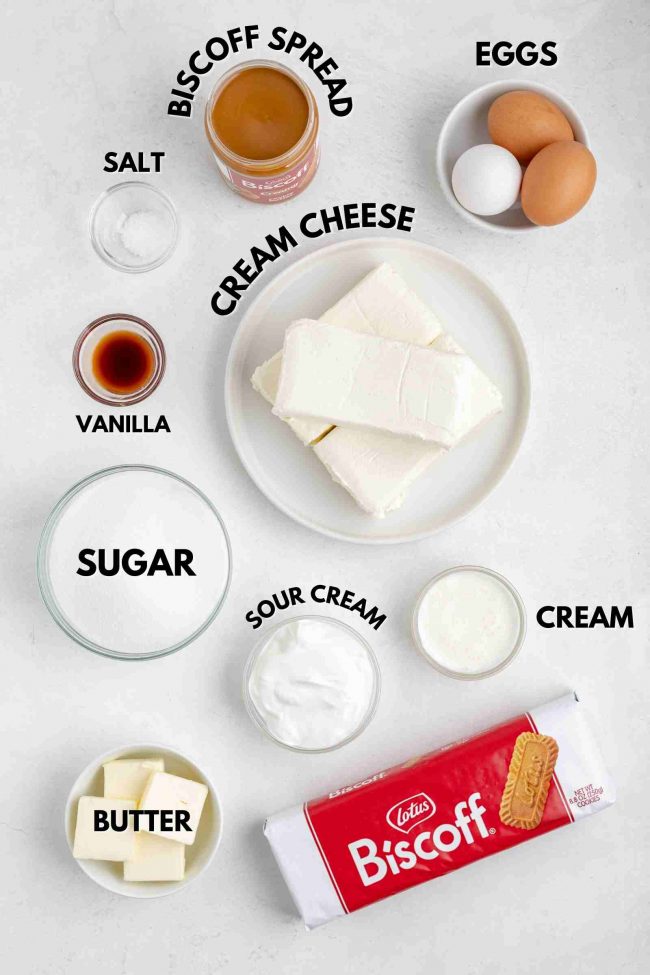
Here’s an overview of what you’ll need to make this Biscoff cheesecake.
You can use other brands of cookie butter as long as they have a similar texture to Biscoff, which is like regular, firm peanut butter.
Biscoff subs
If you’re in a pinch and don’t have Biscoff cookies or cookie butter, here are a few substitutions that work well in this cheesecake recipe.
- Graham crackers – use graham crackers for the crust if you don’t have Biscoff cookies. You can even add a little cinnamon to mimic the spice of the cookies. Or make this DIY speculoos spice mix and add to taste.
- Speculoos cookies – these are similar to Biscoff cookies and can be used as a direct substitute for the crust.
- Peanut butter – if you don’t have Biscoff spread, you can turn this Biscoff cheesecake into a peanut butter cheesecake by simply subbing regular peanut butter in place of the Biscoff. But you’d need to use the regular, firm stuff like Skippy or Jif, which has the added fat and sugar. You can also use those peanut butters that are labeled as “natural” for whatever reason, although they still contain added fat and sugar.
How to make it
The full recipe can be found at the bottom of this page. This is just here to give you a quick look at how to make this cheesecake.
I’m writing the text on the collages below for the people who use text readers.
Pulse Biscoff cookies to make uniform crumbs, but don’t pulse them into a fine powder.
Melt the butter. Add crumbs and salt.
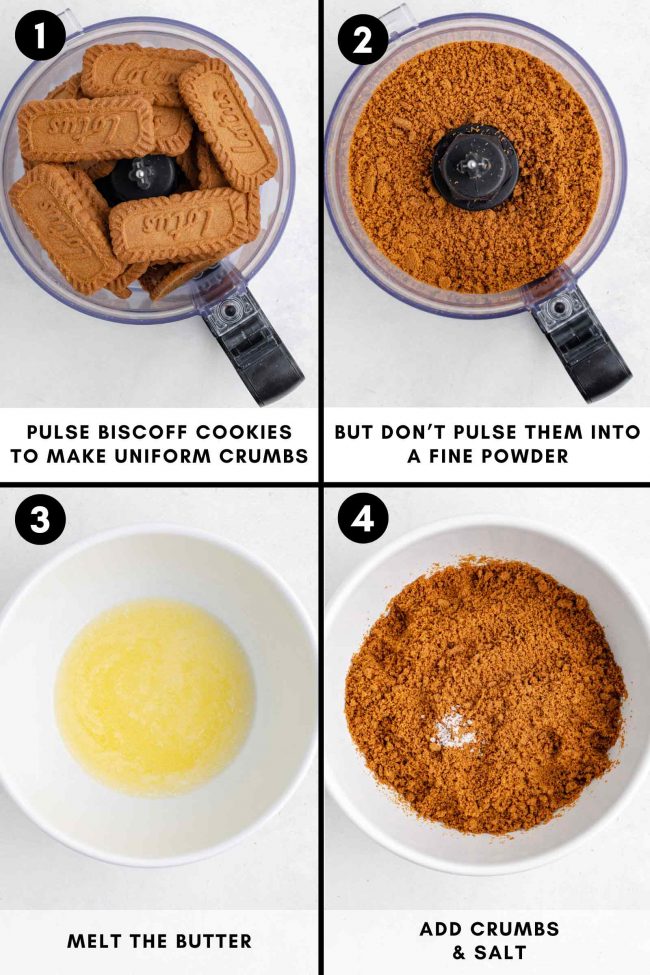
Mix until well combined.
Beat the cream cheese and sugar until well combined.
Press into pan and bake.
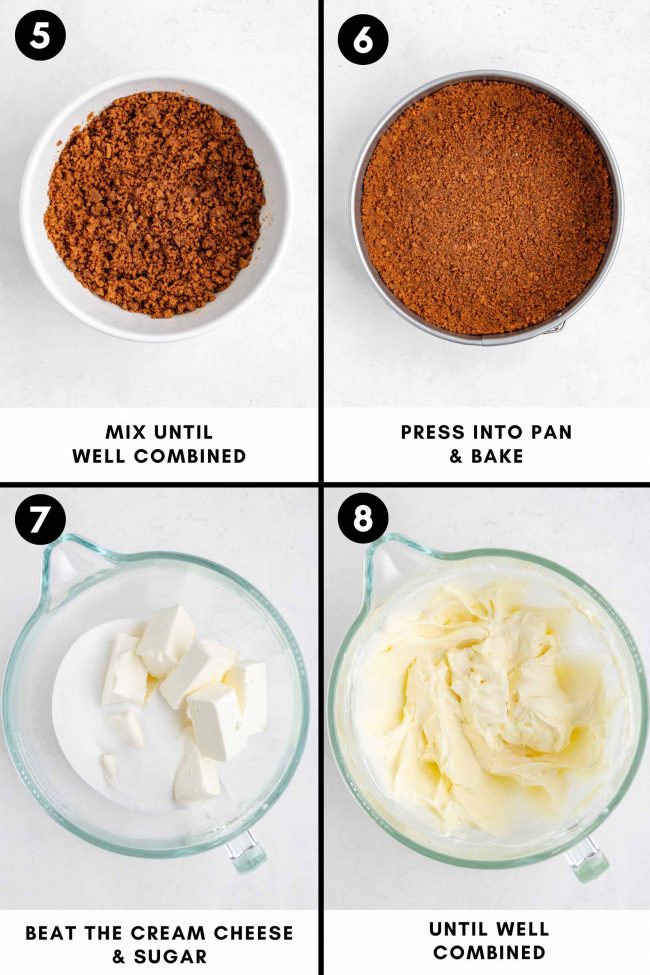
Beat in the Biscoff spread until well combined.
Beat in sour cream, cream, vanilla and salt until well combined.
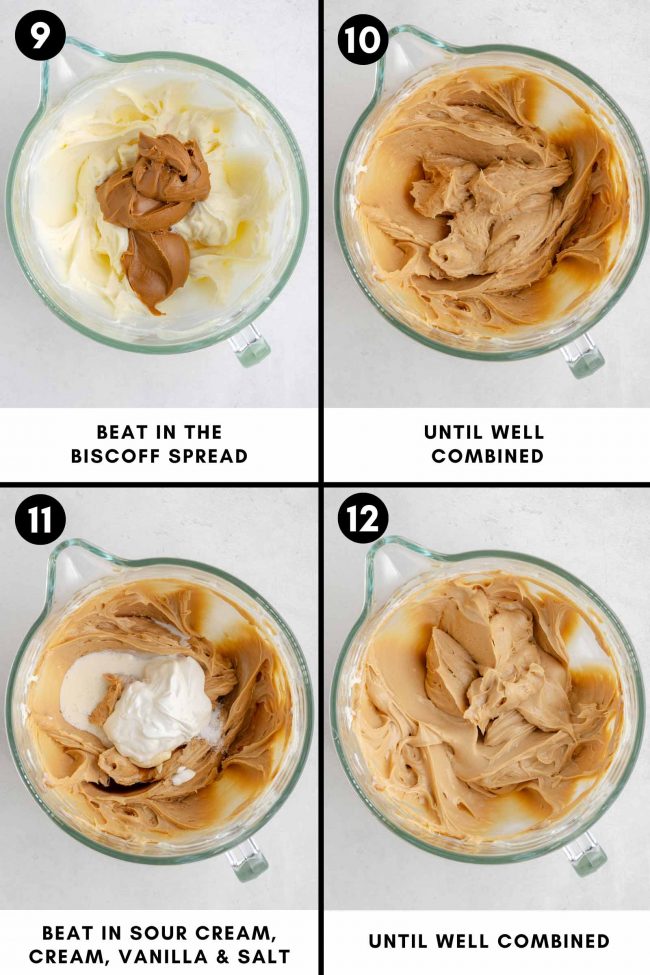
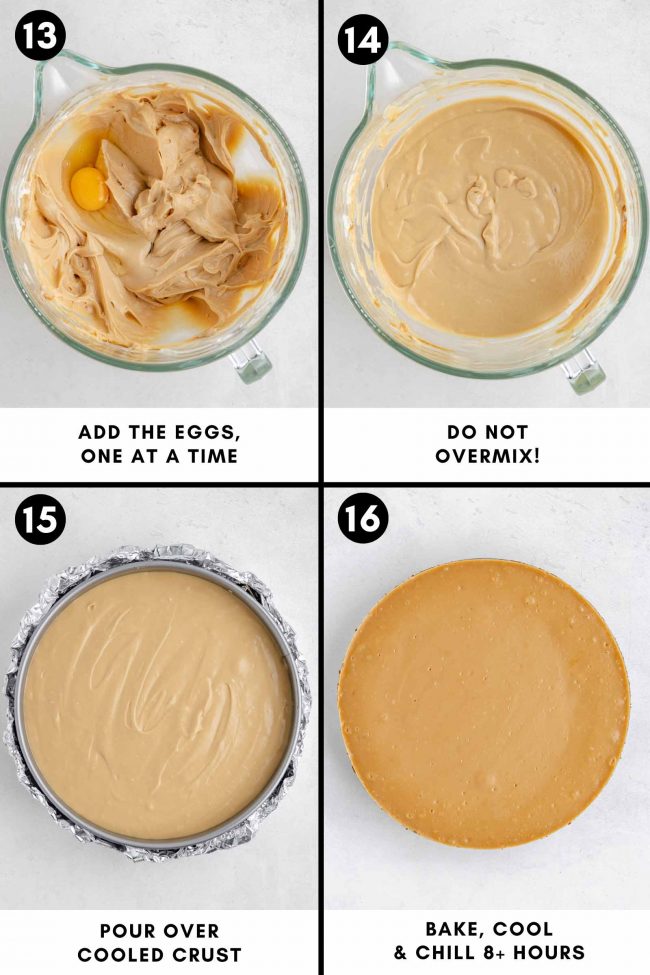
Add the eggs, one at a time. Do not overmix!
Pour over cooled crust.
Bake, cool and chill 8+ hours.
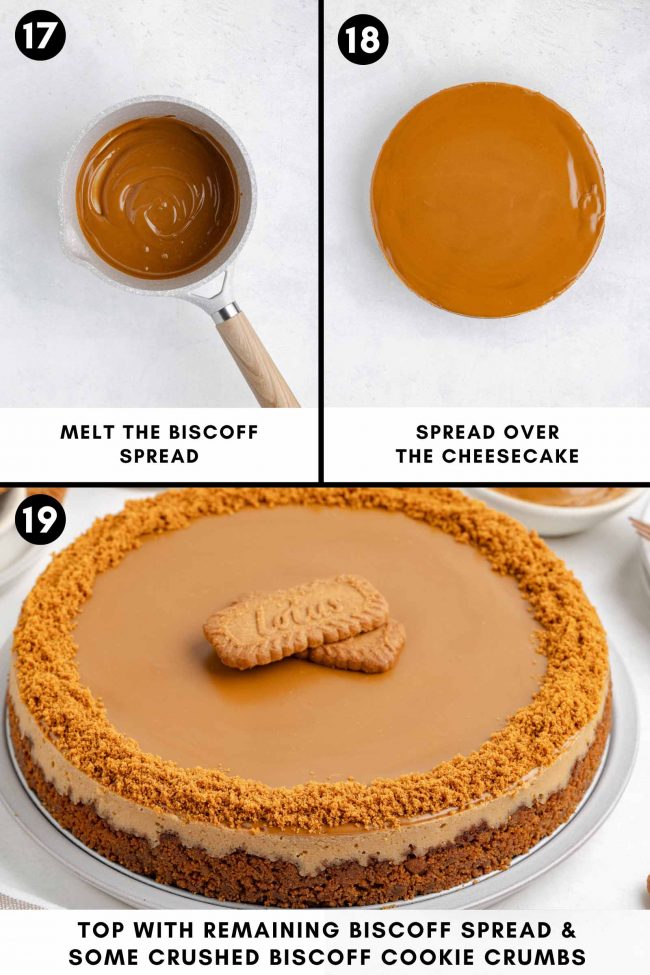
Melt the Biscoff spread. Spread over the cheesecake.
Top with remaining Biscoff spread and some crushed Biscoff cookie crumbs.
Decoration
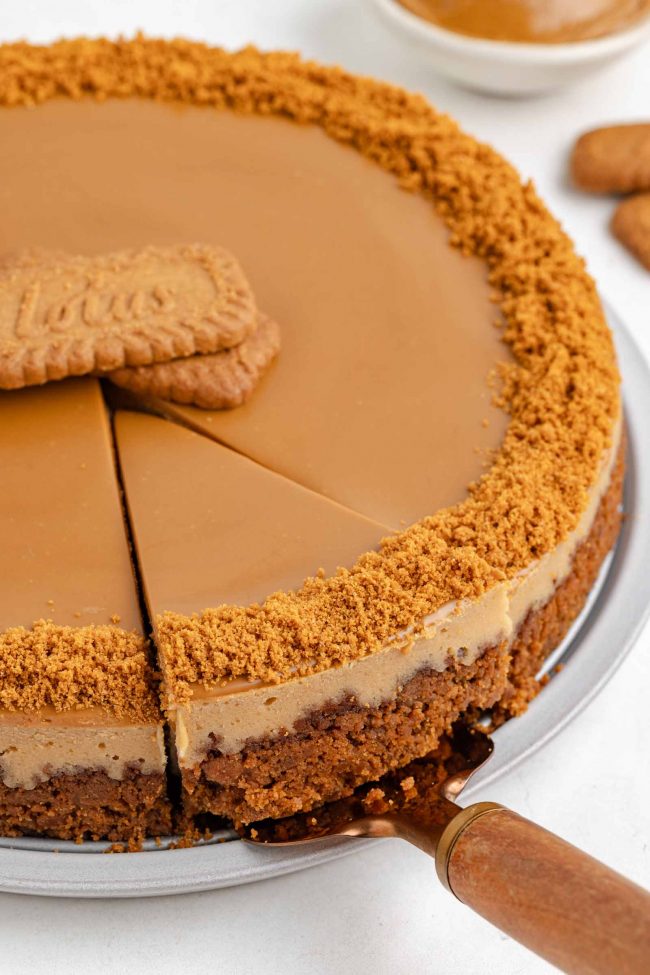
This cheesecake is pretty drab-looking if you just top it off with the Biscoff spread. It’s even less impressive looking if you don’t top it off with the spread!
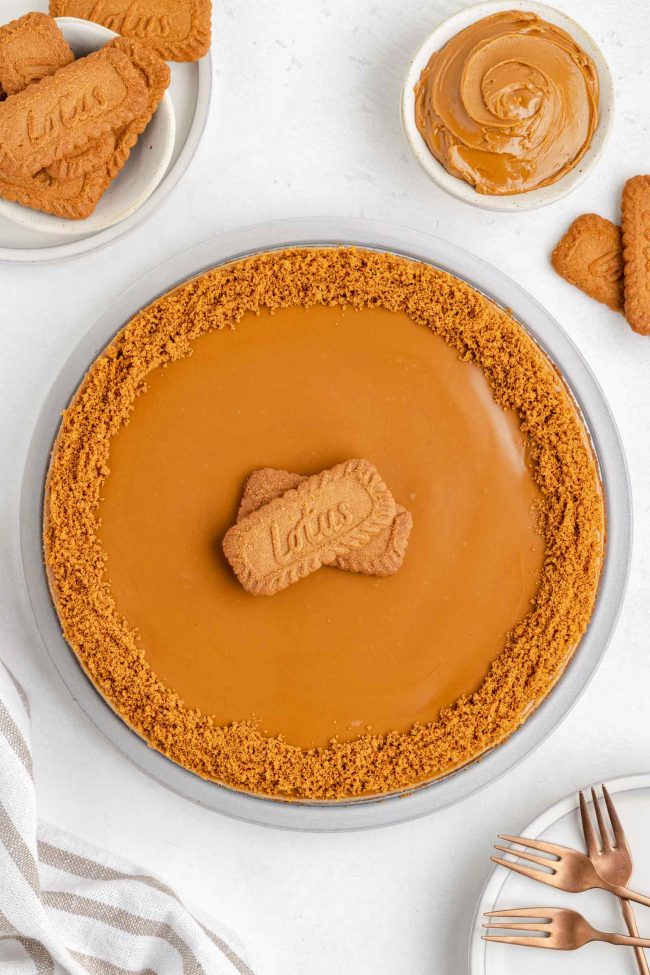
So I added some Biscoff cookie crumbs and 2 cookies to the center of the cheesecake. There are some people claiming they only used 2 crushed cookies to sprinkle around the edges of the cheesecake.
There’s no way that’s possible with the amount of crumbs they used. What a strange thing to lie about. 🤔
I went with around 1/3 to 1/2 cup of crumbs. You can use more or less depending on whatever you think looks good.
One whole package of the cookies is for the crust, so you, unfortunately, have to get another package just for the decoration, so you’ll definitely have enough to use as many crumbs as you’d like.
Why don’t you grease the pan?
When making a cheesecake, it’s important not to grease the sides of the springform pan. The cheesecake batter needs to cling to the sides as it bakes. If the sides are greased, the batter may slide down, leading to an uneven texture or cracks in the cheesecake.
The sides of the pan provide support, helping the cheesecake maintain its shape and develop the smooth, firm texture associated with a perfectly baked cheesecake. Allowing the batter to stick ensures the cheesecake rises evenly during baking and cools properly to set.
If the batter can’t stick, the cheesecake may shrink away from the sides while cooling, which can also cause cracks on the surface.
Do I have to use a water bath?
A water bath involves placing a pan of hot water around your cheesecake pan. It helps regulate heat, ensuring the cheesecake bakes evenly without drying out or cracking.
This post offers an excellent explanation of water baths with comparison photos. Once you see the difference between a cheesecake baked with and without a water bath, you’ll hopefully be convinced it’s worth the effort. 🙂
After trying it, I realized it’s not nearly as daunting as it sounds. It’s one of those things you do once and then wonder why you avoided it. It only adds about five minutes to the prep time.
Cheesecake batter is similar to custard. Without the added moisture from a water bath, the texture can sometimes turn rubbery.
The water keeps the temperature around the cheesecake pan from exceeding 212 °F (100 °C), allowing for slow, even baking without burning the top.
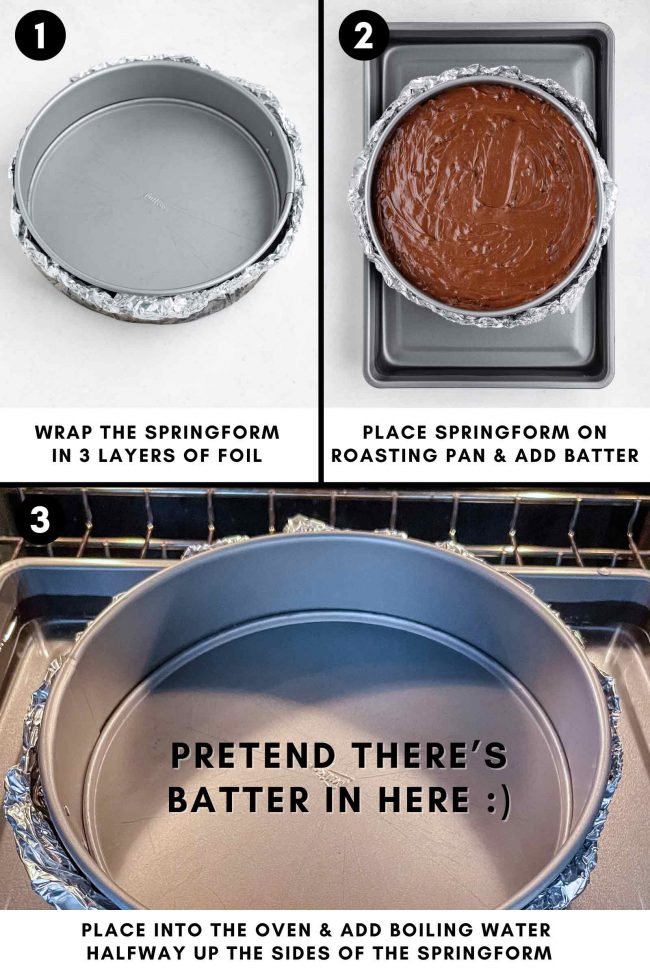
By the way, the note in the image saying “Pretend there’s batter here” is because I don’t want the photographer standing in front of her oven with the door open for a few minutes trying to get a decent shot. When baking cheesecake (that’s my Triple Chocolate Cheeesecake in the above photo; not the Biscoff cheesecake), it’s very important to close the door immediately and not open it until it’s done baking.
So while you may not care about cracks, you should care about that rubbery texture thing. And if you’re thinking the Biscoff spread will just cover up any cracks – you’d still be able to see them. It’s just a thin coating of Biscoff on top and you’ll be able to see where the cracks are unless you buy another jar of Biscoff to make a thicker layer to top the cheesecake with.
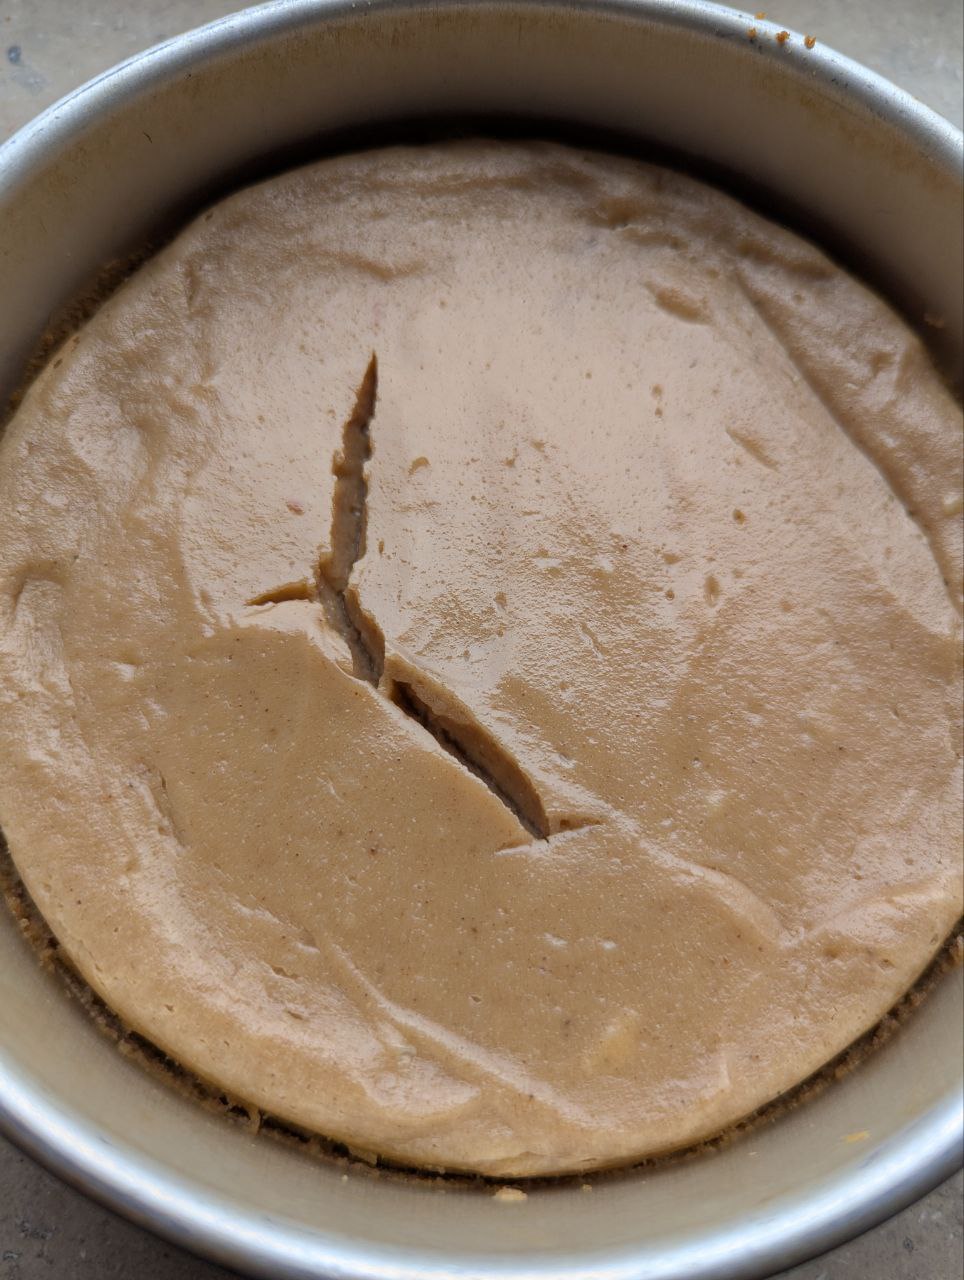
Below is one of the gluten-free Biscoff cheesecake attempts. I have a small oven that I use for testing before using the big, proper oven (as the small one only takes a minute to preheat).
I don’t have space to do a water bath in the small oven, so I did this one without a water bath. You would need a lot of extra Biscoff to cover up those cracks!
When it was done baking, it looked fine and later developed the cracks.
Water bath tips
- Ensure your roasting pan is deep and wide enough to hold the cheesecake pan.
- Wrap the springform pan in heavy-duty foil to prevent water from seeping in. If you use thin or flimsy foil, it may tear, defeating the purpose of the water bath.
- Always use hot water for the water bath. Cold water would affect the oven temperature and baking time.
- Don’t overfill the water bath. The cheesecake pan will displace some of the water, and you don’t want it to overflow.
- Handle the water bath carefully to avoid splashing. Any water that gets into the batter could ruin the cheesecake.

General cheesecake tips
- Make sure all ingredients are at room temperature before mixing to avoid lumps in the filling.
- Allow the cheesecake to cool for a few hours before refrigerating to prevent condensation from forming on the surface.
- Chill the cheesecake for at least 8 hours (or overnight). I know it’s tempting to dig in right away, but cheesecakes do not have a good texture before chilling!
Troubleshooting
- If your cheesecake cracks, it could be due to overbaking or not using a water bath. Try reducing the baking time slightly or ensuring the water bath covers the sides of the cheesecake pan.
- If the crust is too crumbly, make sure the butter is well-incorporated with the cookie crumbs and press the crust down firmly into the pan.
- If your cheesecake is too runny, it may not have baked long enough. Ensure it’s slightly set but still jiggles when tapped.
How to make ahead, store and freeze
- Crust – you can make the crust up to 3 days in advance. Simply store the unbaked crust the refrigerator after pressing it into the pan. Cover the pan with plastic wrap.
- Baked cheesecake – you can refrigerate it for up to 4 days. If you want to freeze the cheesecake, wrap it tightly in plastic wrap and foil, then freeze for up to 3 months. Let it thaw overnight in the fridge before serving.
Gluten-free version
This was quite the hassle. 🙃 We have gluten-free cookie butter and spekulatius cookies here in Germany, and I assumed the US did, too.
But the US doesn’t. Not really.
I was so excited when I found ChocZero Keto Cookie Butter Spread from iHerb. The reviews were pretty good, and I thought it’d be an easy sub.
I thought it was awful. Just… the worst spread I’ve ever tasted. I had a few other people taste it to see if my tastebuds were off, but everyone agreed with me.
I just can’t believe those reviews being from people who have ever had Biscoff. The taste was disgusting (to us) and the texture was also off-putting.
That said, the reviews are so positive. Maybe I received a bad batch?! I just can’t imagine that happening, though.
I didn’t waste a ton of time and ingredients trying out the cheesecake with that, but I think it’d work. In case you’re one of the many, many people who do like it!
So up next, I tried with homemade gluten-free cookie butter. You just blend the cookies, milk, butter, cinnamon and salt in a high-speed blender.
I used Schar Spekulatius, which honestly aren’t very good. The flavor of the cookie butter didn’t really taste like Biscoff. But the finished cheesecake was delicious.
I tried the cookie butter with Pamela’s Gluten-free Honey Grahams, and that was incredible! Same with Honey Cinnamon Seed & Nut Flour Sweet Thins from Simple Mills.
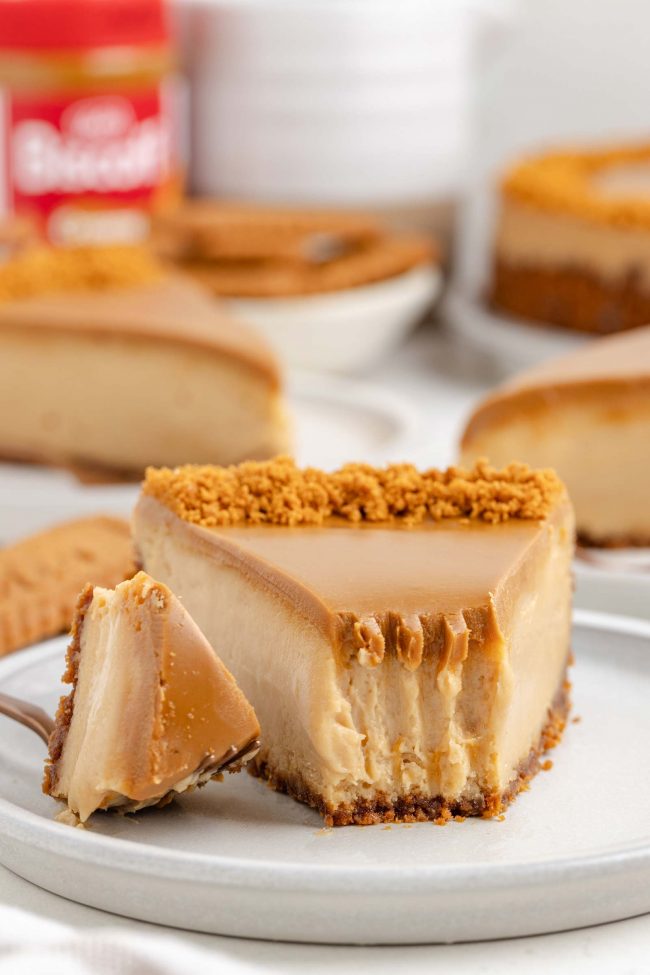
I thought the cookie butter was much tastier with those 2, but then you’re missing the special Biscoff flavor. Just make the speculoos spice mix I mentioned above and add to taste.
This spread isn’t meant to be a Biscoff copycat. It’s just meant as a sub for this cheesecake. So please don’t make it just to eat by the spoonful on however you like to eat Biscoff.
It works perfectly in this cheesecake, but the taste and texture aren’t a perfect copy of Biscoff.
Live in Germany?
I live in Germany and our 2 biggest drugstore have, or rather had, their own brand of cookie butter. And it was gluten-free!
But it went out of stock almost as soon as it appeared. On the off chance you live in Germany AND you still have some Spekulatius Creme from DM or Rossmann, you can use that.
I also tried 3 brands of gluten-free Spekulatius and didn’t really like any of them. Schaer was the best of the bunch.
I didn’t like the texture, but as a crust, mixed with butter, they work great.
Also, if you don’t live in the US, be sure to do the cream cheese trick listed in the recipe notes. And if you’re in the EU, then use medium eggs (US large eggs = EU medium).
I hope you’ll enjoy this Biscoff cheesecake! If you try it out, I’d love to hear your thoughts below in the comments. Thanks! 🙂
 >
>
❀
- Prep Time:
- Cook Time:
- Ready in:
- Yield: 12
See notes for the gluten-free version!
Ingredients
- 32 Biscoff cookies (this is a whole 250-gram / 8.8oz package)
- 1/3 cup (75 grams) unsalted butter, cut into pats
- 1/16 teaspoon salt
- 24 ounces (675 grams) full-fat cream cheese, room temperature
- 1 1/4 cups (250 grams) granulated sugar
- 1 cup (275 grams) creamy Biscoff spread (you need a 14.1-oz / 400-gram jar for this recipe)
- 1/2 cup (115 grams) sour cream
- 2 tablespoons heavy cream
- 1 1/2 teaspoons vanilla extract
- 1/4 teaspoon salt
- 3 large (50 gram each, out of shell) eggs, room temperature
- the remaining 125 grams of Biscoff that’s still in the jar
- 2 cookies for the middle
- 1/4 to 1/3 cup crushed Biscoff cookies
For the crust:
For the filling:
For the topping (you’ll need to buy a 2nd 250-gram / 8.8oz package of Biscoff for this):
Directions
- Preheat the oven to 350 °F (175 °C). Place a round of parchment paper on the bottom of a 9″ springform pan. Position the oven rack to the lower-third section of your oven.
- Melt the butter in a medium microwave-safe mixing bowl at 50% power for 10-15 seconds. Stir and continue in 10-15 intervals until melted.
- Place all the Biscoff cookies in a food processor fitted with an S-blade. Pulse until you have uniform crumbs.
- Pour the crumbs over the butter and add the salt. Stir until combined.
- Press this mixture over the bottom and about halfway up the sides of the ungreased springform pan. It shouldn’t be pressed up so high that the crust is super thin. I use the bottom of a flat glass to ensure the crust is level. But don’t press it down hard. It should be compact but not pressed down as hard as possible.
- Bake for 6-8 minutes or until it appears dry.
- Remove from the oven and let it sit on a cooling rack for 15 minutes while you prepare the filling. Turn the oven down to 325 °F (167 °C).
- In a large mixing bowl using an electric hand mixer at medium speed, beat together the cream cheese and sugar until well-combined and fluffy.
- Beat in the Biscoff at medium speed until combined.
- Add the sour cream, heavy cream, vanilla and salt and beat on low until combined.
- Beat in the eggs on low, one by one, until combined. Be sure not to overmix.
- Do this once your cheesecake crust has cooled enough for you to handle the pan (after about 10 minutes of cooling). Using heavy-duty, extra-wide foil, cut three pieces that are at least 14″ (36 cm) long for your 9″ (23 cm) springform pan.
- Place the foil pieces on top of each other on a flat surface and put the cheesecake pan in the center of the foil pieces.
- Fold the foil up and around the outer edge, but it shouldn’t be attached to the upper rim of the pan.
- Get out a roasting pan large enough for your foiled-wrapped cheesecake pan.
- Bring a kettle of water to a boil. How much you’ll need depends on the size of your roasting pan. It’s better to boil too much than to boil too little, and then have to boil more. Should you not have a kettle, then bring water to a boil and then pour it into something shatter-resistant that has a spout, which allows for easy pouring and will prevent water from splashing into the cheesecake. If you think you’ll need 2 kettles of water, then boil 1, pour the boiling water into something shatter-resistant, and boil another kettle. Then when the 2nd kettle is ready, you’re ready to pour all the water in the roasting pan and don’t have to open the oven door twice.
- Place the foil-covered pan into the empty roasting pan. Pour the cheesecake batter over the top of the pre-baked crust. The filling will go over the crust, and that’s fine. Use a silicone spatula to smooth out the top.
- Right as the water starts boiling, move the waterless roasting pan with the cheesecake in it onto the oven rack.
- Very, very carefully pour the just boiled water into the roasting pan, pouring only about halfway up the sides of the cheesecake pan. Be careful that it doesn’t splash onto the cheesecake batter.
- Bake at 325 °F (167 °C) for 50 minutes. When you tap the pan, it won’t be totally set but won’t be super jiggly. It’ll look a bit strange and not like normal cheesecake. It’ll probably also look dry and maybe a little overdone (but should definitely not look burned!).
- Remove the roasting pan (including the cheesecake) from the oven, place on a cooling rack, and let it cool for 1 hour before removing the cheesecake from the roasting pan. Let cool for about 2 hours on a cooling rack or until room temp before chilling for 8+ hours.
- I let the cheesecake chill for 8+ hours and then cover it to prevent condensation from building up and dropping back down onto it. Cover and keep refrigerated for up to 4 days. It can also be frozen for up to 3 months.
- Melt the remaining Biscoff in a small saucepan over medium-low heat. It only takes about 1-2 minutes. Stir frequently until melted enough that you can easily pour it over the cheesecake, but it shouldn’t be super runny.
- Pour over the cheesecake.
- Add the crumbs of a few Biscoff cookies around the edge and add 2 cookies to the middle.
Prepare the crust:
Make the filling:
Prepare the water bath pan:
Prepare the water bath:
Bake:
Make the topping:
Notes
- If you live outside of the US, you likely don’t have brick cream cheese like in the US. So for this recipe, buy 900 grams of cream cheese and squeeze out the liquid until you have 680 grams of cream cheese. If you don’t do this, your cheesecake will come out badly.
- For the gluten-free version, use the below homemade Biscoff-like mixture in place of the Biscoff and Schar Spekulatius for the crust. You can also use Pamela’s Gluten-free Honey Grahams or Honey Cinnamon Seed & Nut Flour Sweet Thins from Simple Mills and add speculoos spice mix to taste. You can also use them + the spice mixture for the homemade spread below. To make the Biscoff spread sub, blend all the ingredients together (starting off with 4 tbsp of milk) in a high-speed blender until totally smooth. It should be as firm as regular peanut butter. You don’t want it runny like 100% peanuts peanut butter. Add more milk, if needed.
– 200 grams (2 boxes) Schar Spekulatius
– 2 tablespoons (28 grams) unsalted butter
– 4-6 tablespoons (I used 4 tablespoons + 4 teaspoons) milk of choice (not canned coconut milk)
– 1/4 cup (50 grams) light brown sugar
– 2 teaspoons cinnamon
– 1/8 teaspoon saltThis will give you 368 grams of the spread. The recipe calls for 275 grams in the filling and the rest goes on top. For the remaining 93 grams of spread, use a little more milk to thin it out so it can be spread over the cheesecake.
Click here if you want the version I posted in 2011.

