Self-Myofascial Release Techniques Using Massage Balls: Your Guide to Self-Massage
If you’ve clicked your way to this article, chances are you’re searching to soothe aches and pains, gain range of motion in your joints, enhance performance in your sports activities or weekend hobbies, or seek medication-free ways to improve your emotional resilience.
This article provides you with step-by-step video instruction to get you on your way to becoming a self-care pro using self myofascial massage techniques with a variety of Therapy Balls. At the end of this article there are a series of videos that will have you down on the ground (or at the wall) feeling the immediate benefits of this work and these tools, but first, it will be helpful to dive into some important basics.
BENEFITS OF SELF-MYOFASCIAL RELEASE (SMFR)
Self-massage (SMFR) relieves aches and pains, enhances breathing, reduces stress and improves your posture and performance. To understand how it works, you must first understand that the body is made up of multiple layers of connective tissue (fascia) that weaves and winds its way around every part of your body’s parts, connecting (and separating) you from head to toe. If you’d like to learn more about fascia, we recommend reading our January article Understanding Fascia and the Benefits of Myofascial Release for an in-depth look at this incredible living seam system (it gets a little technical, but you’ll come out the other side feeling incredibly educated on the importance of fascia to your daily life, activities and health).
JARGON ALERT
“A fascia is a sheath, a sheet, or any other dissectible aggregations of connective tissue that forms beneath the skin to attach, enclose, and separate muscles and other internal organs.”
Massage Balls improve the slide and glide between the fascial layers which translates into ease of movement, release of tension, and reduction of discomfort. The grippy texture of our massage therapy balls work by gently locking into all the tissue layers, from the surface of the skin, to the spongy superficial fascia underneath, and further within towards deep fascia. As the balls roll along the skin, they create massive shear that heats, calms, and lengthens not only the targeted tissues but the associated tissues as well.
BEFORE YOU ROLL: A FEW THINGS TO KNOW
IT DOESN’T HAVE TO HURT TO WORK
When working with your body’s tissues, keep in mind “It doesn’t have to hurt to work.” Our tissues are soft and often under a tremendous amount of tension. Going ‘all out’ to achieve relaxation can leave you sore and bruised the following day, exactly the opposite of what you’re trying to achieve.
Research shows that the body’s tissues respond better to a soft tool that gently entices your muscles into relaxation. Harder tools tend to switch on the flight or fight response resulting in muscle bracing (contracting) to protect themselves against a threat. (1)
SELF-MASSAGE TOOLS
There are a myriad of self massage tools available, running the gamut in shapes, sizes and textures, from foam rollers to wooden balls and everything in between. With so many choices, it can be overwhelming deciding which tool is right for you.
Our massage therapy balls have a compressible inner core, surrounded by natural latex rubber and uniquely designed to grab the skin for optimal shear. They have enough give to roll over and around bony prominences, like the shoulder blades, spine and sacrum, yet are firm enough to burrow deep into multiple muscle layers. The YTU® Therapy Balls provide pressure much like a massage therapist’s thumb working deep into the tissues. The Therapy Ball PLUS are slightly larger in diameter so they cover more surface area and plunge into tissues with the accuracy of an elbow. Experiment and explore with all sizes to find the right fit.
BREAK IN THE THERAPY BALLS WITH YOUR FEET
New Therapy Balls can feel firm. A great way to develop their squish and grab texture is to first break them in under your feet before rolling the rest of your body. Place them under your feet and roll, scrunch and press down. Your feet will thank you and the balls will be well on their way to developing a soft suede-like grippy exterior.
PAIN: GOOD VS BAD, HOW TO DIFFERENTIATE
We all perceive pain differently in our bodies. Here are some key things to be aware of when beginning an SMFR practice.

‘BAD’ PAIN
It can be difficult to distinguish between pain and sensation. These are some signs that you might be moving towards ‘bad’ pain and should look to modify using one or more of the techniques below.
- Clenching jaws or hands
- Short or shallow breathing
- Tension in the entire body
- Tingling, burning or numbness
‘GOOD’ PAIN
Self-Massage (SMFR) will most likely be accompanied with some sensation, especially if you’re new to rolling. Ideally, you want to stay away from pain signals (above) but you might get curious about ‘tolerable discomfort,’ exploring your edge of sensation without tipping over into anguish. Here are some ways to know you’re moving in the right direction.
- A feeling of gentle fluidity or heat in the tissues being rolled
- An overall feeling of relaxation
- Less pain throughout your entire body
- Deeper breath with less effort
- Whole body tension dissolves
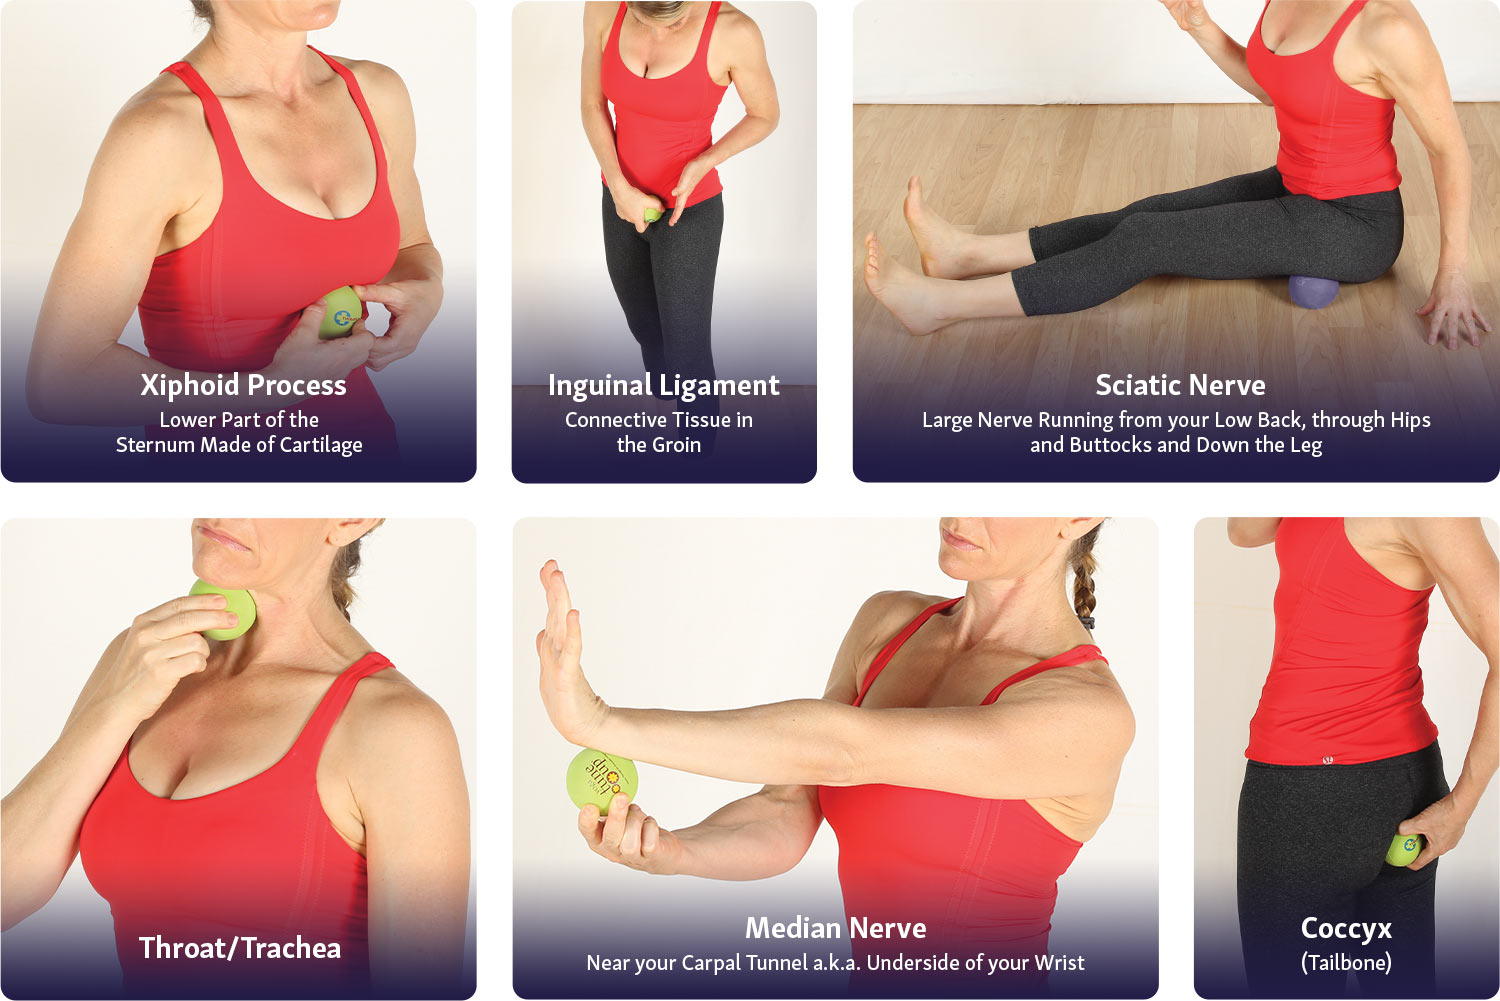
AREAS TO AVOID
While rolling is good for the overall body, there are some areas you definitely want to avoid.

- Inguinal ligament – connective tissue in the front of your pelvis
- Xiphoid process – lower part of the sternum made of cartilage
- Throat/ Trachea
- Median nerve near your carpal tunnel aka underside of your wrist
- Coccyx (tailbone)
- Sciatic Nerve – large nerve running from your low back, through hips and buttocks and down the leg
Massage Ball Video Tutorials
These quick Self-Myofascial Release (SMFR) techniques give you a taste of full body self massage. You can begin with the standing sequences or go directly to the area of need. In these videos, Jill primarily uses the YTU® Therapy Balls for reasons explained above, but if you don’t have these tools you can start your SMFR practice with a tennis ball.
Feet Forward: Massage Ball Techniques for Feet
There are 26 bones and 33 joints in each of your feet! Your feet are your foundation. As with any structure, the base is the most important part. Take care of your feet because they literally take you everywhere, and “fascially speaking,” lead to literally every other area of your body. Rolling your feet impacts all body areas “above.”
- Place toted Therapy Balls on the ground
- Press into the balls with your feet and begin to roll toe to heel and back. Switch sides
- Remove the balls from the tote and place one ball under the center of the foot, in the inner arch
- Start to sway the foot back and forth, mobilizing the ankle as you cross fiber the muscles underneath
- Roll the therapy ball to the toe mounds aka the ball of the foot and repeat the motion above, rolling the ball from side to side
- Change sides and repeat
Hand Help: Massage Ball Techniques for Hands
Almost everything is at your fingertips. With just a few keystrokes you can access anything, communicate with anyone and even have time for your favorite app. With all the typing and texting, this technique is a must do to release the unknown tension in hands and fingertips. Similar to your feet, there is a very significant “upline” effect from your hands to your wrists, elbows, shoulders neck, and even your jaw and skull.
- Place the ball on the fleshy part of your thumb
- Pin the ball down onto a chair, table or desktop
- Place your other hand on top to add pressure, breathe and press into the thumb
- Begin to pivot your hand over the ball “like you’re squeezing orange juice”
- Move the ball between the thumb and index finger and to the ‘thumb splits’, pressing down into the ball for a nice stretch
- Roll the ball under your hand, like you’re ‘kneading bread’
- Switch sides
Shoulder Boulders Begone: Massage Ball Techniques for Tense Shoulders
Driving, texting, talking, stress, and constant computer use can lead to muscle stiffness and pain. This tension can lead to headaches, backaches, jaw stiffness, eye strain and trouble concentrating. Because your body is intimately connected from head to toe, rolling the muscles of the upper back and shoulders will have an immediate effect on your neck and face. Targeting one of these areas, spreads joy to the rest. As we like to say “Work locally, act gloBALLy”.
- Lay on your back, with knees bent and place either the YTU Therapy Balls or Therapy Ball Plus in the upper trapezius (exactly where you want a friend to grab and massage out the kinks)
- Lift your hips up towards the ceiling
- TOO MUCH? Modify by taking the balls to the wall and do this routine one side at a time
- Lift your arms up over your head and towards the floor
- Shift and shimmy your ribcage and arms from side to side – play with movement
- Breathe – your breath is your barometer
- Go slow for the win
Glutes and Glory: Massage Ball Techniques for Hips & Glutes
These days we sit at our desks or drive for hours on end. When we get up from our chair or out of the car, we still carry that ‘seat shape’ with us. This sequence will get you re-acquainted with your posterior, wake up those sleepy glutes, and get you prepared for your next activity. Your glutes are your main conductor for pushing you forward through space, they are your jet pack and need to have proper and consistent blood flow, stimulation and movement.
- Lay on the floor and place a toted pair of therapy balls on the side of the hip and let it burrow its way into the flesh – breathing deeply will facilitate this
- Let the balls slowly move from the side of the hip to towards the sacrum, reset and repeat
- Contract and relax with breath. Inhale, hold the breath, squeeze the glute while pushing your knee into the ground, exhale and release completely
- Move the balls in towards the sacrum and repeat contract/ relax
- Switch sides and repeat slow roll and contract/ relax
Low Back Love: Massage Ball Techniques for Low Back
According to the American Chiropractic Association (2), back pain is the single leading cause of disability in the world and most cases are not the result of a serious condition. Do this technique daily to ward off back pain caused by excessive sitting, chronic poor breathing habits, or repetitive movement stressors such as lifting incorrectly, to help you ease discomfort and keep you moving well.
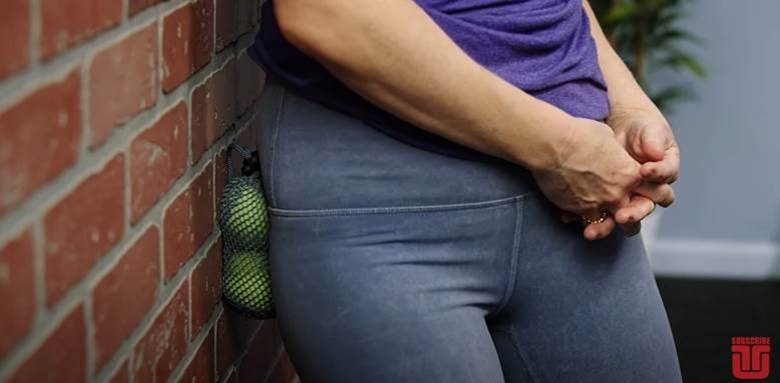
- Lay on the floor or stand at the wall, place a toted pair of therapy balls in the low back flesh between the ribcage and pelvis
- Slowly roll up and down
- Lay on the floor slightly leaning to one side
- Place the toted therapy balls so that one is supporting the side body and the other is nuzzling into the low back
- Take 3-5 deep breaths into the waist, enveloping the balls
- Contract/ relax into the balls – think mini side bend as you exhale, open and expand as you inhale
- Shift yourself from side to side, like a rocking motion
- Switch sides
Best Neck Ever: Massage Ball Techniques for Stiff Neck
Stiff neck and shoulders can be caused by high stress and many hours staring at a computer screen or looking down at your phone. This self-massage routine is the perfect way to press the reset button to downregulate your nervous system and wind down after a long day or to set yourself up for a good night’s sleep.
- Lay on the floor with a toted pair of therapy balls
- Place the toted balls at the base of our skull and on top of a block
- Flex and extend your neck, creating a nodding motion
- Create a passive nodding motion by using your feet to push and pull your body
- Slowly turn your head from side to side
- Rest on one side and make tiny circles with your nose
- Switch sides
Bonus Move: The Surprise On Your Side
One way to sooth low back discomfort and spasm is to release the side body. The obliques share an attachment with the low back, and are responsible for side bending and twisting and stabilization. Back tissues can become tired and weak from too much sitting, standing and lack of diverse movement. This can lead to back spasms and general discomfort. Targeting the obliques will help calm and stretch deep into the low back. This incredible bonus move is perfect in combination with Rolling 101 for Low Back or can be done on its own.
- Place Coregeous Ball in the soft tissue space between the pelvis and the rib cage
- You can use a rolled up blanket or small decorative pillow
- Lay over the ball using your hands as a pillow
- Inhale and hold the breath, activate the muscles by drawing the waist muscles in towards the midline or belly button
- Exhale and relax the body. Repeat 2-5 times
- Make small movements with your torso like a teeter totter over the ball to massage the activated muscles
- Inhale, hold, activate the muscles towards towards the midline
- Exhale and squeeze your pelvis towards your rib cage and your rib cage towards your pelvis like you’re trying to pop air out of the ball. Repeat 3 times.
- Switch sides
While this sequence provides a good foundation for a head-to-toe self-massage routine, if you’re interested in learning more techniques and sequences for body-specific areas pick up a copy of The Roll Model: A Step-by-Step Guide to Erase Pain, Improve Mobility, and Live Better In Your Body by Jill Miller. The Roll Model Book provides over 100 massage ball moves with additional techniques to equip yourself to create your own rollouts.
MODIFICATIONS
If you experience any ‘bad’ pain or find you need ease off the pressure, try one of these modifications

- Go to the wall
- Use two therapy balls in the tote
- Use a larger size therapy ball
- Consider using the Coregeous Ball if the smaller solid therapy balls illicit too much sensation
- Place the ball on a blanket, sofa or bed to absorb some of the pressure
- Move the ball above, below or to the side of a hypersensitive area
- Skin Roll by placing any size therapy ball on exposed skin and using a light touch, spin and gather up the tissues until you feel a pleasant pinch
- Contract and relax the muscle you’re rolling to help the muscle and its surrounding tissues soften
- Breathe. Your breath is your guide. Modify until you can breathe fully
- Stay hydrated – drink fluids frequently as you would with any form of bodywork
WHERE TO GO FROM HERE?
These videos are just the tip of the iceberg. Now that you’ve had a taste of self-massage and these easy self-myofascial release techniques, here’ are a few great next steps:
End Notes
-
Kim Y, Hong Y, Park HS. 2019. A soft massage tool is advantageous for compressing deep soft tissue with low muscle tension: Therapeutic evidence for self-myofascial release.
-
“Back Pain Facts and Statistics.” American Chiropractic Association Today, https://www.acatoday.org/Patients/What-is-Chiropractic/Back-Pain-Facts-and-Statistics. Accessed 01 May 2020.


