How to make photos look like film in Lightroom is question photographers who follow my website ask me regularly.
Even though film photography has experienced a resurgence in recent years, it is far from becoming mainstream again. But I believe people are starving for nostalgic analog aesthetics of film photography with all its imperfections.
I admit that digital photography offers unparalleled advantages. Still, it often produces an unrealistic reflection of reality where digital images look too perfect, sometimes too similar, and have no character.
If you are not ready yet to embrace analog film photography, I offer you a creative compromise. Use your digital images but process them in Lightroom with analog film photography in mind. Create a nostalgic old feel of darkroom processing.
Instead of developing a Lightroom film preset and share with my readers, I decided to put together a step-by-step guide so you can understand and learn how to make photos look like film in Lightroom.
How To Edit Your Photos Look Like Film In Lightroom
To make a photo look like film, start with reducing contrast and clarity in the Basic panel. Desaturate warm colors in the HSL panel and shift the color balance using Color Gading tools. For the final touch, add fine grain with the help of the Effect panel.
In film photography, the final look of the photo is defined by the chemical characteristics of the film. Over the years, thousands of different types of film were developed, with the most notable Fuji Velvia, Kodak Ektar, Fujifilm Provia, Kodak Tri-X, Ektachrome, and Kodachrome.
But today, we aim not to create a particular film’s look but rather a generic look and feel that reflects analog photography.
When developing new presets, I never limit myself to how many Lightroom adjustments I use and how many different sliders I involve. I use as many I as I feel necessary to achieve my desired look. In today’s guide, we will use the minimum number of Lightroom adjustments to create the film base, the one you can customize and take it as far as your creativity takes you.
Step 1: Reduce Contrast in the Basic Panel
One of the main differences between digital and analog photography is dynamic range. The modern digital sensors produce images with a much wider dynamic range than film.
It is most evident in landscape photography when shooing film. Because of the narrower dynamic range, capturing an entire range of light from the scene is often impossible. As a result, when shooting film, you often see clipped shadows or highlights.
When I start processing digital images in Lightroom, I try to maximize their dynamic range. I do it by cranking up the Highlights and the Shadows sliders, and in the next step, I set black in white points using the Whites and the Black sliders. It helps preserve the broadest dynamic range and reach maximum contrast without clipping highlights and shadows. You can find a dedicated tutorial here: Setting Black and White Points in Lightroom.

But we are not trying to maximize the dynamic range and contrast to make photos look like film.
We use the Highlights and the Shadows sliders to reduce the image’s contrast without touching contrast dedicated controls.

Important. At this point is the right time to adjust exposure of your image. If it is overexposed or underexposed, use the Exposure sider of the Basic panel to balance it. In my case, I did not have to do anything because I nailed exposure when I took the photo.
Step 2: Reduce Clarity Using Dehaze
Today in digital photography, there is an obsession with image sharpness. Digital sensors, in combination with modern lenses, produce very sharp images. On top, you can use dedicated sharpening programs in post-processing. “Sharpness obsession” often results in images with an unnatural look.
Film photography has a different feel. The combination of properties of analog film with older lenses produced much softer prints, often with a dreamy look.
In the second step, we need to reduce Clarity. We can do it in the Basic Panel.
There are different adjustment sliders you can use to reduce clarity. The most obvious choices are the Clarity and Contrast sliders. Plus, you can achieve a similar effect using the Texture slider.
But, I prefer to use the Deheze slider. It produces a more subtle effect.
Move the Deheze slider to the left (-33).

Step 3: Control Individual Colors in HSL Panel
In this step, we will manipulate individual images’ colors.
The goal is to desaturate the warm colors: Red, Orange, and Yellow. And to shift the cooler colors: Blue, Aqua, and Green, toward a warmer spectrum.
We can achieve our goals in the HSL Panel.
Use the Saturation tab to desaturate Yellow, Orange, and Red by moving the sliders to the left.
Use the Hue tab to shift the Blue, Aqua, and Green. Blue becomes turquoise, Aqua greenish, and Green yellowish.
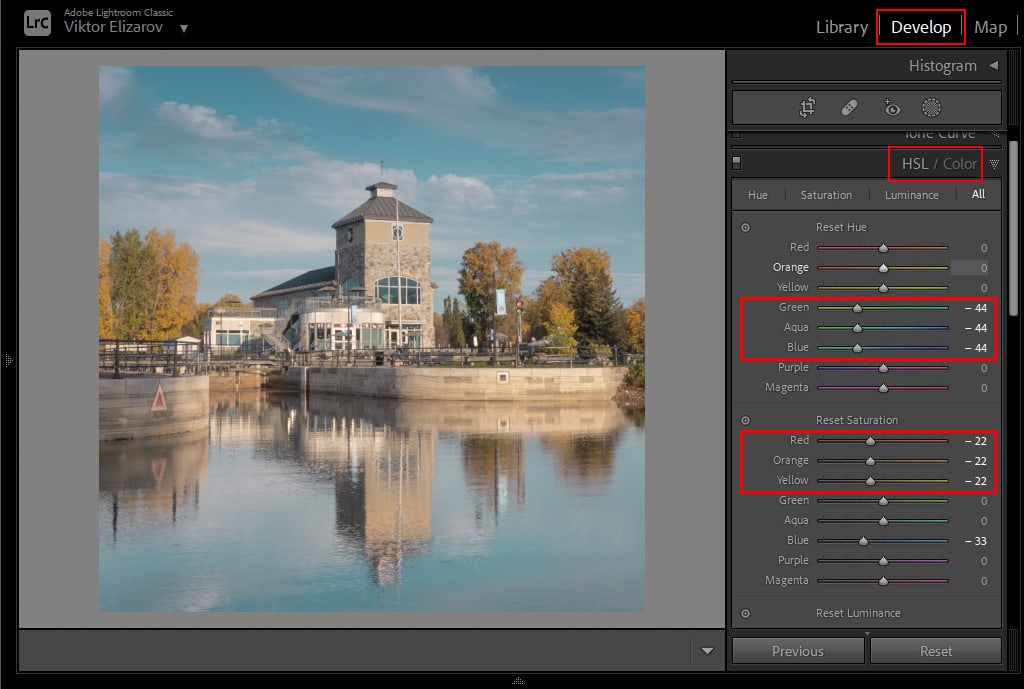
The Luminance sliders control the brightness of individual colors. The adjustments here are image-dependent. If any of the colors in your photo is too bright or too dark, adjust Luminance accordingly.
Step 4: Create Split Toning Effect in the Colar Grading Panel
The split toning is the process of introducing different colors to the highlights, the midones, and the shadow areas of the image. We can achieve it by using the Color Grading panel (formally known as the Split Toning).
In our case, we will add blue color to the shadows, which will make them cooler. And by adding the orange color to the highlights, we will make them warmer. And to make it simpler, we are going to disregard the Midtones.
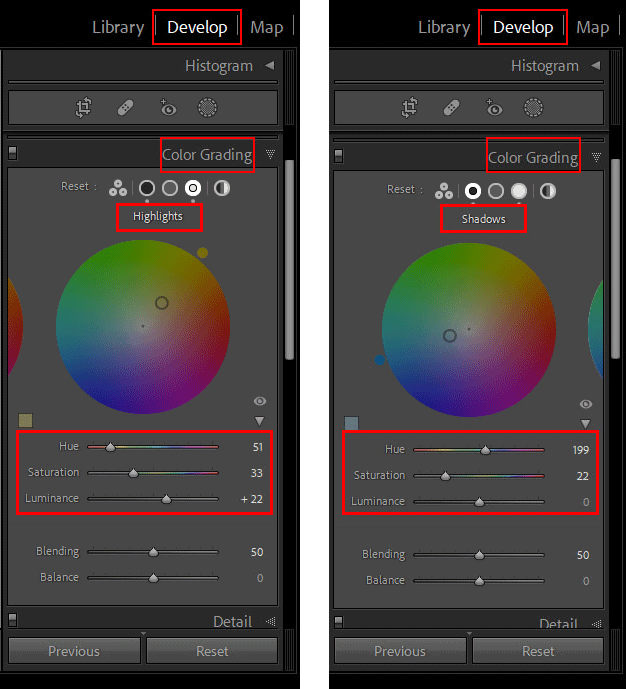
I used very conservative values. But feel free to experiment. Moving the Saturation slider to the right will create a strong effect.
Step 5: Add Grain Using the Effect Panel
In digital photography, we have noise. It is more prominent in the shadows.
We have grain in analog photography, which appears mainly in the highlights.
Grain is the constant property of analog photographs.
The plastic emulsion of film is coated with light-sensitive layers of silver halide crystals. Film emulsion that has layers of crystals coarser and larger is rated as more sensitive to light. The larger grains allow the emulsion to record light more quickly. Likewise, film emulsion rated as having lower sensitivity to light has a finer film grain.
The larger size and coarseness of the film’s silver halide crystals increase the light sensitivity and ISO speed. It results in pictures with more grains and lesser saturation.
It means that higher ISO films produce more pronounced grain. You can control grain properties in the Effects panel.
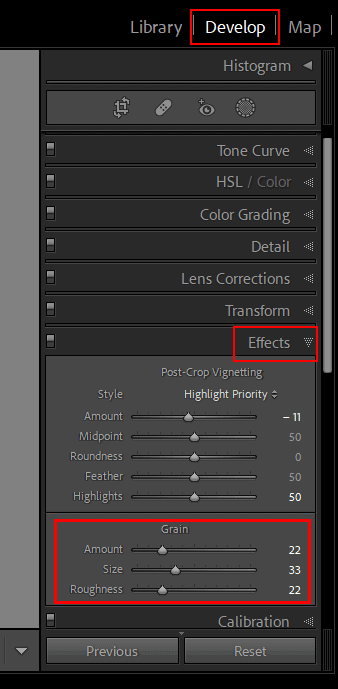
Feel free to add more grain or make it larger and more pronounced.
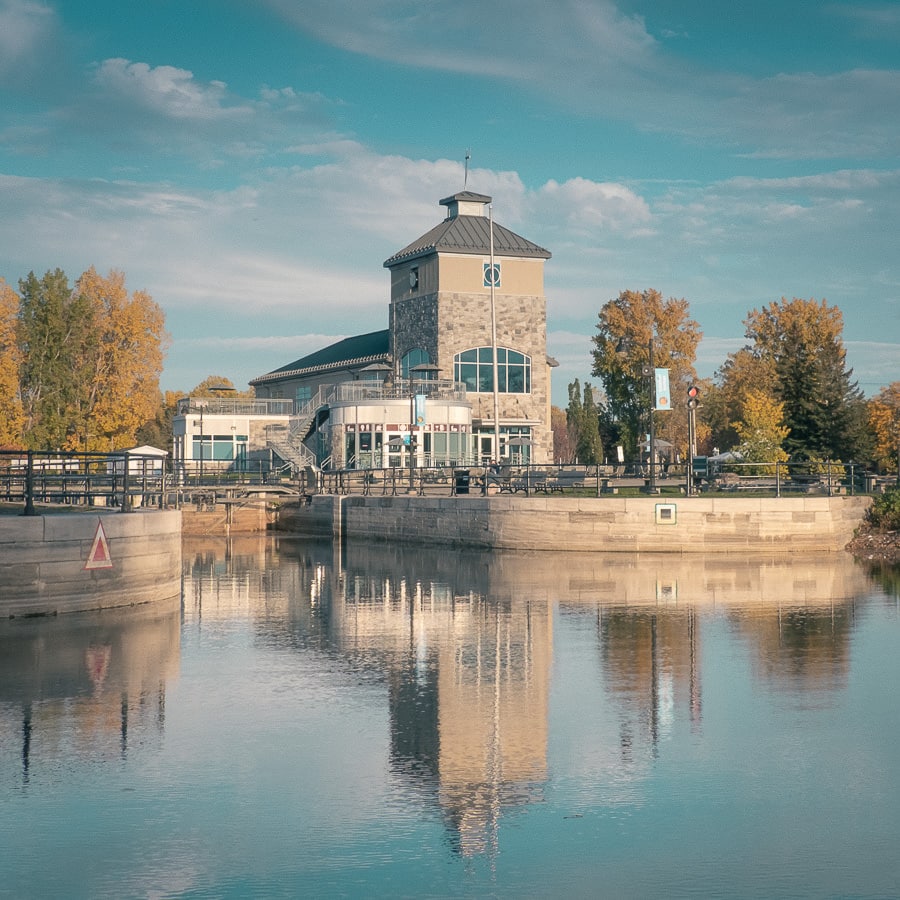
And here is the final result:
Step 6: Customization (Optional)
Since it is almost impossible to develop a universal editing method that works with every image, you will most likely need to customize it.
Start customization with the HSL panel.
For example, suppose you edit a landscape photo with a vast open sky with predominant blue colors. In that case, you most likely will need to reduce the saturation of blues in the Saturation panel.
And if you have an image with plenty of vegetation, you will need to play with Green, Orange, and Yellow colors in the HUE panel.
Use the Color Grading panel by adding various colors to the shadows and the highlights. Also, play with the color intensity by adjusting the Saturation slider. It will allow you to create an unlimited number of editing variations.
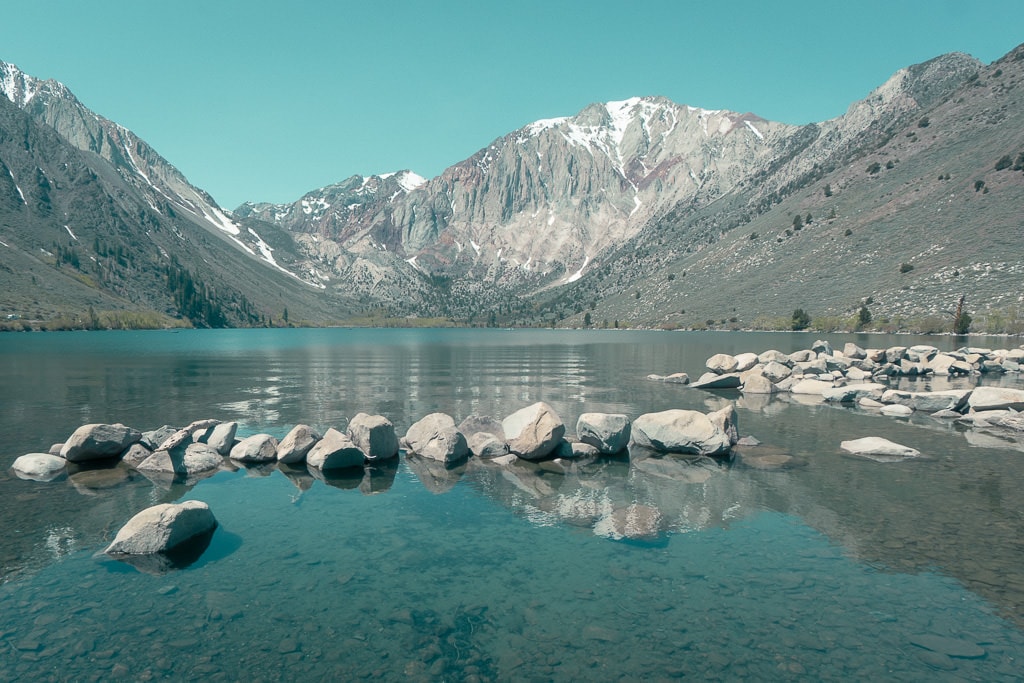
Below are some examples of photos I processed using the “film look” technique I outlined above:


How To Make Photos Look Like Film In Lightroom Mobile
Making photos look like film in Lightroom Mobile is similar to the Lightroom Classic. You can use the framework to make images look like film in Lightroom I covered above to edit photos in Lightroom Mobile.
The Lightroom Mobile has identical editing adjustments to Lightroom Classic, but in some cases, they are grouped in panels with different names.
For example, there is no Basic panel in Lightroom Mobile; it is called the Light panel instead.
You can find the HSL adjustments under the Color Mix panel in Lightroom Mobile.
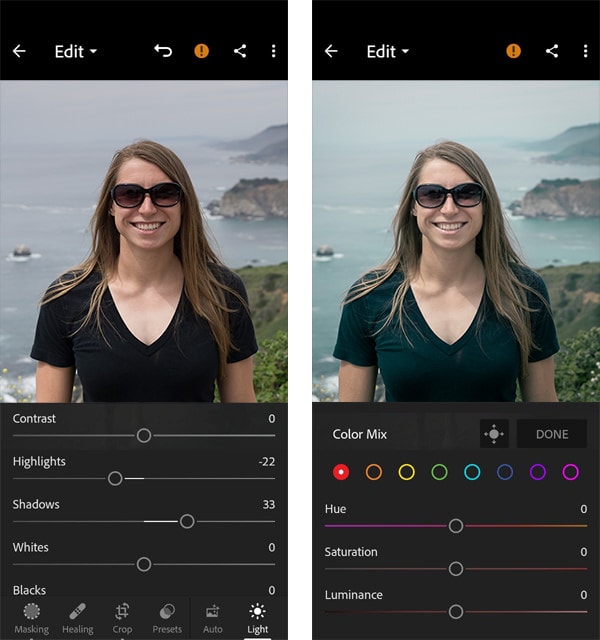
But the easied method to achieve a film look in Lightroom Mobile is to create Film Preset in Lightroom Classic, install it to Lightroom Mobile, and reuse it when needed.
How To Make Photos Look Like Film | Final Thoughts
The goal of this tutorial is to provide you with a universal method of “how to make photos look like film.” The editing effect you can modify and take even further by creating different variations of the “film look.”

