The How to Take Pictures of Stars Guide is the product of collaboration between Kevin Choi from CapturetheMoment.pics and Viktor Elizarov from PhotoTraces.com.
At some point in the photography journey, every photographer entertains the possibility of getting into astrophotography. But, for many beginners, it is a scary proposition because of two major misconceptions.

Misconception One
The equipment for astrophotography is prohibitively expensive and, as a result, is out of reach for most beginners and hobbyists.
This was true even five to seven years ago when a combination of cameras capable of producing quality images at high ISO paired with a fast and wide angle lens would cost you anywhere from $4,000 to $5,000.
But, in recent years, things have drastically changed. Rapid advances in sensor technology allow us to use entry level cameras from nearly any manufacturer to photograph the stars. Also, third party lens manufacturers, mostly those from Asia, finally achieved the perfect balance between the quality of lenses and price.
We will address the equipment you need to photograph the stars in great detail in the Equipment section but, it is worth mentioning now that you can have all the equipment necessary for astrophotography for under $1,000.
Misconception Two
The second misconception is that the technique of photographing the stars is too complex for most beginners. This is completely false. The astrophotography process is actually very simple and straightforward. But, what makes the process more time consuming than traditional landscape photography is preparation and scouting.

What is Astrophotography in Simple Terms?
When you look at the sky at night with a naked eye, you see only the brightest stars and, even then, the brightest are still very dim.
Astrophotography allows us to amplify the brightness of the stars by keeping the camera’s shutter open for a longer period of time, which lets the camera sensor capture much more light than what’s possible with our eyes.
As a result, astrophotography enables us to photograph stars that are not visible to the naked eye.
Equipment
Even though location is the most important part of the astrophotography equation, there is obviously no way to photograph stars without the proper equipment.
There are five pieces of equipment you need, but only three are essential.
1. Camera
You need a camera with manual controls that can produce decent, quality photos at ISO 1600-3200. The good news is that most modern cameras already fall under this category.
2. Lens
The Milky Way is spread widely across the sky and is a very dim subject. Because of this, you need a wide and fast lens.
If you want to shoot the whole Milky Way in one shoot, you will need a lens wider than 24mm on a full frame camera or 18mm on APS-C.
For the aperture, f4 is good, f2.8 is great, any lens with aperture faster than f2.8 is excellent.
3. Tripod
This is probably the most important part of the entire astrophotography setup. When using a shutter speed of around 20-30 sec, even the slightest movement of the camera will ruin your photos. This means that it is not enough to use just any tripod, it is essential that it is rock solid.
4. Headlamp
This is an optional piece of equipment that can be replaced with any standard flashlight.
5. Remote Shutter Release
The remote shutter release is another optional piece of equipment. It can be replaced by the 2 sec delay functionality on most cameras.
Kevin’s Equipment
Both the Nikon D810 and Canon 100D can produce great quality images even under ISO3200 but, of course, the Nikon D810 is better.
Viktor’s Equipment
I have a minimalistic astrophotography setup.
I use a Sony a6000 camera and a Rokinon 12mm f2.0 prime lens. I use a Feisol tripod which, by design, does not have a center column and is incredibly steady even in windy conditions.
Finding the Milky Way and the Dark Sky
When you start learning how to photograph the stars, the Milky Way is usually the first and most popular object to shoot.
However, it can be a challenge to find the Milky Way in the dark sky. Even though we all live in the Milky Way galaxy, most people never see it.
Before going into the technical aspects of shooting the Milky Way, it is important that you first know how to find it.

Seasons of the Milky Way
Although the Milky Way is always across Planet Earth, you see different parts of it depending on the different seasons and your location.
The best months to shoot the Milky Way are always from March to September. During this time, you are able to photograph the Milky Way’s bright galactic center.
You can also shoot the Milky Way throughout the rest of the year because, even without the galactic center, you can still create interesting photos.
Dark Sky
Another factor that directly affects astrophotography is the dark sky. The Milky Way is dim on its own so even the tiniest hint of light can make it less visible and more challenging to photograph.
Light pollution and moonlight are the two main light sources that affect astrophotography the most.
Light Pollution
Where there are people, there is light. At night, this is called light pollution. Because of light pollution, it is almost impossible to photograph the stars in the middle of the city.
The best way to locate areas with minimal light pollution is to check this free online resource known as the Light Pollution Map. You can find it here: http://www.lightpollutionmap.info/
Moon Phase
Another source of light that affects the dark sky and photographing the stars is the moon. When there is a full moon, it is almost impossible to capture any stars.
The best practice is to shoot during a new moon or to shoot before the moon rises or after it sets. By timing the moon just right, you can ensure that your camera is able to capture the finest details of the Milky Way.
To check the moon phase, you can visit these websites:
Kevin’s Scouting Routine
I normally check the moon phase and weather report first. If the day is good for shooting Milky Way, I will then check StarWalk 2 to see what time I should go out. Then, I will head to some landscape photography group on Facebook and also 500px to find some new location. If I find an interesting landscape location, mostly sunrise and sunset spot, I will then check Google map to see if the place faces the Milky Way or not.
I like to go to locations that no people have shot Milky Way before to give myself a challenge. If the weather turns suddenly cloudy, I still have a chance to shoot an amazing sunrise or sunset.
Viktor’s Scouting Routine
My scouting routine starts with the standard set of tools I use for my travel photography planning. I use Google Maps, Google Earth, and 500px.com to find interesting locations. I compliment them with an android version of Star Walk 2 when scouting specifically for astrophotography.
Focusing
The main challenge of capturing the perfect image of the stars is to get the stars as sharp as possible. Focusing becomes the most essential part of the process. But, we all know how difficult it is to focus in complete darkness.
It sounds simple—you always focus to infinity. In theory, all you have to do is turn the focusing ring all the way to the right. In reality, however, this will focus beyond infinity on most lenses, which is absolutely illogical from a physics perspective. Focusing beyond infinity will produce out-of-focus and soft stars.
Here are a few different techniques you can use to get the stars in focus and sharp:
- While scouting during the day, focus and then make marks on your lens as reminders.
- Know exactly where infinity is on every lens you own. Finding infinity can be more problematic on a zoom lens since, for different focal lengths, infinity will be in different places.
- Take a few test shots and check the sharpness of the stars after every shot. Keep adjusting the focus until you have the perfect settings.
Viktor’s Focusing Routine
I have a very simplified focusing routine. I have only one lens dedicated to astrophotography – a manual prime lens. I know exactly where infinity is on the lens but, to ensure the perfect shot each time, I made a small mark on the lens as a reminder.
Kevin’s Focusing Routine
I use a different focusing technique with my 14-24mm zoom lens. I switch the camera to a live view, zoom in to a maximum, find a bright star, and focus on it.

Shooting Technique
As I mentioned earlier, shooting is one of the easiest parts of the entire astrophotography process. Why? Because you do not have much room or flexibility to experiment with a variety of different settings.
Let me explain.
The sky is dark and the stars are dim. You use the widest aperture possible to capture that limited light.
The earth is constantly moving, which limits your choice of shutter speed values. If you go beyond a 25-30 sec shutter speed, the effect of star trails becomes obvious which, in turn, makes the stars soft. I personally prefer to never go beyond a 25 sec exposure.
This leaves us with the only parameter we can play around with – the ISO.

When I am on location, I have my camera in M (manual) mode. I set the aperture to f2.0 (the widest value on my lens), the shutter speed to 25 sec, and the ISO to 640. Then, I take a test shot. I preview the image and analyze the histogram. In most cases, these settings produce an underexposed image so I start increasing the ISO and analyzing the preview after each shot until I have a properly exposed image. From that moment on, I keep shooting with the same settings for the rest of the night.
Related: Low Light Photography Tips
The shutter speed of 25 seconds is not an ideal value. To get sharper stars, I prefer to shoot between 15 and 20 seconds, but I also have to balance this with the ISO value by not going beyond ISO3200. I find that even ISO3200 is a bit too much for the Sony a6000 APS-C sensor.
Perhaps the most important aspect of shooting is that you always shoot in RAW.
Composition in Astrophotography
Even if you have all your equipment ready, you know exactly where to find the Milky Way and you know exactly what settings to use to photograph the night sky, this does not automatically guarantee that you will be able to produce interesting photographs. Astrophotography is no different than any other type of photography as it is not enough to have all the technical aspects in place. The artistic part always comes into play.
If you simply photograph the sky, your photos will look like sky charts and, while they may be technically sound, they’ll likely be boring. You need to find a way to bring other elements besides the sky into your composition. The elements of a scene can serve as reference points for the viewer to emphasize the scale of the sky.
When you are shooting at night in pitch black, it is often difficult to visualize your potential compositions; sometimes, it is not even possible to see the objects of the scene.
I recommend addressing the composition aspect of your astrophotography shoot during the day when you are scouting the scene. You can take your time without rushing to assess the composition. When you return to the location at night, composition becomes a simple technicality – a simple process of triggering the shutter.

Editing in Astrophotography
The editing part of astrophotography is not any more complicated than conventional landscape editing. The only exception is that you always have to deal with excessive noise.
Here is a simple outline of editing in astrophotography:
Balancing Exposure
Before you start applying any effects, you first need to balance and adjust the exposure. When you take pictures of the sky, they usually come out a bit underexposed. Therefore, you should increase the exposure of the image until you reach a properly exposed starry sky with the Milky Way.


White Balance
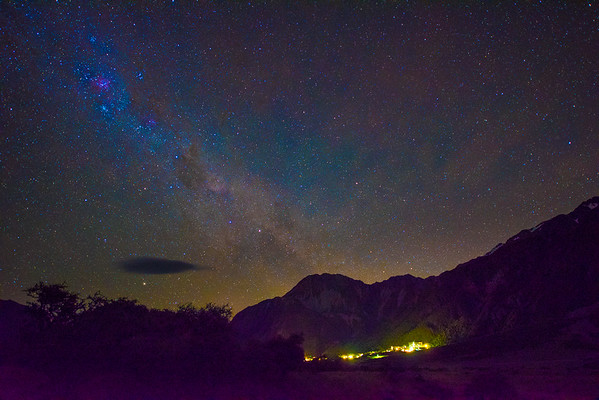
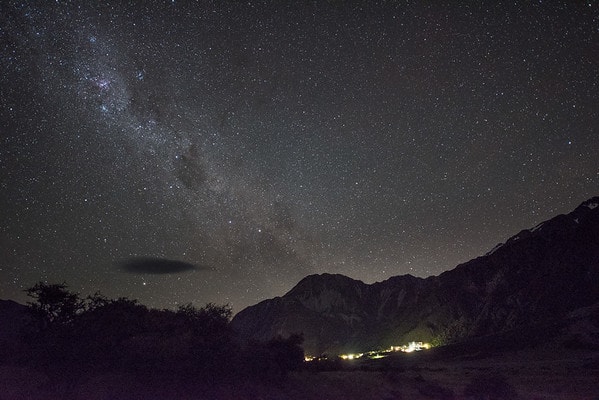
The next step is to adjust the white balance. When you take picture of stars in AWB (auto white balance) mode, the camera normally produces a very warm toned image.
Since photos of the night sky are naturally very dark, it is difficult to determinate if the white balance is correct or not. But, you can always use a method known as the “Extreme Saturation Method” to adjust the white balance.
Extreme Saturation Method
First, increase the vibrarance and saturation all the way up to 100. Your image will become oversaturated and have some hard color transition.
Don’t worry, you can change it back later.

Next, adjust the white balance by playing with both the temperature and tint sliders in order to achieve a good balance of color transition. You should have some yellow in the center of the Milky Way and blue in the sky.

Finally, change the vibrance and the saturation back to zero. With the perfect white balance, your image now looks more natural.

The rest is your usual editing adjustments. Boost the contrast and clarity, increase the saturation and vibrance until you have an image with a vibrant sky and beautifully contrasted stars.

Noise Reduction
Shooting the night sky at a high ISO (1600-3200) typically results in an image with excessive noise. By increasing the contrast and saturation during the editing process, you end up amplifying the digital noise even more.
Start reducing the noise by using the Details panel in Lightroom. If you find it is not possible to achieve the desired results, you most likely need to use a dedicated noise reduction program.
Kevin’s Favorite Noise Reduction Program
Noise reduction is an essential part of astrophotography.
The amount of noise reduction is different in the starry sky and the foreground. I use Nik Define to get the job done. It allows me to create a layer mask to give a different degree of noise reduction in a different area.
Viktor’s Favorite Noise Reduction Program
I use Topaz DeNoise from Topaz Labs on a daily basis. I run noise reduction with DeNoise on every single image I edit. It becomes critical when editing astro images.

