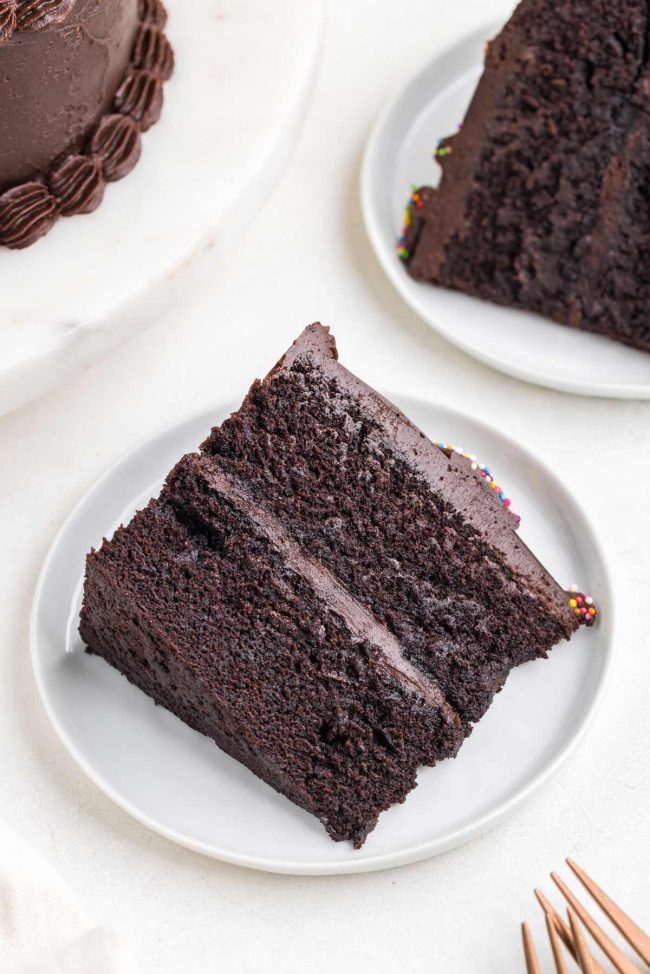
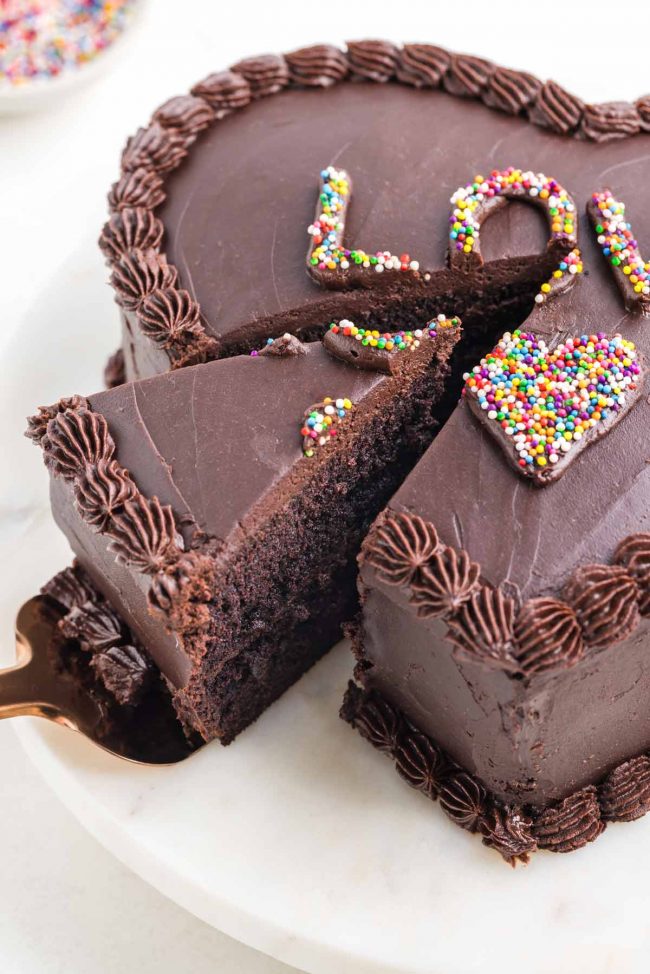
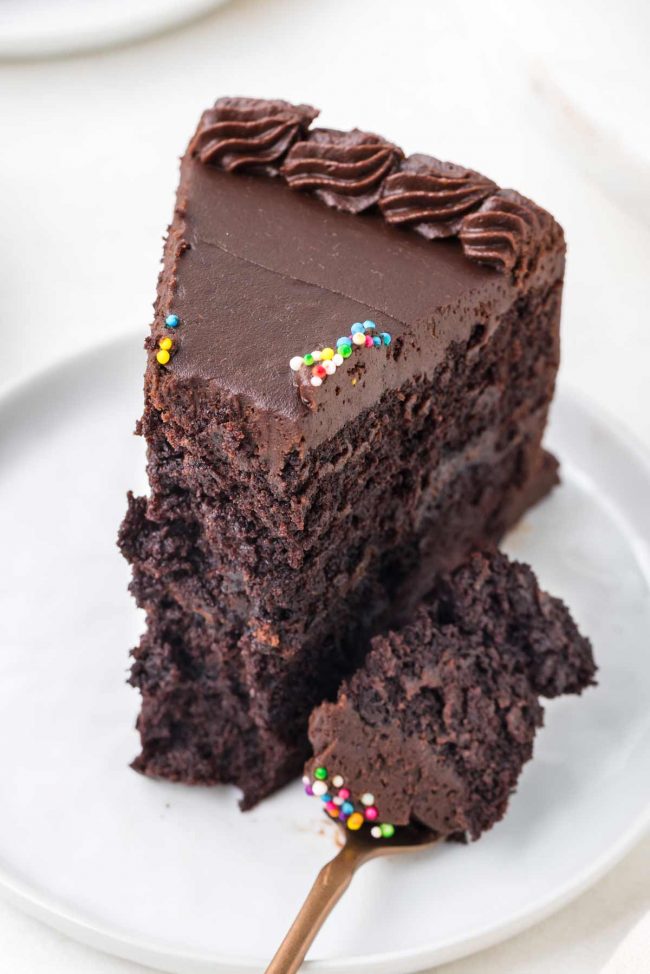
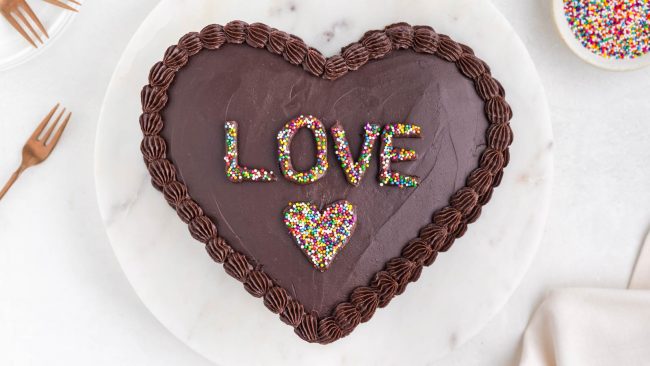
This chocolate heart cake with chocolate cream cheese frosting is a decadent treat perfect for Valentine’s Day, and you make it using regular 8″ cake pans. With its incredible texture and rich chocolaty flavor, it’s the ultimate dessert to express your love. Whether you choose regular flour, whole wheat, or gluten-free flour, this cake is bound to impress!
Before anyone runs off thinking this is too difficult, I should say that I was a bit worried that making a heart-shaped cake would be too hard for me, as I’m not a decorator. But this was really easy.
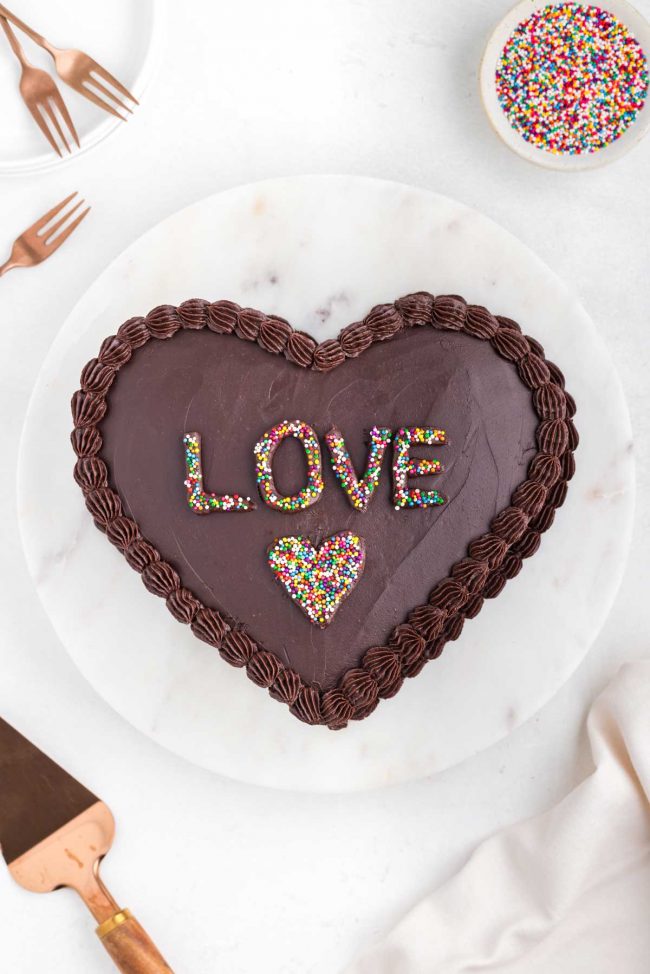
You absolutely don’t need a specialty pan. Also, when using 8″ pans, after your 2 simple cuts, you’re left with a small piece to try before anyone else as a reward for your hard work. A nice bonus for the baker. 🙂
If you want something even easier, check out these Heart-shaped Chocolate Chip Cookies. You just need a heart-shaped cookie cutter a jellyroll pan.
I just posted this Vintage Heart Cake last week, and in that post, I included a photo of today’s recipe. I wasn’t going to post this cake so soon after the first heart-shaped cake, but people have been asking for the chocolate version, so here it is. 🙂
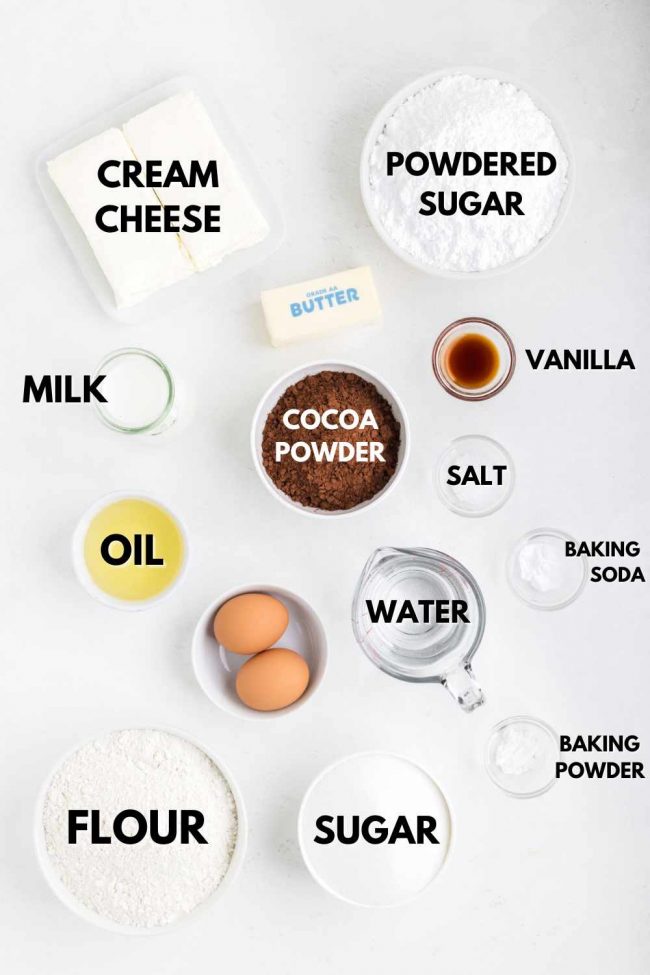
Ingredients
Just standard ingredients here!
For the cake
- Granulated sugar – coconut sugar is an alternative.
- Flour – options include all-purpose, whole wheat, white whole wheat, or either of the gluten-free alternatives mentioned below.
- Cocoa powder – I opted for Dutch-process. Using regular Hershey’s cocoa powder will result in a lighter shade of brown.
- Eggs – chia eggs are an option for an eggless cake, but the cream cheese frosting prevents this cake from being vegan. But I’ve included links to 3 of my other vegan chocolate frosting recipes below.
- Milk – any type of milk works. I used unsweetened cashew milk.
- Oil – I usually use olive oil, but canola oil, vegetable oil, or another neutral oil work. Avoid using a costly, flavorful olive oil. I use organic olive oil from Aldi or Lidl and the olive taste dissipates once the cake cools.
- Boiling water – although it may seem excessive and result in a very thin batter, the full quantity is necessary.
- Vanilla extract, baking powder, baking soda, and salt
For the frosting
- Cream cheese – essential for the frosting. No subs are possible. The same applies to other frosting ingredients listed below.
- Butter – ensure it reaches room temperature for easy blending with the cream cheese. I’m sometimes in such a rush that I don’t let it warm up properly. I regret it 100% of the time, and I waste a ton of time transferring the frosting to a glass mixing bowl that I then microwave at 30% power to melt the clumps of butter in the frosting (with a lot of stirring after every 20 seconds or so).
- Powdered sugar – if it’s clumpy, consider sifting it or blending it in a high-speed mixer to restore its powdery consistency.
Cake recipe
This is the same base I use in all my cake recipes, like my Chocolate Walnut Cake, Jack Skellington Cake and my Dairy-free Chocolate Cake.
So many commenters have said that this is the best chocolate cake ever, and I agree. I’ve been making it for over 15 years.
I’ve stopped trying other cake recipes and ordering cake from bakeries because they’re always disappointing. This is really the perfect chocolate cake!
If you have questions about the cake recipe that I haven’t answered here, check out my Healthy Chocolate Cake post as I believe I’ve answered everything. 🙂
If not, feel free to ask below!
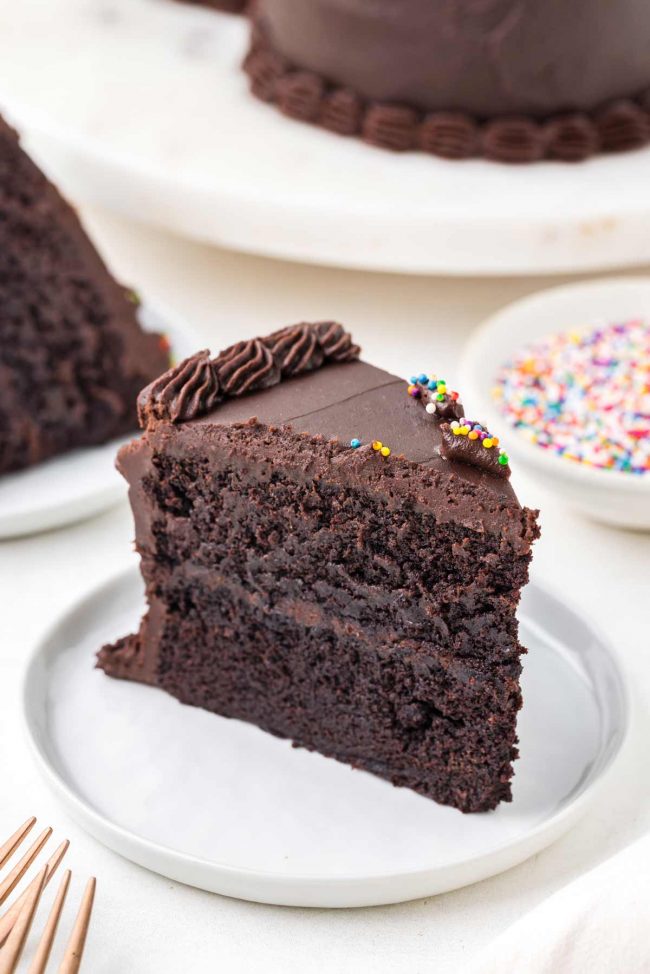
It’s adapted from the famous Hershey’s One Bowl Chocolate Cake Recipe. I find that the stickiness of the surface makes it a bit challenging to handle, which I definitely didn’t want for this cake which you have to cut to create the heart shape.
The batter of the original is almost as thin as water, but for today’s recipe, I reduced the water by 25%.
I also reduced the baking soda and baking powder. It’s no longer sticky, and you can easily hold, stack, and cut the layers for this heart cake.
It’s a really easy one-bowl recipe. If you’ve made this cake before, please note that the batter is thicker than the original Hershey’s recipe with my adaptations.
How to bake the cake
First, mix together the dry ingredients.
Next, add in the wet ingredients.
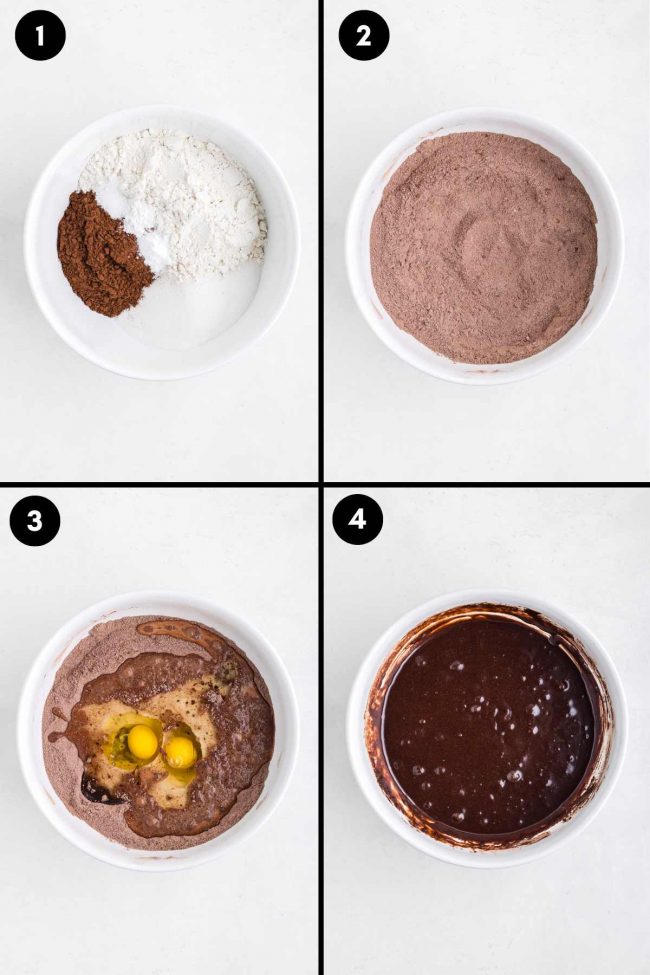
The batter will look really thin. Don’t be alarmed!
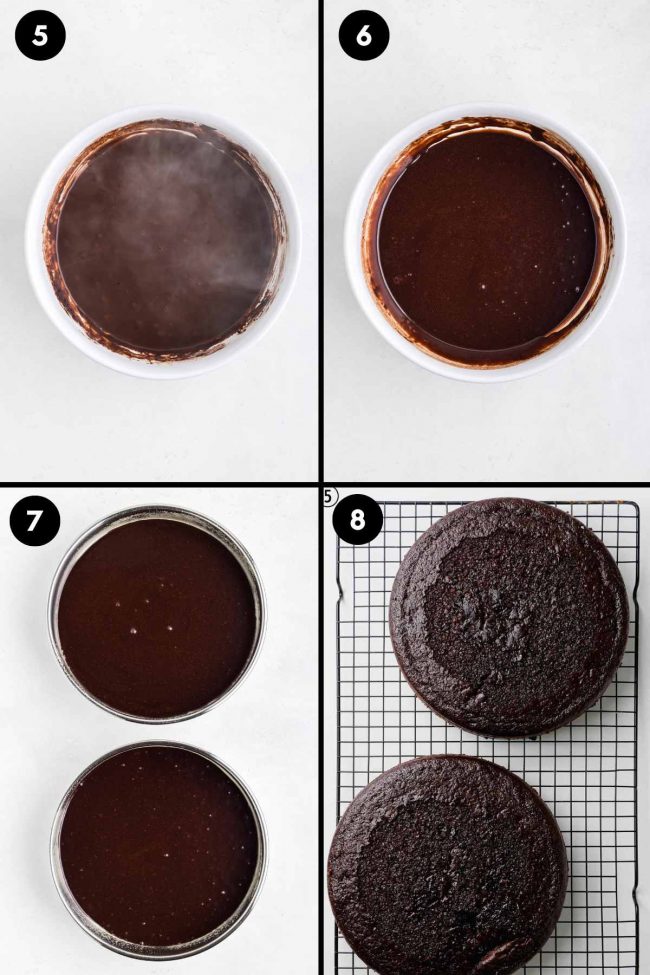
Divide the batter between the 2 pans and bake. A dry toothpick means that it’s overbaked. You want moist crumbs but not uncooked batter.
It needs to cool completely before frosting.
Frosting
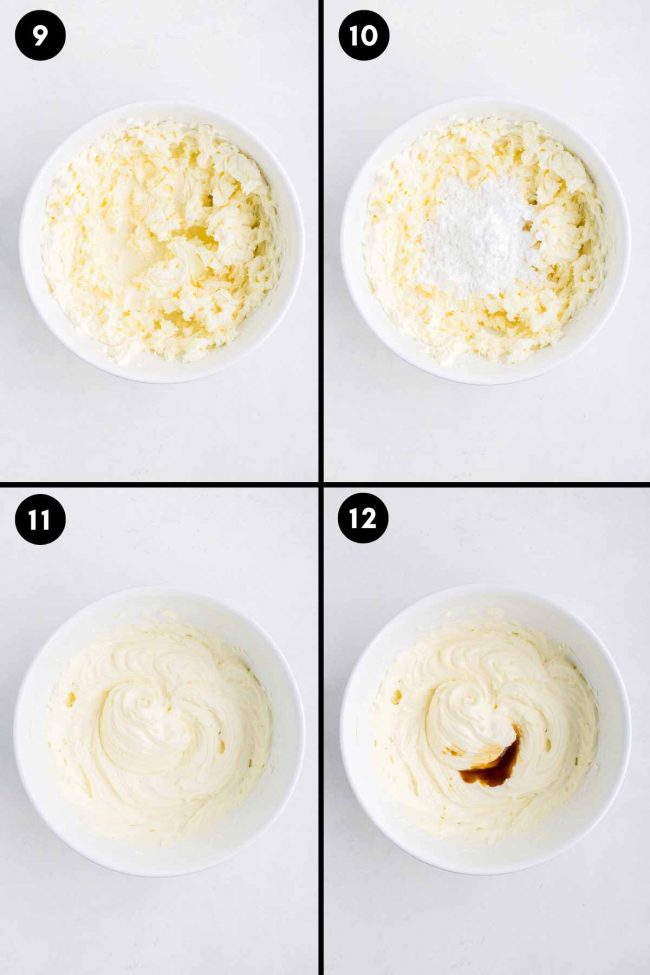
I used a double batch of the chocolate cream cheese frosting in my Gluten-free Chocolate Cupcakes.
It’s my favorite chocolate frosting recipe, but if you want to make this cake vegan, you can use chia eggs, plant-based milk (I always use cashew milk), and one of the below frosting options and adjust the recipe as needed so that you have 4 cups of frosting.
If you think that’s way too much frosting and want to reduce the amount, here’s how much I needed for this chocolate heart cake and where:
- Middle of cake – 3/4 cup
- Crumb coat – 1/2 cup (will probably just need 1/3)
- Attaching rounded cut-offs to main cake piece – 1/4 cup (you’ll likely use less)
- Top of cake – 3/4 cup
- Sides of cake – 1 cup
That = 3 1/4 cups (750 grams) total. The recipe yields 4 cups (925 grams), so this leaves 3/4 cup (175 grams) for piping on some decorations.
So if you don’t want to pipe anything on top or don’t want to frost the sides, now you know how much frosting to make.
How to make the heart
When I started cutting the heart, I didn’t have much hope that I’d actually be successful. I just assumed I’d screw it up because again – I’m not a cake decorator!
But this was easy peasy. The photographer was also a little apprehensive and surprised by how easy it actually was.
If I can do it, so can you!
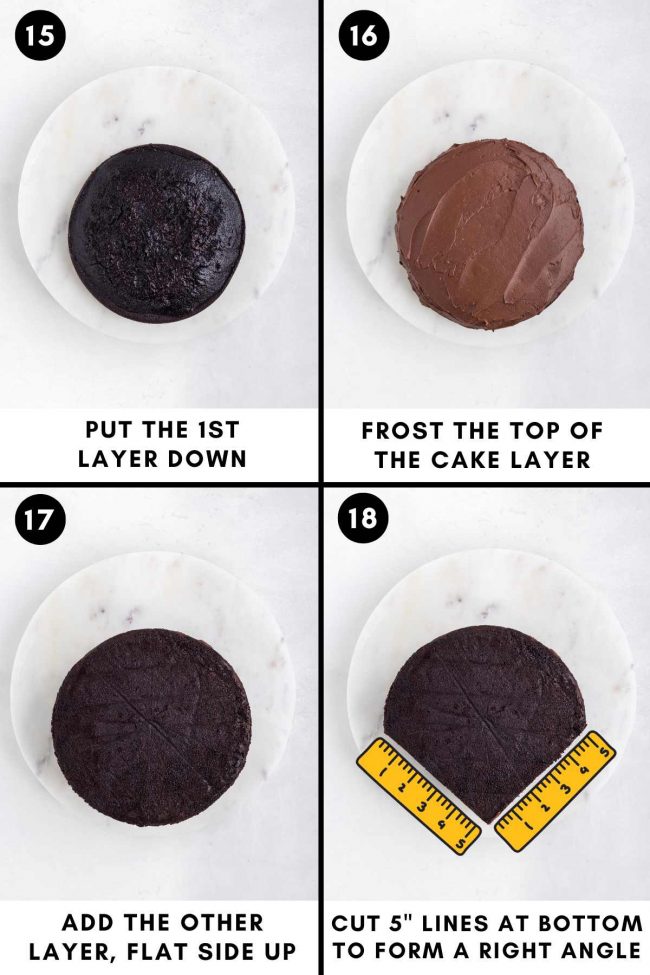
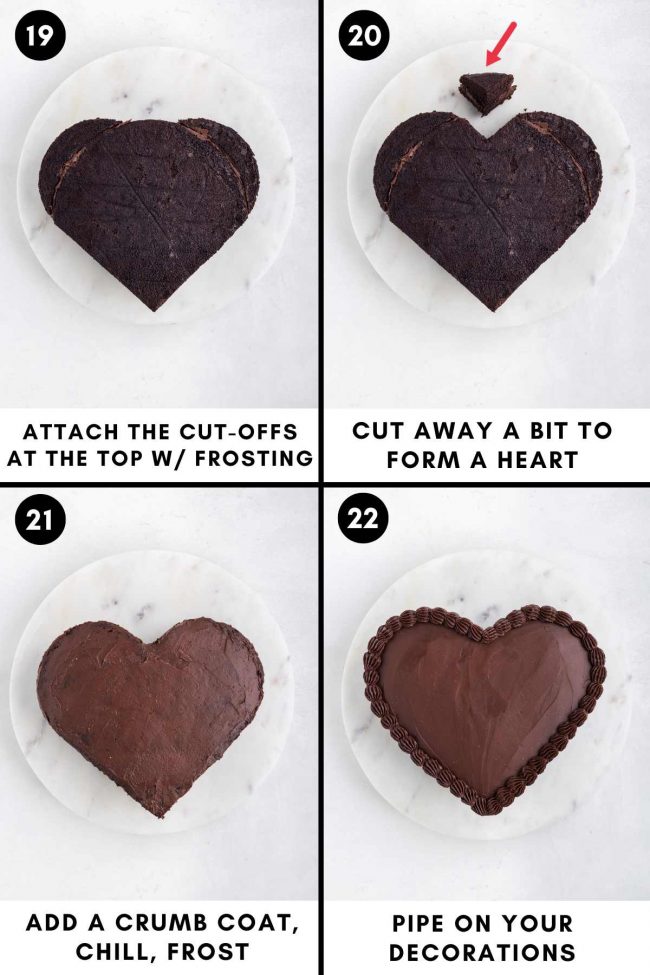
Also, you get to eat that cut off bit in photo 20 (below) right away. It’s not used somewhere else on the cake. 😉
Crumb coat
A crumb coat involves applying a thin layer of frosting to a cake before the final frosting layer. This step ensures that crumbs won’t mix into the frosting.
You just need up to 1/2 cup (115 grams) of frosting for the crumb coat. Though it may seem minimal, it’s enough.
Keep the frosting chilled until use. If it appears too soft, return it to the refrigerator to avoid messy results from runny frosting.
Spread a very thin layer of frosting layer over the top and the sides. It’s fine if it’s so thin that you can see through it in some parts, like in photo 21 below.
For best results, place the cake in the freezer for 20-30 minutes or chill for 1-2 hours in the refrigerator after crumb coating.
Prepare in advance
The unfrosted cake layers can sit at room temperature for 2 days, or you can refrigerate them for up to 3.
You could freeze them for up to 3 months.
After baking, let them cool, wrap the layers individually in plastic wrap and place inside a Ziploc bag.
For ease of handling, use the cake layers straight from the freezer when assembling. There’s no need to defrost.
If you find that the layers are too hard to cut through by the time you’ve stacked them, let them sit for about 15 minutes.
After assembling and applying the crumb coat, you can freeze the cake for up to a week. For added protection, wrap it in plastic wrap, followed by placing it in a larger freezer-safe bag.
Freeze the frosting, too! You’ll need it to finish the cake.
Store it in a freezer-safe, airtight container. While plain cream cheese may alter in texture when frozen, the high-fat nature of cream cheese frosting allows for freezing without issue.
If desired, complete the entire cake – minus the sprinkles, and store it in the freezer. Once solidly frozen, wrap it with plastic and then place in a large freezer-safe bag for storage.
Advantages of preparing in advance
- Handling a chilled cake layer is simpler than a room temp one.
- A frozen cake layer is very sturdy, eliminating concerns about breakage.
- It also makes this chocolate heart cake much easier to prepare. You can, of course, start from step 1 and serve the cake on the same day.
However, my preference leans towards making the cake layers and cream cheese frosting one day and assembling the next. Or at least taking a nice long break between baking and decorating.
While this cake is straightforward to decorate, I find it more enjoyable when approached calmly and free from kitchen chaos. 😉
How to decorate
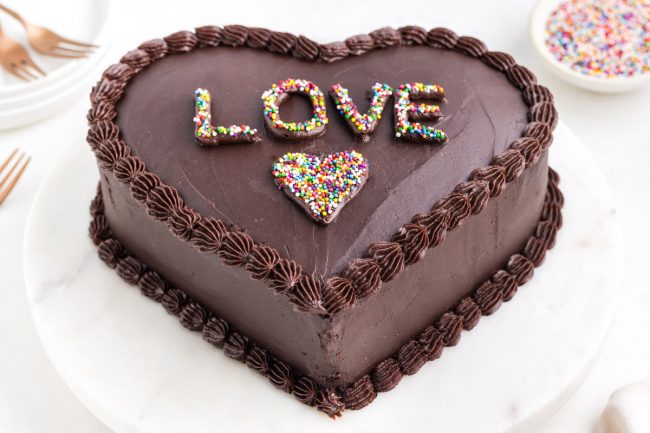
I made a shell border with Wilton tip 32. Here’s a good video showing you how to do it.
She also shows you what the shell border looks like with 3 other tips.
If you’re new to piping shell borders, it may take some practice to achieve uniformity and consistency. Start with a few practice shells on parchment paper or a plate before moving on to your cake.
Decorative touches
As an Amazon Associate, I earn from qualifying purchases. For more info, see my disclosure.
Raspberries, strawberries, or decorative sprinkles would be perfect for Valentine’s Day.
I wanted something colorful and cheery, so I went with nonpareils. The photographer didn’t use natural ones, but if you happen to live in Germany, like me, I used these natural ones from RUF.
If you’re in the US, this hot pink sanding sugar from Supernatural would look great for the heart on this cake!
How to store the cake
Because of the frosting, it should be kept refrigerated.
If you want to make it and serve a few hours later, that’s fine – no need to refrigerate. But ideally, you’d keep it refrigerated as long as possible.
Freezing also works great as I mentioned above.
Questions about this chocolate heart cake?
Fat
If I use olive oil, will I be able to taste it? You can taste it in the batter and right after the cake comes out of the oven. But once it cools down, that flavor disappears. If concerned, opt for light olive oil. The light refers to taste, not calories.
What other oils could I use? Canola oil, vegetable oil, grapeseed oil, or even melted refined coconut oil. Essentially, any oil with a mild taste will do. Using unrefined coconut oil would add some coconut flavor to the cake.
What about using butter? While butter can be used, expect it to be less moist. Butter contains 80-82% fat, while oil is 100% fat. For the best, moistest cake, you should really use oil.
Gluten-free options
Could a different gluten-free flour blend be used? I always make this cake with Bob’s Red Mill 1:1 Gluten-free Baking Flour. The taste and texture are identical to the version made with all-purpose or whole wheat.
King Arthur Flour Gluten-free Measure for Measure Flour also works with the same results, but I think the cake is a bit more delicate with it.
Switching to another brand of gluten-free flour might yield varied outcomes. For best results, use one of the flours I’ve tested this with.
But if you have another gluten-free flour that’s a direct sub for all-purpose flour, you can certainly try it. I’d love to hear how it works out if you do!
What about almond, coconut, oat or other flours? No, these aren’t even close to direct subs for all-purpose flour.
You could use a heart-shaped cookie cutter on these Almond Flour Brownies for a Valentine’s Day dessert with almond flour! Same with these Vegan Date Brownies, which are a pretty healthy choice.
Sweeteners
Can I decrease the sugar amount? The less sugar you use, the less moist the cake will be. If you need to reduce it, I wouldn’t go any lower than 1 3/4 cups.
I hope you’ll enjoy this chocolate heart cake! If you try it out, please let me know your thoughts below. Thank you. 🙂
❀

- Prep Time:
- Cook Time:
- Ready in:
- Yield: 12 slices
Ingredients
- 2 cups (400 grams) granulated sugar
- 1 3/4 cups (219 grams) all-purpose or whole wheat flour or for gluten-free, use 1 3/4 cups (242 grams) Bob’s Red Mill 1:1 Gluten-free Baking Flour
- 3/4 cup (85 grams) Dutch-process cocoa powder
- 1 teaspoon baking powder
- 1 teaspoon baking soda
- 1 teaspoon salt
- 2 large eggs (50 grams each, out of shell), room temp
- 1 cup (236 ml) milk of choice
- 1/2 cup (120 ml) neutral oil of choice
- 2 teaspoons vanilla extract
- 3/4 cup (177 ml) boiling water
- 16 ounces (450 grams) cream cheese, room temperature
- 1/2 cup (113 grams) unsalted butter, room temp
- 2 1/2 cups (300 grams) powdered sugar
- 1 teaspoon vanilla extract
- pinch of salt
- 2/3 cup (74 grams) Dutch-process cocoa powder
For the cake:
For the frosting:
Directions
- Preheat the oven to 350 °F (175 °C). Line two round 8″ cake pans with parchment paper on the bottom and grease the sides of the pans.
- In a large bowl, stir together the dry ingredients (sugar through salt).
- Add the eggs, milk, oil and vanilla.
- Mix until combined, and then stir in the boiling water. The batter will be very thin. Do not add more flour!
- Divide the batter between the two prepared pans. That’s 692 grams per pan when using Bob’s GF flour or 680 grams if using the other listed options.
- Bake for 26-28 minutes or until a toothpick comes out with some moist crumbs, but no uncooked liquid.
- Let cool for 10 minutes in the pans, and then turn out onto a rack to cool. Let cool completely before frosting.
- You can make these a few days in advance. Wrap them in plastic wrap, place in a bag, and refrigerate or freeze until ready to use. Freezing them will make them easier to handle when assembling the cake.
- In a large mixing bowl, beat the cream cheese and butter together with an electric hand mixer at medium speed until well combined. It’s okay if it looks a little crumbly.
- Gradually beat in the powdered sugar until totally combined, and then beat in the vanilla and salt.
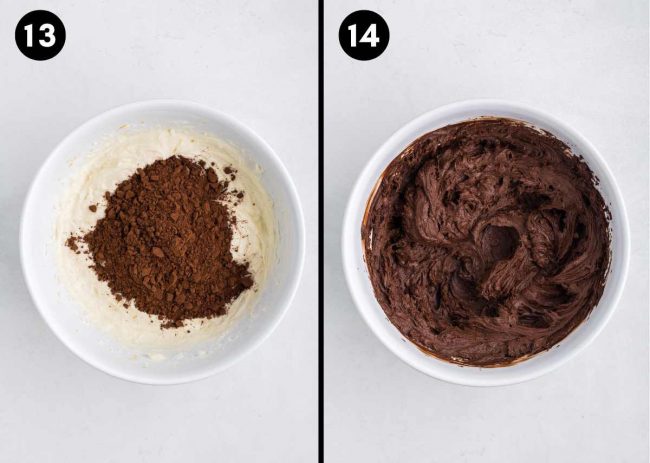
- Beat in the cocoa powder until well combined.
- Get out a cake plate that’s big enough for the heart.
- Transfer a cake layer to the cake plate – you want the first layer of cake to be towards the bottom of the serving dish (and not right in the middle) because the cut-off bits will be added towards the top of the cake to form the rounded top of the heart. If you put the cake plate on top of a cake layer (which is on the cooling rack) and flip everything over, the rounded part will be on top. If you have a different preferred way of transferring cake layers, do whatever you like. It doesn’t really matter if the rounded part of the cake layer ends up on top in the end, as it’s not very domed.
- Spread 3/4 cup (173 grams) of frosting on top.
- Add the other layer on top, flat side up.
- Use a ruler and measure out two 5” (12.7 cm) lines, forming a right angle. This will be the bottom of the heart.
- Cut away those curved bits, but be careful with them as they’re going to help form the top of the heart.
- Use about 2 tablespoons of frosting to help attach the rounded cut-offs to the main cake piece to form a heart shape. You’ll have to bend them a little.
- My heart shape looked pretty bad at this point, so I cut away a little bit at the very top, in the middle, and then the heart looked very nice.
- Use about 1/3 to 1/2 cup (76-115 grams – you’ll probably need closer to 1/3 cup) as a crumb coat. Spread the frosting over the sides and top of the cake.
- Place in the freezer for about 30-60 minutes or the fridge for 1-2 hours or until the frosting is very firm.
- Frost the rest of the cake. I used about another 3/4 cup (175 grams) on top and then about a cup on the sides.
- If needed (it probably won’t be), chill or freeze the cake again to allow the frosting to firm up before piping on the decoration.
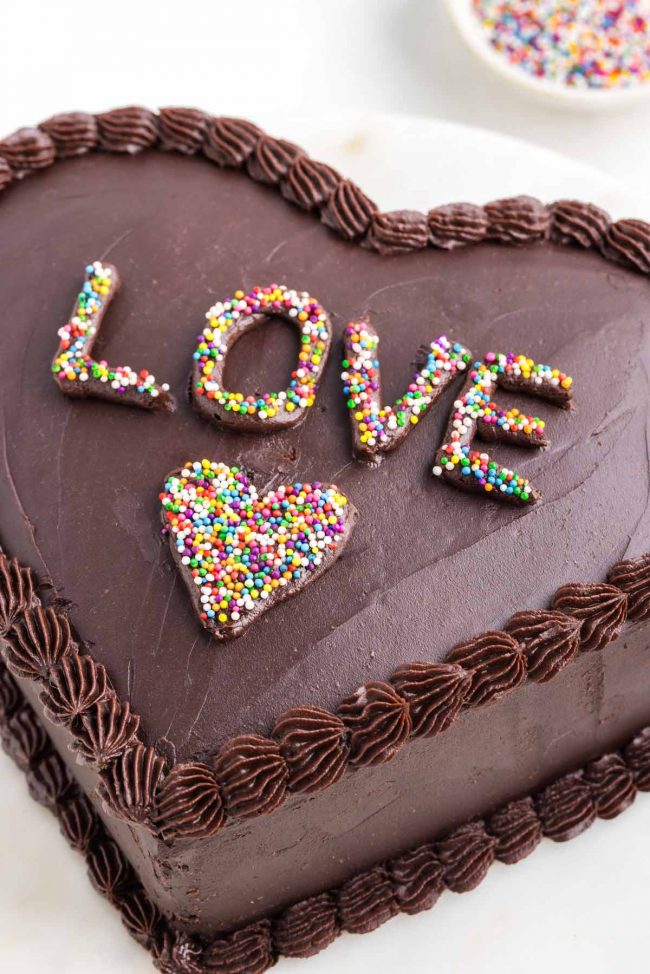
- Pipe on the LOVE and the heart with a round tip, and then pipe on the small shell border. To do that, fit a decorating bag with Wilton tip 32. Fill the bag with the remaining frosting. Make sure to push the frosting down to eliminate any air bubbles and twist the top of the bag to secure it.
- Place your cake on a rotating cake stand or turntable if you have one. This will make it easier to pipe consistent and even shells around the border.
- Position the tip slightly above the surface of the cake at the point where you want to begin your shell border. Hold the piping bag at a 45-degree angle to the surface of the cake.
- Apply steady pressure to the piping bag while moving your hand in a half-circle motion. As you squeeze, the frosting will come out in a wave-like pattern, creating a shell shape. Continue squeezing as you move the piping bag to the right (or left, depending on your preference) to form the first shell.
- Slightly overlap the next shell with the tail end of the previous one. This will create a seamless border around the perimeter of your cake. Try to maintain consistent pressure on the piping bag and maintain a consistent speed as you pipe each shell. This will ensure that all the shells are uniform in size and shape.
- Continue this motion, slightly overlapping each shell as you move along the edge of your cake. Maintain consistent pressure on the bag to ensure uniform shell sizes and shapes.
- Once you’ve piped shells around the entire perimeter of the cake, gently release pressure on the pastry bag and lift it away to finish the border.
- Some sprinkles can bleed. For this reason, I always recommend putting on sprinkles as soon to serving as you can. I had my cake in the fridge a few days, and there was no bleeding, but I can’t guarantee every brand will work the same.
- Cover and refrigerate the finished cake for up to 4 days. It also freezes great for up to 3 months.
Prepare the cake:
Make the frosting:
Assemble the cake:
Decorate:
Store:
Notes
- If you reside outside the US, you likely have a different cream cheese compared to what’s common in the US. American cream cheese is denser and designed primarily for baking, as opposed to the softer variety typically used for spreading on toast in Europe. For each 8 ounce of cream cheese you need, purchase a 300-gram package of cream cheese, such as those available at Aldi or Lidl, and place it in the middle of a clean tea towel or cheesecloth. Extract the excess liquid until you’re left with 225 grams of cream cheese. So for this particular recipe, buy 600 grams of cream cheese and remove the liquid until you achieve a remaining weight of 450 grams. Also, in the EU, medium-sized eggs are equivalent to large eggs in the US. Consequently, if you’re in Europe, opt for medium-sized eggs for this recipe.

