When traveling to or from the Philippines, one of things you should know is that you’ll need to accomplish the eTravel form. In this article, we’ll tell you exactly how to get and accomplish it!
WHAT’S COVERED IN THIS GUIDE?
What is eTravel?
The eTravel form is an online form used to collect personal and travel information from passengers entering and exiting the Philippines for the purpose of immigration, border control, data analysis, and health surveillance. It serves as your departure/arrival card, health declaration, and contact tracing form.
It was first implemented at the height of the COVID-19 pandemic to reduce physical contact between the passengers and airport personnel, replacing the traditional paper departure cards. Today, no more pandemic, but it has remained in use.
Who are required to accomplish the eTravel form?
Most travelers are required to complete and submit the form, including the following:
- arriving Filipinos and foreign nationals
- departing Filipinos
Adults and children alike falling under these two categories must submit an eTravel form. That covers most travelers.
I say “most” because, as you can see, it does not include departing foreigners. The following are also exempted from submitting eTravel:
- foreign diplomats and dependents
- foreign dignitaries and members of delegation
- 9(e) visa holders
- holders of diplomatic and official/service passport
The eTravel form must be completed and submitted as early as 72 hours (3 days) before your departure from the Philippines or expected arrival time in the Philippines.
If you’re traveling with family, you can also complete this form on behalf of your family members.
How to Create an eTravel Account
Whether you’re outbound or inbound traveler, the first step is to create an account, if you don’t have one yet. You can do so in two ways:
If you have traveled internationally and submitted an eTravel form before 2024, it doesn’t mean that you automatically have an account. Prior to 2024, creating an account was not a requirement. One could simply accomplish the form and submit without having to sign up for an account. However, in early 2024, this has become mandatory. Don’t worry. It does feel like a lot of work in the beginning, but it will make your subsequent submissions a breeze because, unlike before, the system is now able to save your personal details and automatically fill in some of the fields with pre-saved data.
If you don’t have an account yet, here’s how:
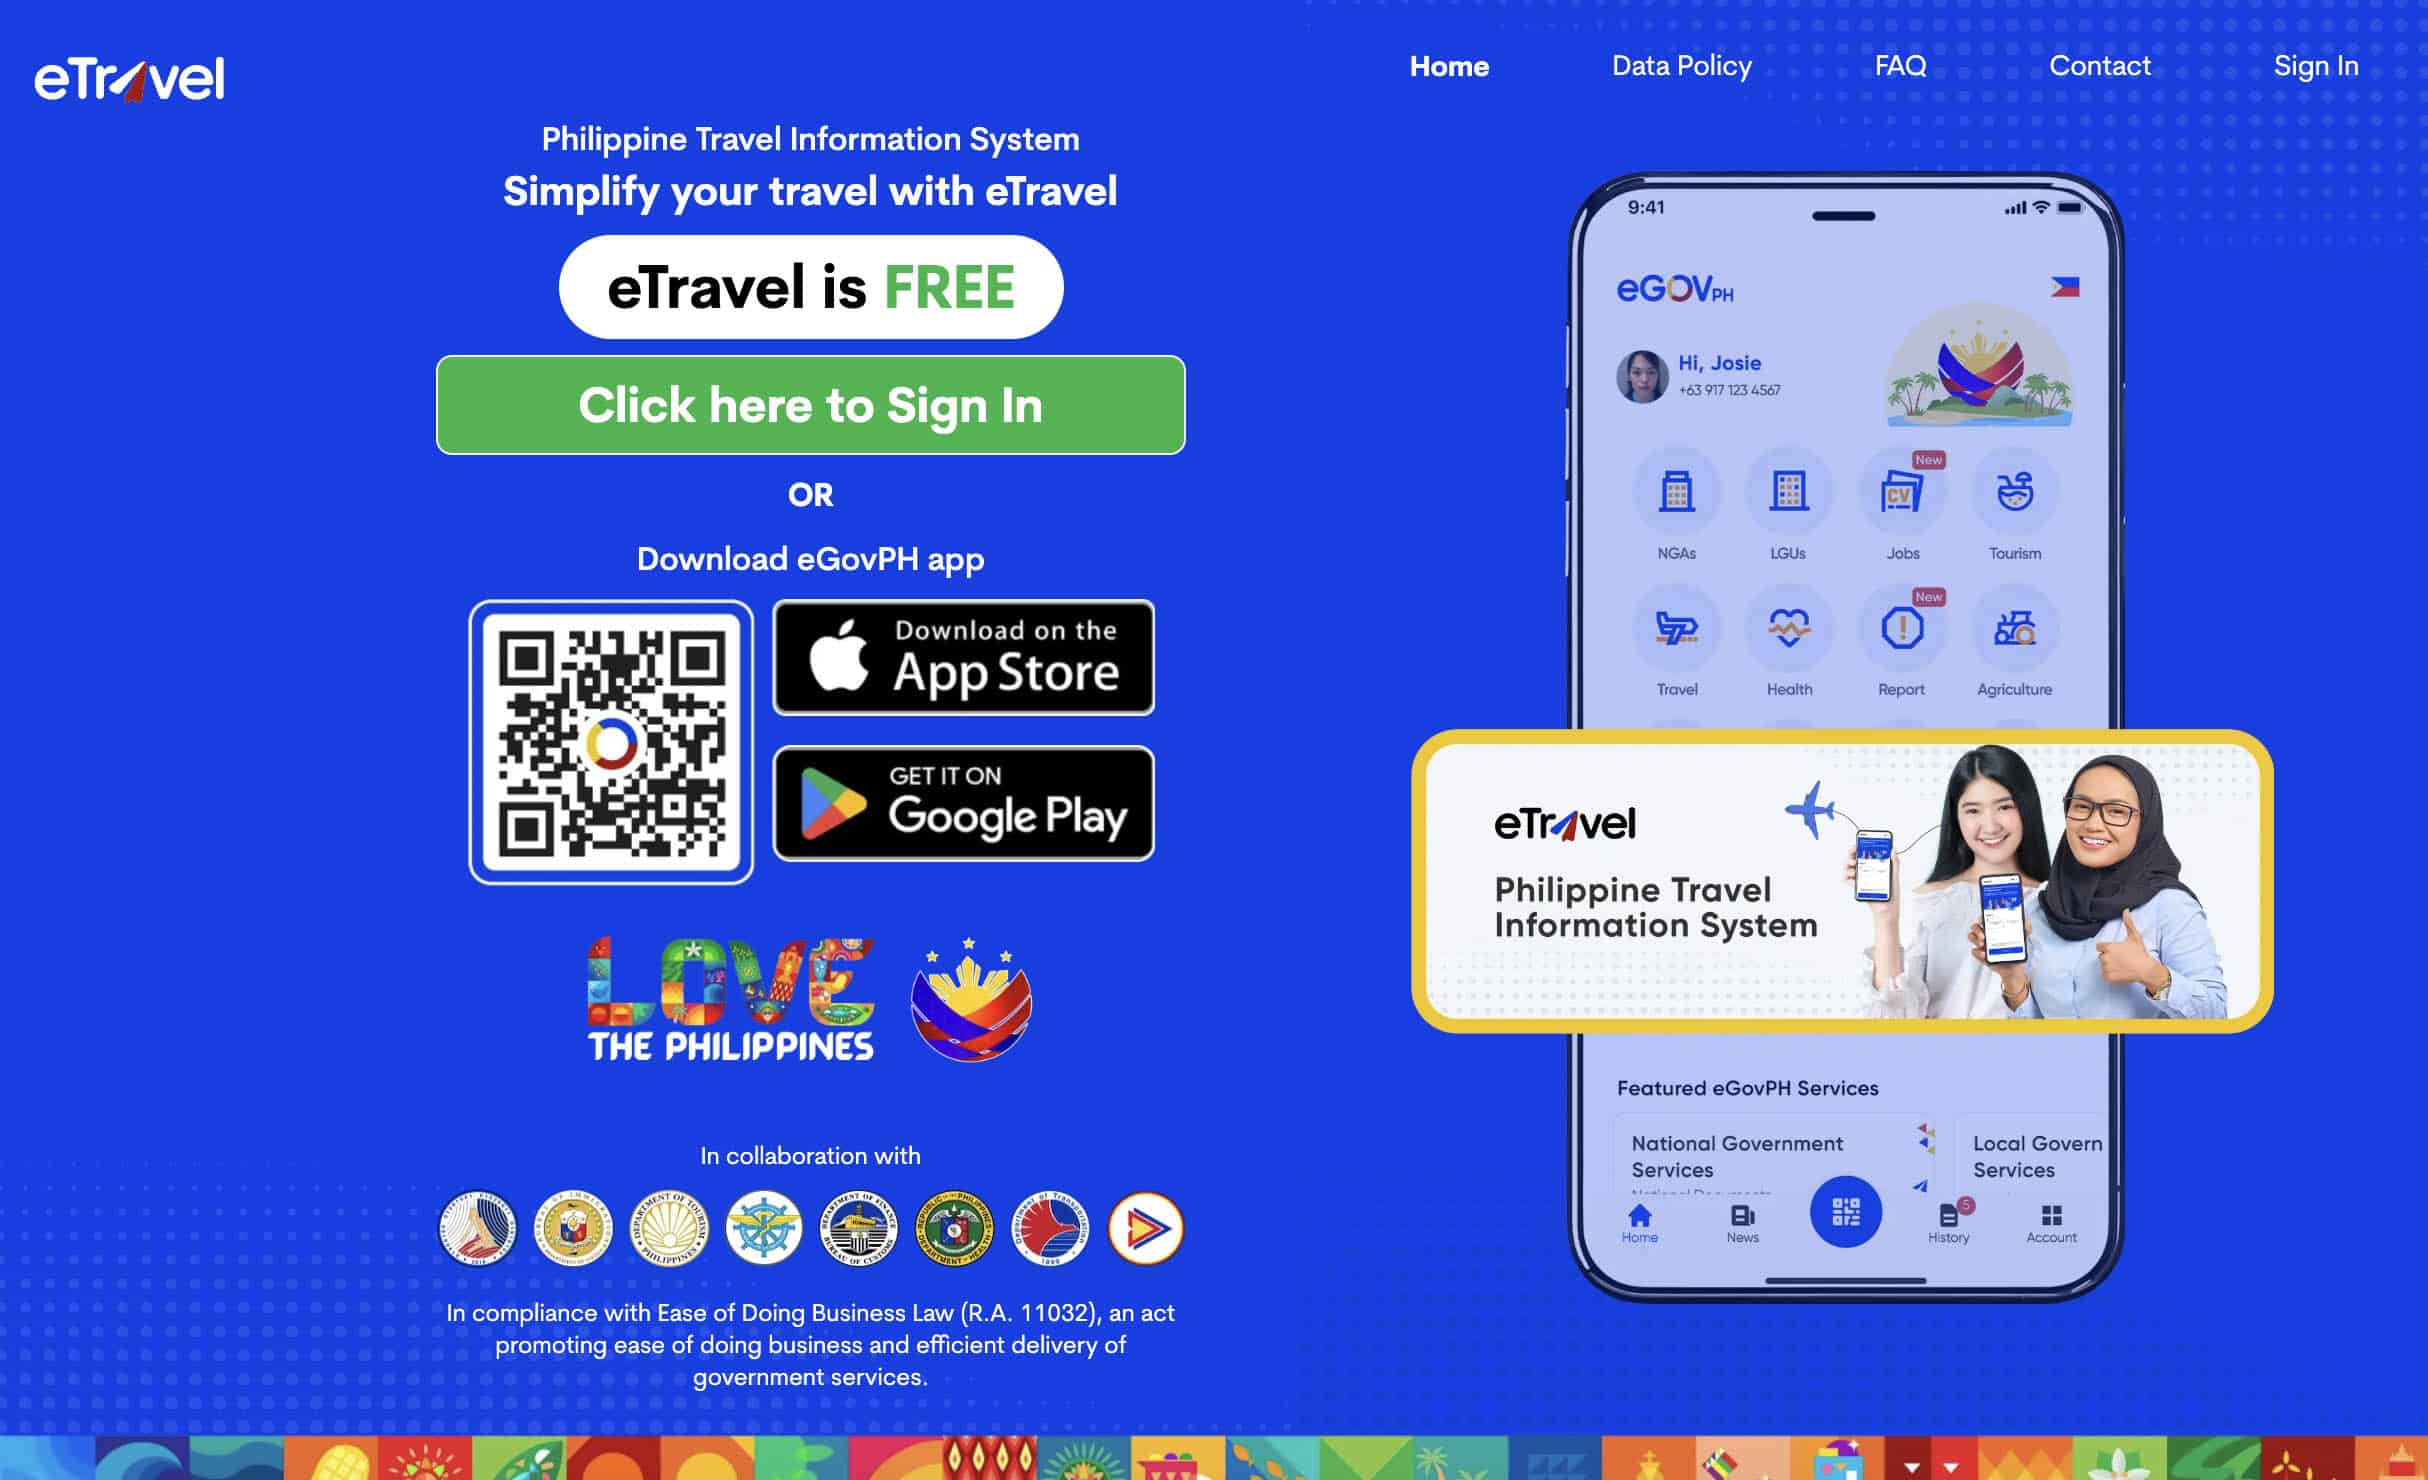
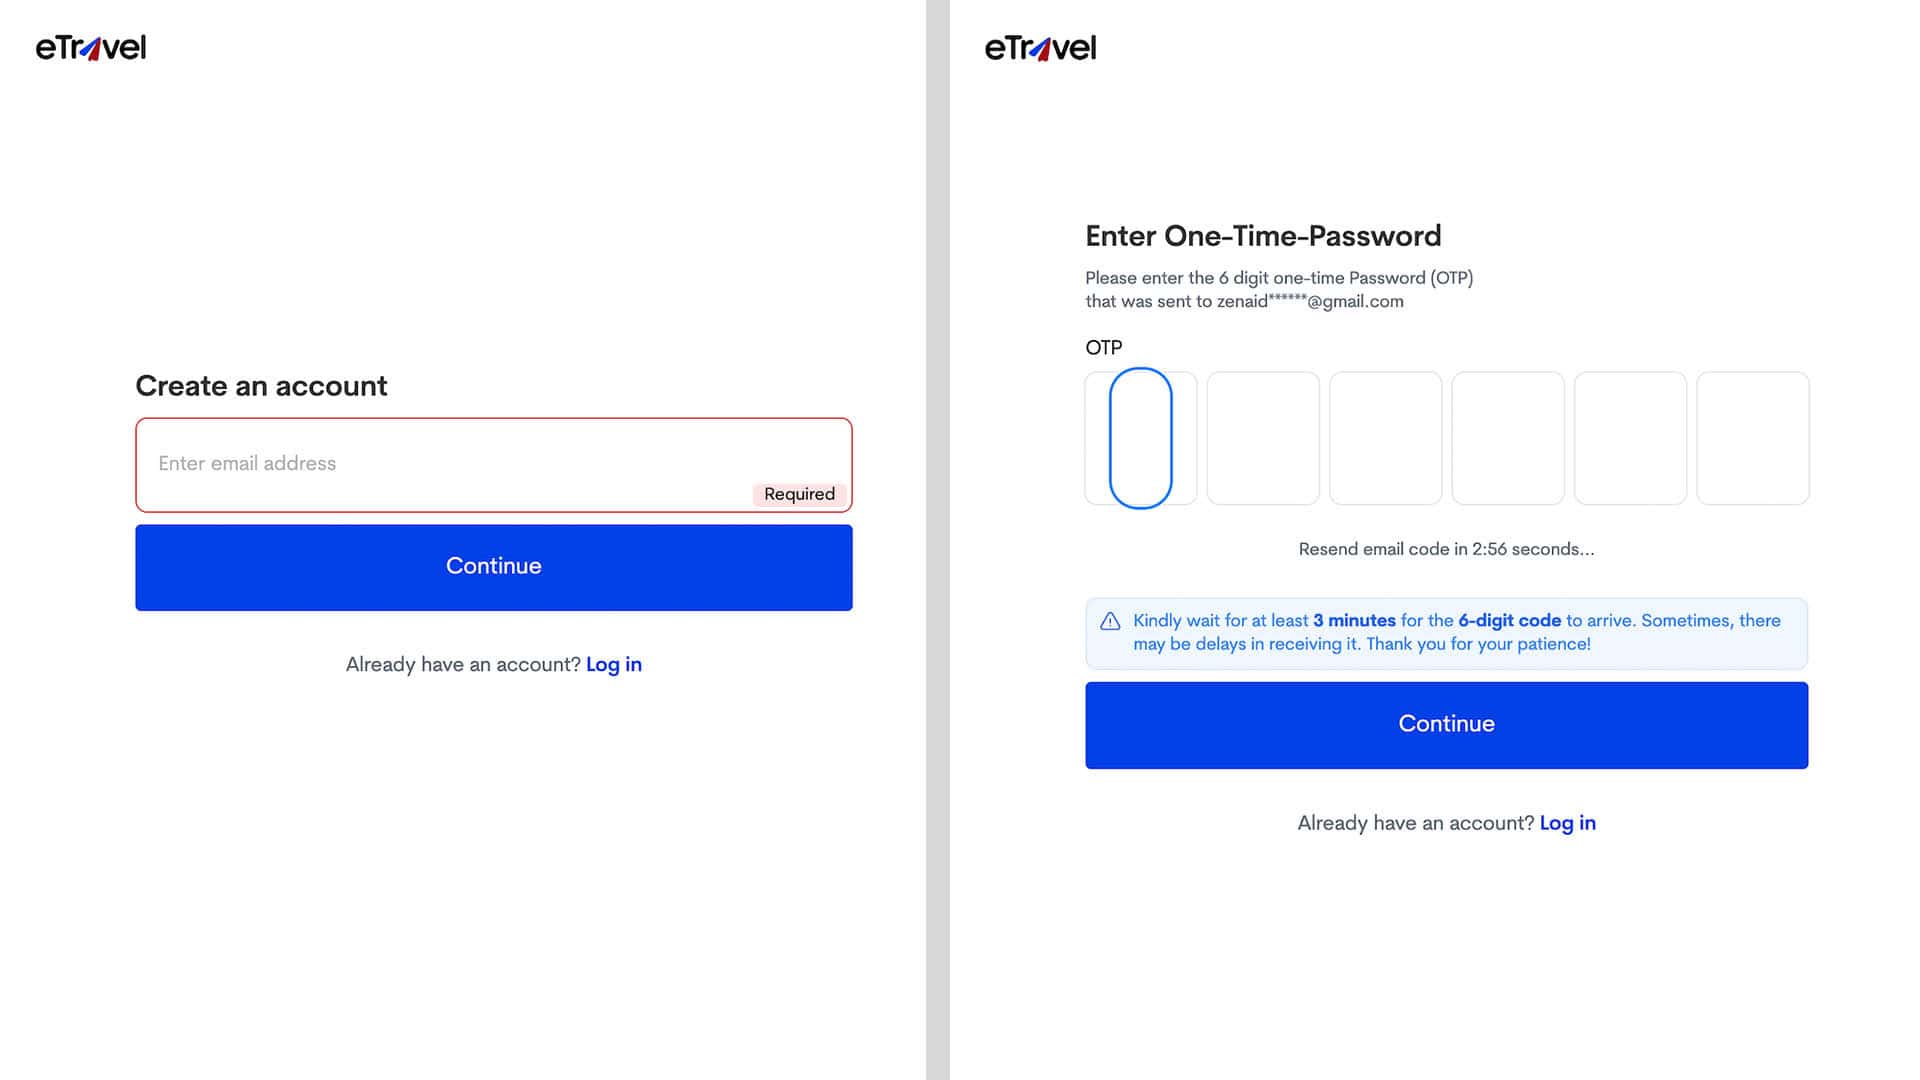
- Visit the etravel.gov.ph/authentication. This is the official sign-up page. Make sure you’re on the right website.
- Enter a valid email address. Make sure it’s correct because the system will be sending a one-time password (OTP) to this email address.
- Enter the OTP. Check your email to retrieve it. It should have 6 digits.
- Create a password. The password must have at least 8 characters, with at least one uppercase and one lowercase letter. Re-enter your password to confirm.
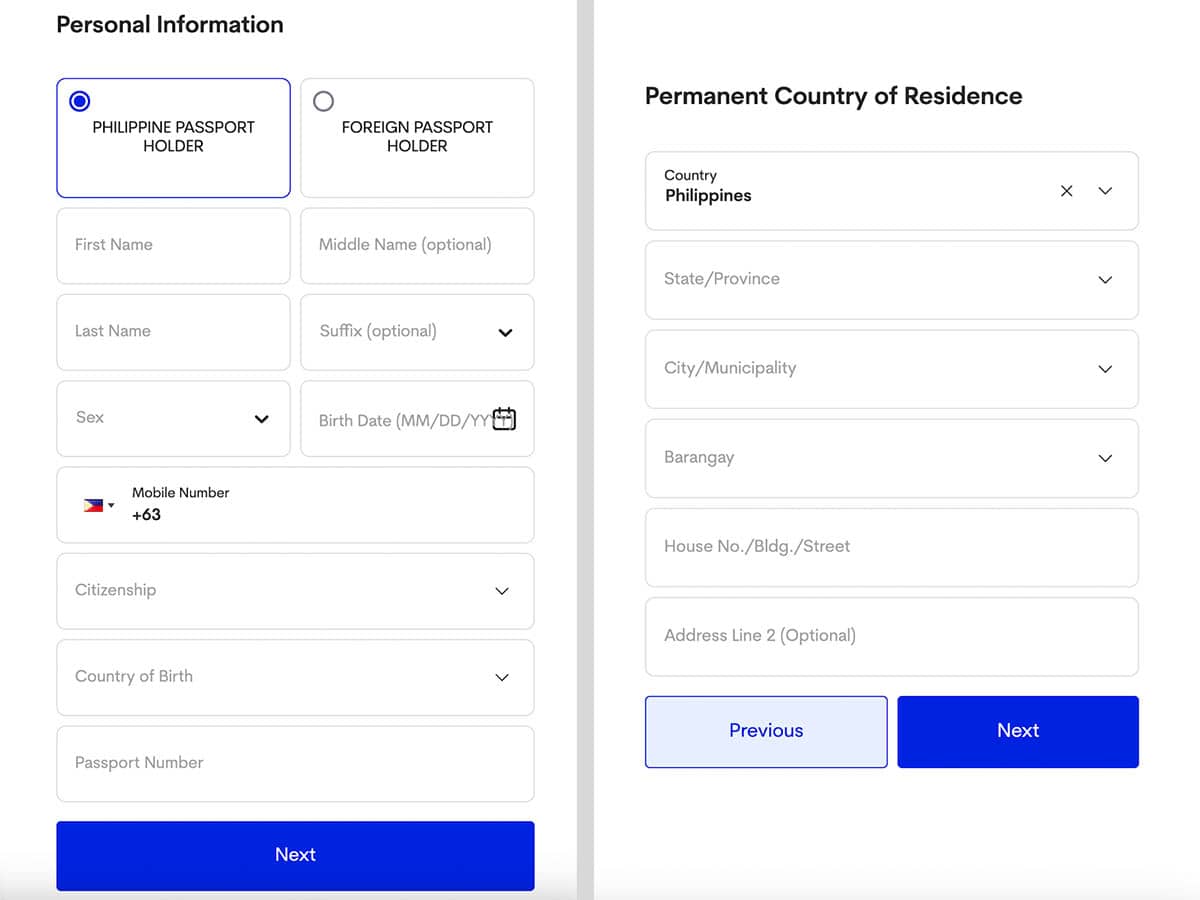
- Enter your personal information. The system will ask for the following:
– Full name
– Sex
– Birth date
– Mobile number
– Citizenship
– Country of birth
– Passport number
Tap NEXT. - Enter your residential address. Click NEXT after.
- Review all the information you entered. The system will show you a summary of your details. If every thing is correct, hit SUBMIT.
That’s it! You now have an eTravel account!
Using this account, you can register a trip for yourself and even family members.
Now, it’s time to register your trip.
How to Accomplish eTravel for DEPARTING Passengers
Now that you have an account, all you need to do is register your upcoming trip. Every time you do so, you’ll be asked if you’re completing the form for yourself or for a family member. (Yes, you can submit a form on their behalf.) You’ll also be asked if it’s for ARRIVAL or DEPARTURE.
This section is for DEPARTURE, i.e. for those flying OUT of the Philippines. This applies to all Filipino passengers and crewmembers. Foreign nationals departing the Philippines do not need to register their departure trip.
Here’s how to register a departure trip:
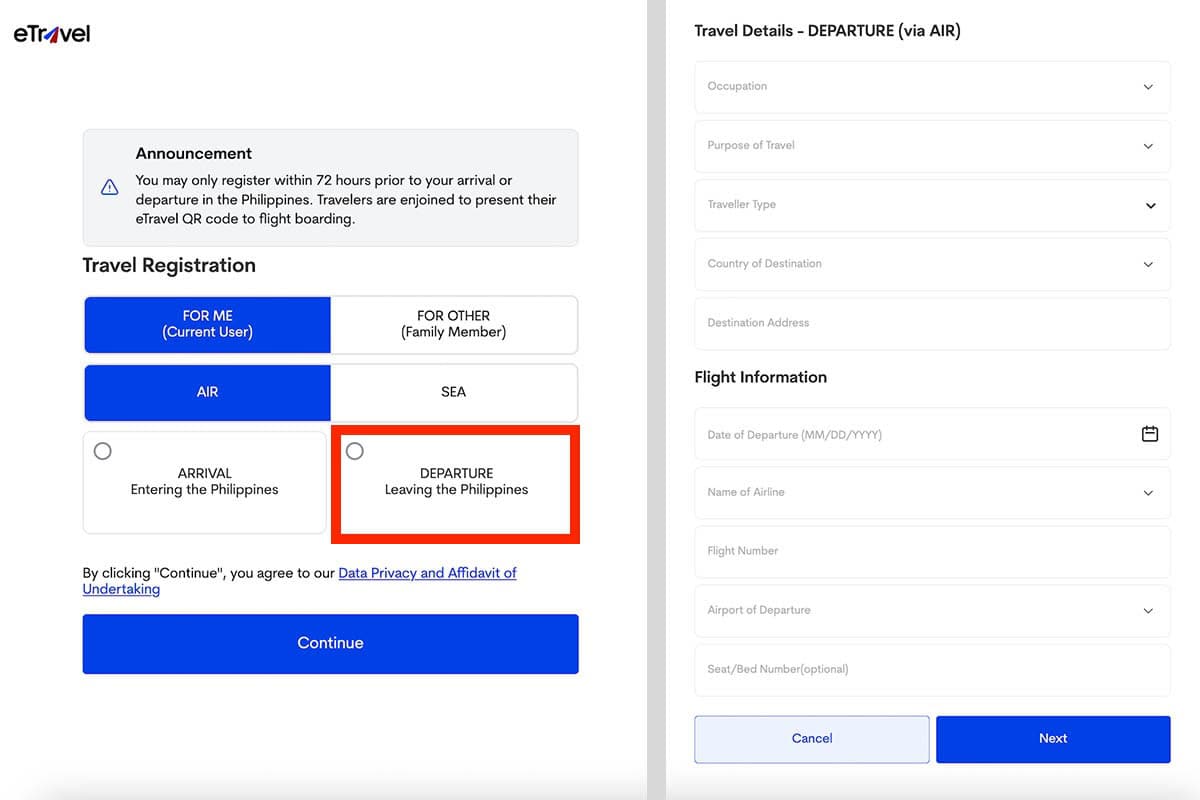
- Select whether you’re accomplishing the form for yourself or a family member. You should also select whether you’re traveling by air or by sea. Let’s assume you’re flying, so choose AIR.
- Choose DEPARTURE (Leaving the Philippines). Make sure you select the right one! Then click CONTINUE.
- Enter your travel details, including the following:
– Your occupation. Select the industry closest to yours)
– Purpose of travel. If you’re traveling as a tourist, choose HOLIDAY/PLEASURE/VACATION. Other choices are OFW, Convention/Conference, Education/Training/Studies, Religion/Pilgrimage, and Transit. Just pick what applies to you..
– Traveler type. Choose AIRCRAFT PASSENGER.
– Destination country and address. If you’re staying at a hotel, enter your hotel’s address. If you’re staying with someone else, type their address. - Enter your flight information. Provide the following details:
– Date of departure
– Name of airline
– Flight number
– Airport of departure. If flying out of Manila, choose NINOY AQUINO INTERNATIONAL AIRPORT (MNL). But make sure you pick the right terminal, too.
– Seat number (optional)
Click NEXT. - Review your details. You’ll be shown a summary of all the info you entered. Make sure everything is correct. If so, click SUBMIT.
- Save or take a screenshot of your eTravel QR code. This will also be sent to the email address you used.
That’s it! All your information will also be sent to the Immigration Officer’s database. In most cases, they won’t even ask to see your QR code because they can already see it on their screen as you clear Immigration Check.
How to Accomplish eTravel for ARRIVING Passengers
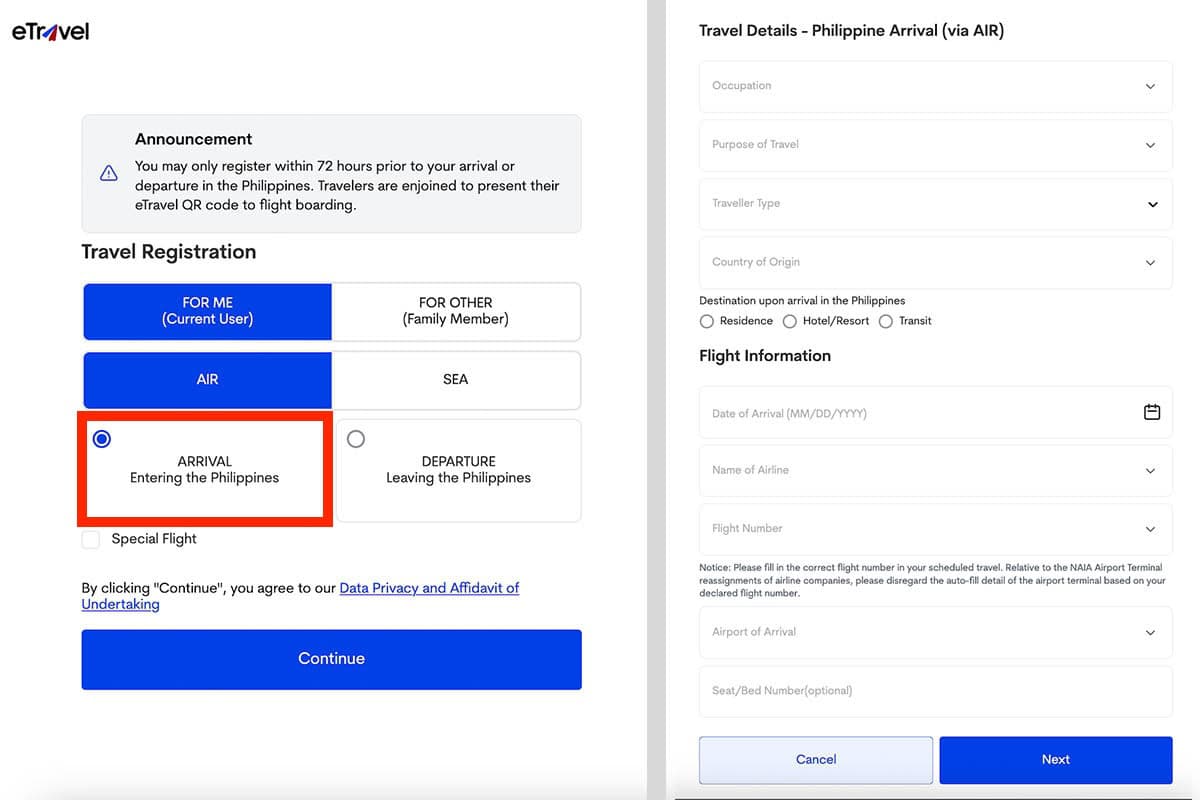
Assuming you already have an eTravel account, you only need to register your trip. For ARRIVAL registration, all passengers — Filipinos and foreigners alike — must complete and submit an ARRIVAL eTravel form. Just follow these steps.
- Select whether you’re accomplishing the form for yourself or a family member. You should also select whether you’re traveling by air or by sea. Let’s assume you’re flying, so choose AIR.
- Choose ARRIVAL (Entering the Philippines). Make sure you select the right one! Then click CONTINUE.
- Enter your travel details, including the following:
– Your occupation. Select the industry closest to yours)
– Purpose of travel. If you live in the Philippines and you just went abroad for business or holiday, choose RETURNING RESIDENT. Other options are OFW, Convention/Conference, Education/Training/Studies, Religion/Pilgrimage, and Transit. Just pick what applies to you.
– Traveler type. Choose AIRCRAFT PASSENGER.
– Country of origin. This is the country where you will be flying from. - Enter your address in the Philippines. Choose where you will be staying in the Philippines: Residence, Hotel/Resort, or Transit. Once you select, type in the address of your residence or hotel, whichever is applicable.
- Enter your flight information. Provide the following details:
– Date of arrival
– Name of airline
– Flight number
– Airport of arrival. If flying to Manila, choose NINOY AQUINO INTERNATIONAL AIRPORT (MNL). But make sure you pick the right terminal, too.
– Seat number (optional)
Click NEXT. - Fill out the Health Declaration Form. Enter all the countries you have visited within the past 30 days. You’ll also be asked if you have been sick, have experienced symptoms, or have been exposed to someone with symptoms within the past 30 days. After answering all the items, click NEXT.
- Review your details. You’ll be shown a summary of all the info you entered. Make sure everything is correct. If so, click SUBMIT.
- Save or take a screenshot of your eTravel QR code. This will also be sent to the email address you used.
That’s it! All your information will also be sent to the Immigration Officer’s database. In most cases, they won’t even ask to see your QR code because they can already see it on their screen as you clear Immigration Check.
Frequently Asked Questions (FAQs)
I want to change something after generating the QR code. How to correct it?
You can still edit your info if you noticed a typo error or you entered wrong data. However, note that you can only do this BEFORE it gets validated or verified by the BOQ officer upon your arrival sa Pilipinas. Ensure that you make your corrections before your flight to the Philippines.
To do this, just go to the main page or home page of eTravel, then click the UPDATE REGISTRATION button. Provide your reference number or transaction number and birth date.
At what point of the airport process should I present the QR code?
In most cases, you won’t be asked to present this at any point. But it doesn’t mean you can skip it. The Immigration Officer can see on their screens if you’ve accomplished this form.
- If they see that you have, they usually won’t ask for it.
- If they can’t find your eTravel for this trip, they will ask you to step aside and accomplish one at the tablet station nearby.
Do I have to pay for eTravel QR Code? How much is the charge?
No, you don’t need to pay anything for the eTravel QR Code. It is FREE of charge. If you landed on a website requiring you to pay for the service, it’s definitely a scam.
I’m traveling with family. Does every one of us need to accomplish eTravel?
YES and NO. YES, every member of the family on your trip must have an eTravel record, but not everyone needs to create an account. One member can create an account and then they can register all the accompanying family members under that one account. I’ve done it myself for my mother and sister on our most recent trip, and we didn’t encounter any problem.
Note that this does not apply to friends, colleagues, or romantic partners. If you’re not family, each of you must create an account.
Is there a Tagalog version of this article?
We will be publishing a Tagalog video version of this on our YouTube channel.
Do I still need to accomplish One Health Pass and eArrival Card?
No need. The eTravel has officially replaced the now obsolete One Health Pass and eArrival Card starting 2 December 2022.
To be honest, all these systems are very similar. The changes are not too drastic. Some items were removed such as the Philhealth Number, and then some required items are now optional. The noticeable difference is not really the content but the appearance or the user interface.
Updates Log & Credits
2024 • 5 • 4 – Reflected “account creation requirement” update, and included Departure process: Yosh Dimen
2023 • 2 • 24 – Original publication, covers only Arrival process: Asta Alvarez


