

If you are here to learn how to create preset in Lightroom, you’ve come to the right place. Because in today’s article, I will show you how you can create your own presets using my proven preset development method.
If you are just looking for information on creating a preset, below are step-by-step instructions.
Here’s how to create preset in Lightroom:
- Go into the Develop Module in Lightroom Classic
- Locate the Presets panel on the left-hand-side and click the Plus (+) icon in the top right corner
- Select the Create Preset option from the drop-down menu
- Check the editing adjustments you want to save as the preset
- Name the Preset and specify the Group it belongs to
- Press the Create button
For in-depth details on creating landscape specific preset, check the tutorial below.
In today’s article, I want to go beyond the standard instructions where you tell people to edit the image in Lightroom any way they want and save all the editing steps as a preset.
This tutorial will give you very actionable instructions on how to create a universal preset that will work with 90% of landscape images. The preset you will keep reusing for years to come.
Landscape photos we take will vary depending on lighting conditions, the type of landscapes, and your shooting style. And if you go too deep into the Lightroom editing process and try to save your edits as a preset, the preset won’t be very useful. It will be too specific for a particular image and might work only with a tiny percentage of your landscape photos. Its usefulness will be minimal.
The goal is to create a foundational preset that covers around 80% of any landscape photo post-processing. And the rest, 20% or so, will require a custom intervention to make every photo unique.
Let’s get started.
How to Create Preset in Lightroom Classic
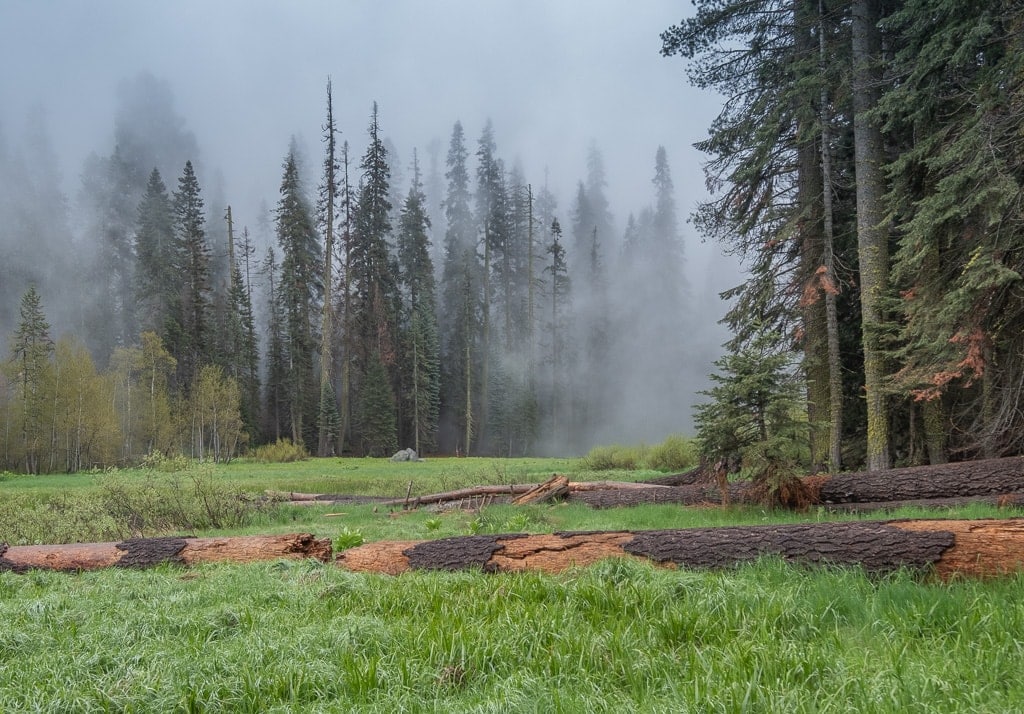
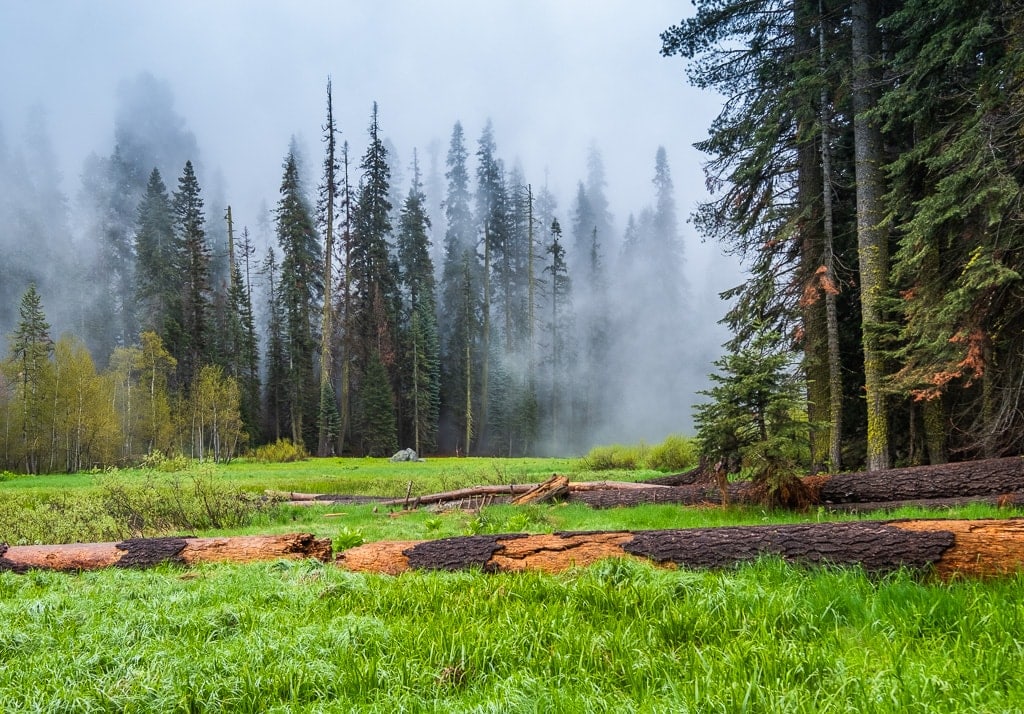
For today’s tutorial, I selected the image I took in Sequoia National Park in California. It is an excellent image to create a foundational preset because it has most of the components of a typical landscape photograph, such as extended dynamic range, vegetation in the foreground, and atmospheric fog in the background.

Let’s start creating a genetic landscape Lightroom preset.
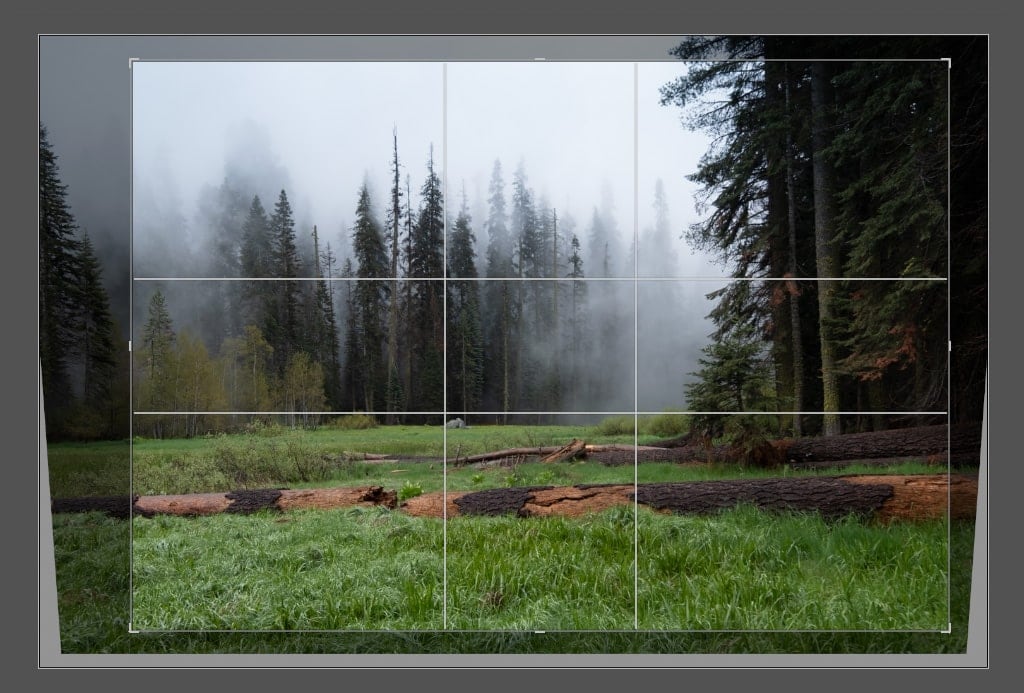
Step 1: Improving Composition with the Crop Overlay Tool
When I start editing any landscape photo, the first step is to see if I can improve the composition by cropping it.
In this case, I can improve the photo by making the compositing tighter.
I used the Crop Overlay (R) tool to crop the image but preserved the original aspect ratio.

Please note that cropping adjustment will not be a part of the preset; I just wanted to follow my regular photo editing routine.
Step 2: Straightening the Photo with Transform Tools
Next step, I had to make sure that all horizontal lines of the photo were horizontal and all vertical were perfectly vertical.
In most landscape photos, you have to ensure that the horizon is straight. And if it is not, you have to fix it.
In my case, I did not have a problem with the horizon because the sequoia forest shields it. But I had another issue which is typical for landscape captures; the vertical lines needed to be straightened.
When I took the shot, I tilted the camera backward, and as a result, the trees in the photo converged from the bottom to the top, which did not look natural.
I fixed it quickly by moving the Vertical slider from the Transform editing panel to the left.

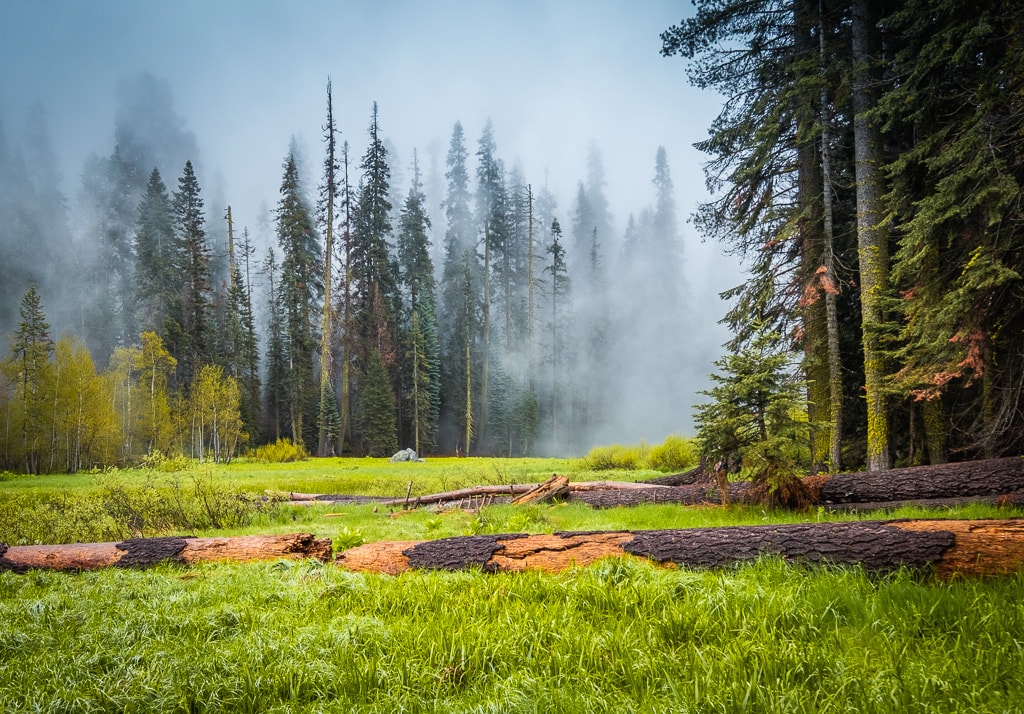
In the end, I had an image with improved composition and sound geometry.

I could move to the processing.
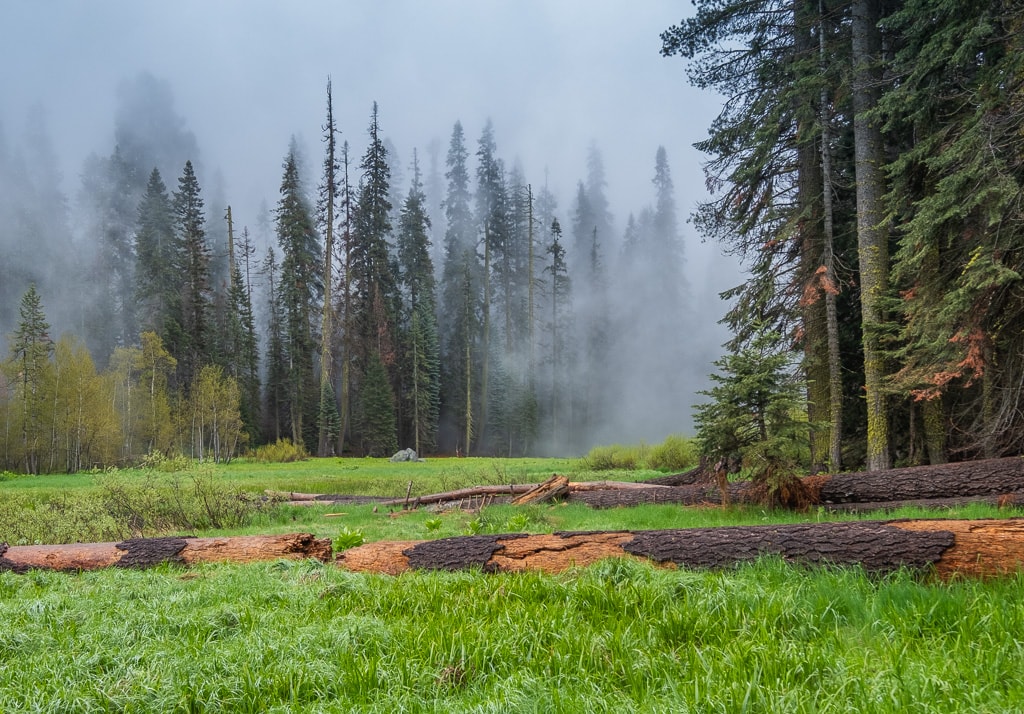
Step 3: Extending the Dynamic Range in the Basic Panel
When we shoot landscapes, as a rule, we deal with scenes with an extended dynamic range. This image was not an exception. For me, the first step of processing was to maximize the dynamic range of the original RAW image.
I did it by recovering the highlights and lifting the shadows.
I moved the Highlights slider to the left (-100) and the Shadows slider to the right (100).
But it was not enough. I was concerned that I might clip the shadows or highlights in the following steps when working on contrast.
I extended the dynamic range further by using the White and Black sliders.
Now, if you check the Histogram of the edited image, you can see how it differs from the original one.
In the original image, I hardly had any midtones; the majority of image pixels were distributed across shadows and highlights.
After recovering the highlights and lifting shadows, the Histogram indicates that most pixes are now in midtones. It is a more balanced photo, which will be easier to edit.
But you can also notice that the image looks blunt with no contrast and colors. I needed to balance it by increasing the contrast and saturation.
I prefer to avoid addressing the contrast and saturation in the Basic panel because it is easy to clip the shadows during the contrast increase and oversaturate specific colors when using the saturation and vibrancy sliders.
To avoid future problems, I only slightly increased the contrast and saturation in the Basic panel to compensate for the reduction of shadows and highlights.

Step 4: Boosting the Contrast in the Tone Curve Panel
The Tone Curve panel is my preferred place to adjust the contrast of the landscape images. It allows me to protect the highlights and shadows and only work with the midtones when adjusting the contrast.
Below are the values of the adjustment sliders I used for the contrast boost.
As you can see, I moved the Highlights slider to the left and the Shadows slider to the right to protect them from clipping.
And I boosted the contrast by adjusting the Lights and Darks sliders. And I used the different values for the Lights and Darks sliders, ensuring I increased the contrast in the brighter area of the image at a higher degree.

You cannot achieve such control over the contrast in the Basic panel using the Contrast and Clarity sliders.
Step 5: Selective Saturation in the SHL Panel
To create a visually pleasing image, you need to use colors with different saturation levels. And it is impossible to achieve it in the Basic panel by only using the Saturation and Vibrance sliders. Instead, I used selective saturation in the SHL panel, where I had complete control over the different hues of the photo.
First, I made the adjustments to the Hues values.
With regard to landscape photography, I see two issues with how the digital sensor records colors.
First, it shifts blue hues towards the red spectrum. It often happens when you shoot an open sky with a perfectly blue color; the digital capture will have an unnatural purple tint. I hate it.
Second, I dislike how digital sensors add blue hues to the greens. It makes the vegetation in the landscape photos unpleasing. And when you try to increase the saturation, the vegetation in the digital image becomes “electric green.”
To compensate for the hue issues, I moved the Green slider toward the Yellow spector and the Blue slider toward the green.
Next, I addressed Saturation.
This is the most crucial step when using selective saturation.
I increased the saturation of Green and Yellow hues.
At the same time, I reduced the saturation of the Blue.
The logic here is that when you have a massive area of oversaturated sky, it overpowers and ruins everything.
Finally, I tweaked Luminosity (Lightness)
Since in most landscape photos, the area of the sky is the brightest part of the capture, I wanted to balance it with the rest of the image by making it darker.

And I am done.

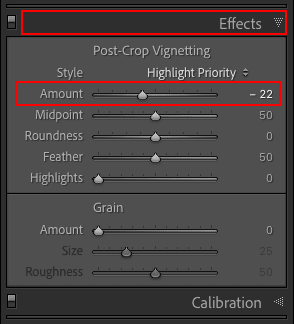
Step 6: Adding Vignetting in the Effect Panel
Every landscape photo needs vignetting. It helps to lead the viewer toward the center of the image, away from the edges.
I used the value of -22, which is an arbitrary number because you will likely have to adjust the level of vignetting for every image you edit separately.
That was it. I was done and ready to save editing adjustments as a preset.
How to Save Preset in Lightroom
In the develop module of Adobe Lightroom Classic, locate the Presets panel on the left side of the interface.
Click the ‘+’ icon and select the ‘Create Preset…’ option from the menu.

And here is the most critical step of the preset creation.
To create a generic new preset, you need to uncheck the parameters that will be unique for every landscape image you will edit.
You need to uncheck the Exposure because any given image can be overexposed, underexposed, or spot-on exposed, and you will need to tweak the Exposure for most of the photos you edit.
The same goes for the Transform tools and Profile Correction.
Now give the preset name and choose the group it belongs to. Optionally, you can create a new group or leave ‘User Presets’ as a default value.
Finally, hit the ‘Create’ button, and you are done.

Now it is your turn. Select your own landscape photo and go through the process of creating the Lightroom presets I outlined above. But, if you cannot do it for some reason, download the preset I just created. After downloading the preset, import it to Lightroom, and you are ready to go.
Here are the instructions on how to import presets to Lightroom. You can use the preset on both Mobile and Desktop versions of Lightroom.
How to Use the Presets in Lightroom
Now, let me demonstrate my routine for using a generic landscape preset.
Here is the photo I took in the local park in Montreal around sunrise, and I wanted to process it using the landscape preset I just created.

After applying the generic landscape preset, this is the result I achieved.

I could see 2 issues I needed to address.
- The photo was too dark.
- The blue area of the sky was oversaturated.
I fixed the issues with 2 simple adjustments:
- I increased the Exposure value (+0.30) in the Basic pane.
- I reduced the saturation of the sky with the help of the Blue slider (value: -46) in the HSL panel.

This is the workflow I use when editing landscape photos. It is not quite a one-click process but pretty close.
How to Create Preset in Lightroom | Final Thoughts
Learning how to create presets in Lightroom is a valuable skill for any photographer. The process may seem intimidating initially, but it will become second nature for you in no time. Ultimately, creating presets can save you time while editing your landscapes and ensuring that your photos have the same consistent look and feel.