

Today, I want to share my favorite technique for Lightroom skin tone adjustments when editing portraits.

For years, I used photoshop for editing all my photos. The process of fixing skin tone in Photoshop is complex and time-consuming. First, I had to evaluate the RGB values for each color channel and after I would adjust each color channel separately.
I never liked the Photoshop skin color adjustment workflow.
In Lightroom, the process of adjusting the skin color takes 10 seconds at most. And it is fun.
As a travel photographer, 99% of my portraits are taken outdoors. And because it is not a controlled environment, there are a number of factors that affect the skin color of my subjects.
The sun is the most obvious factor. Plus, reflections of the environment contribute to the color shifts.
Related: Lightroom Portrait Editing
It means that pretty much every portrait I take requires skin tone adjustment.
How to Perform Lightroom Skin Tone Fix
Here is the outline of my 2 favorite techniques.
1. Manual Lightroom Skin Tone Fix Technique
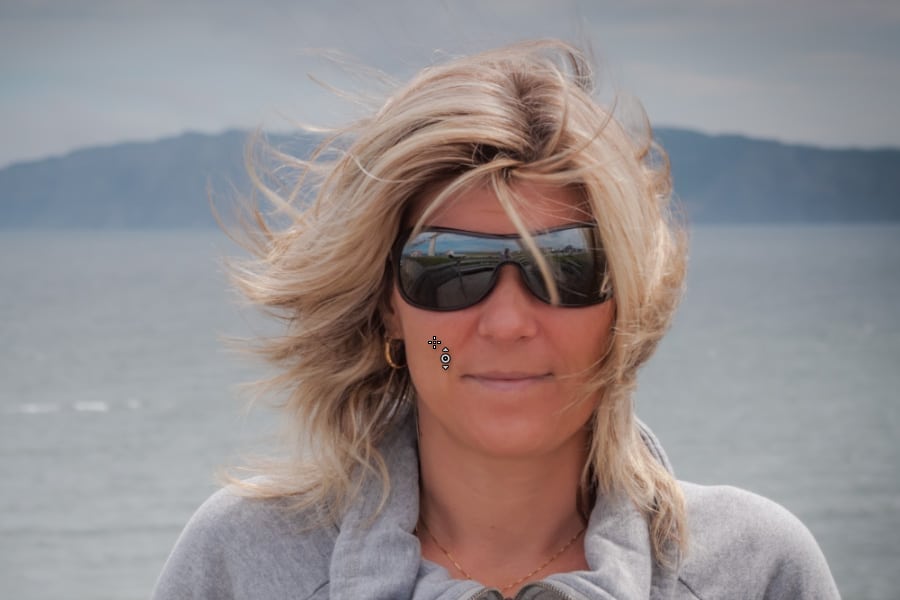
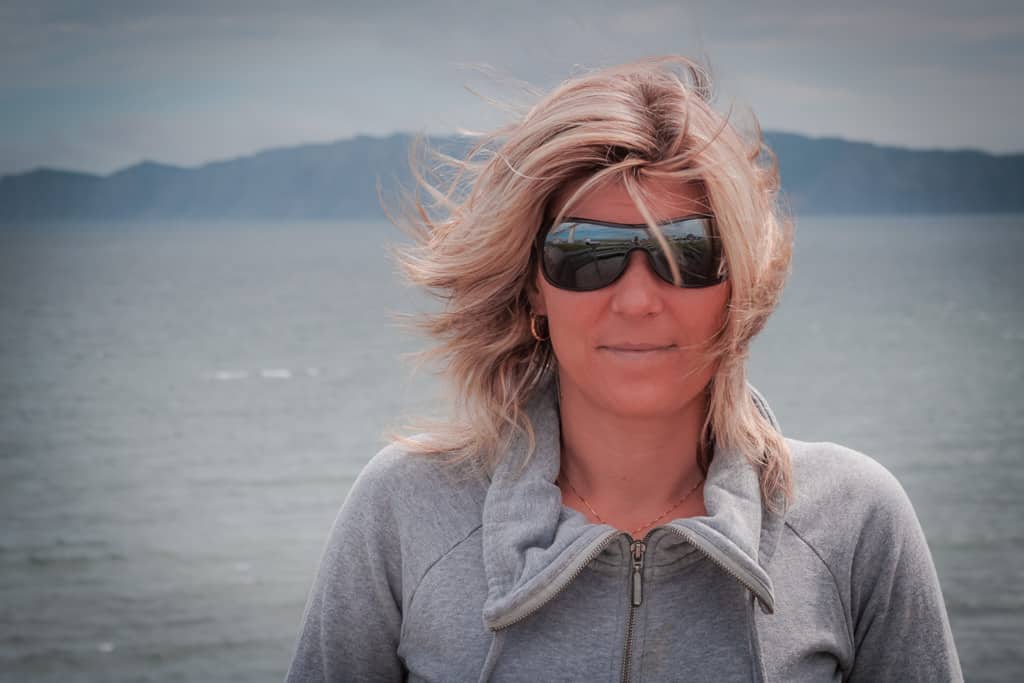
This portrait was taken in the middle of the day on the Atlantic coast of Canada with the sun shining high in the sky. As a result, the skin color of the model is shifted toward red hues.

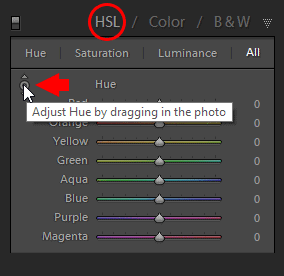
In Lightroom Develop Module locate HSL (Hue Saturation Luminance) Panel.
In the Hue section, click on the rounded icon with two arrows pointing up and down. When you mouse over the icon you will see the text “Adjust Hue by dragging in the photo“.
Next, locate the skin area which is properly lit and click on it.
Without releasing the mouse, start dragging it up or down.
If you drag the mouse too far UP the skin color becomes unnatural yellow. At the same time, you can see how the values of Red and Orange hues will change.
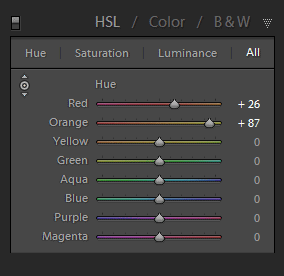
And if you drag the mouse down, the skin color tone will be shifted towards red.
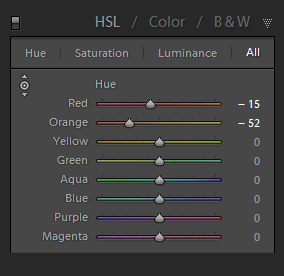
The goal here is to find the right balance between Yellow and Red to achieve a natural skin tone.
Related: My Top Lightroom Workflow Tips for
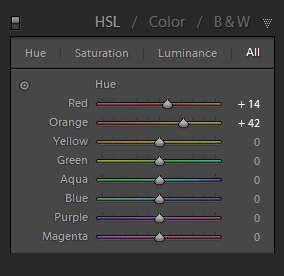
By dragging the mouse UP and DOWN I managed to find the sweet spot. The Hue values of Red +14 and Orange +42, give me the right skin tone.

Extra tip. If you see that the skin color of your subject is oversaturated you can use exactly the same technique in the Saturation section of the HSL Panel. By dragging the mouse UP and DOWN you can increase or reduce the saturation of the selected colors.
See also: How to Soften Skin in Lightroom
2. Preset Based Skin Tone Fix Technique
If you are using my new workflow bundle, the Travel Pro Kit, you can adjust skin tone in your portrait photographs by using the presets.
Locate the TOOLKIT for Landscapes preset collection and open it.

The TOOLKIT for Landscapes is a collection of adjustment presets that help us to preserve people’s skin as naturally as possible.
Most of the portrait adjustment presets (01-34) are dedicated to treating areas of the skin. You can separately target Color, Saturation, Brightness, and Smoothness.
Since we are trying to adjust the skin tone, we need to use the Skin Color Shift presets (1-9).
It is a process of trial and error. Simply click through the Skin Color Shift presets and select the one that produces the best result.
01. Skin Color Shift (Yellow) + adjustment preset works best for this particular photo.
You can learn about the 7 main components of the Travel Pro Kit here: Travel Pro Kit Workflow Bundle
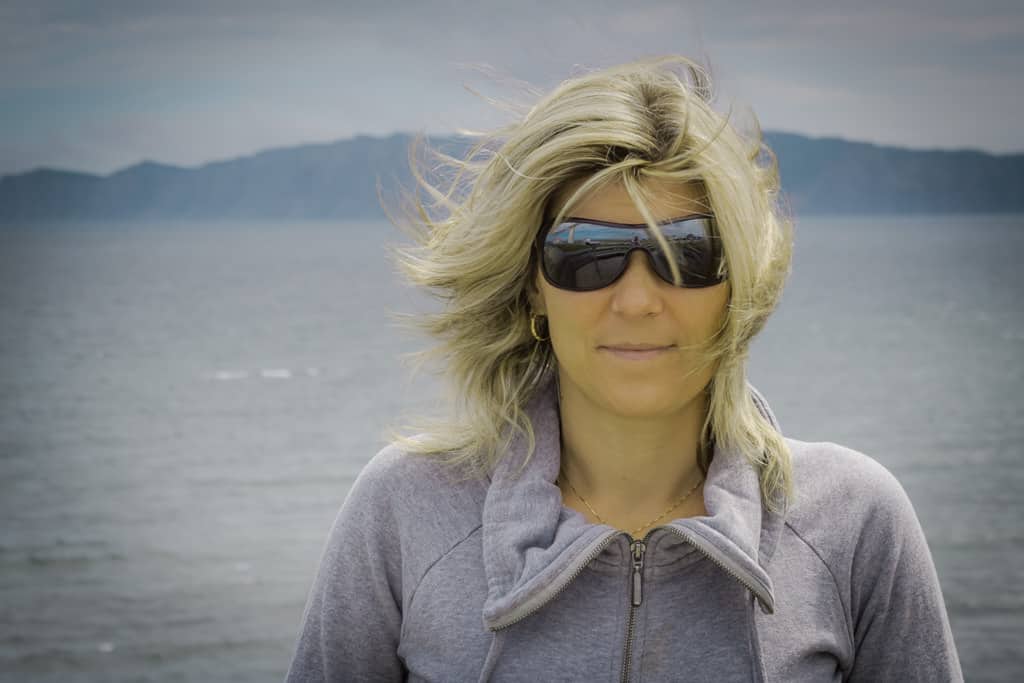
And here is the Before & After transformation. It took me 10 seconds at most.
And if you are planning to print the portrait, don’t forget to run it through Soft Proofing to make sure you achieve accurate colors.
Lightroom Skin Tone Fix | Conclusion
The Lightroom skin tone fix is a great way to improve your photos. It is easy to use and can help you get the perfect skin tone for your photos.