

It is hard to overestimate the importance of keyboard shortcuts in Lightroom or in any other editing program. Shortcuts help us speed up and optimize our editing workflow. You can find the tutorial dedicated exclusively to the most useful keyboard shortcuts in Lightroom here.

There are also keyboard keys that do not act exactly as shortcuts because they work in combination with existing tools and serve the purpose to modify or extend their default functions. I call these “Keyboard Modifiers.”
One of the most powerful keyboard modifiers in Lightroom is the Alt (PC), Option (Mac) key. By using the Alt/Option key in different areas of Lightroom, we can extend the program’s usefulness and even the functional range of the various editing tools.
In today’s tutorial, I will explain how you can extend the functionality of different areas of Lightroom using Alt/Option keyboard modifiers.
Develop Module
I always start with the Develop Module because this is where I spend the majority of my time. It is also where the Alt/Option modifiers are the most useful and effective.
Solo Mode
In the Lightroom Develop Module, there are nine main editing panels. When you open all of these panels, it is easy to get lost endlessly scrolling as you try to find the right editing slider for your needs. Solo Mode helps you eliminate clutter by allowing you to have only one editing panel open (extended).
When Solo Mode is active and you open any of the editing panels—like the Split Toning, for example—it closes all the other panels. Solo Mode is the most useful when your screen real estate is limited like when using a laptop.
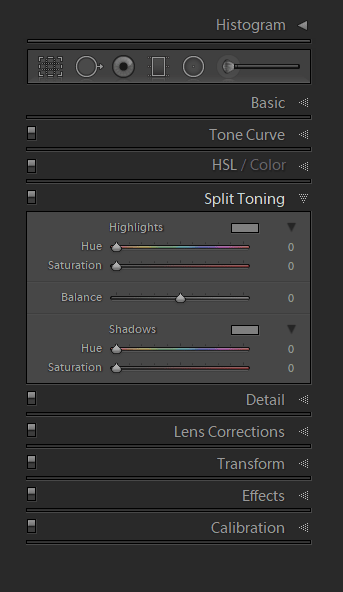
To activate Solo Mode, press the Alt/Option key and click the header of any editing panel. To deactivate Solo Mode, keep the Alt/Option key pressed and click any of the editing panels again.
I use Solo Mode 99% of the time, even when I use a desktop computer with a large monitor. Solo Mode keeps my UI neater.
Now, let’s dive into each editing panel and the tools in the Develop Model to see how we can extend their functionalities by using the Alt/Option modifiers.
The Basic Panel
Reset Sliders
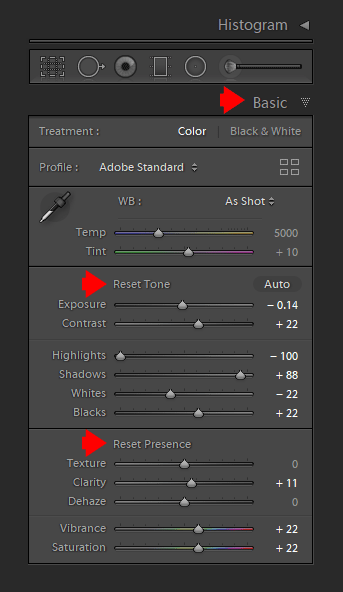
The most common and most popular use of the Alt/Option key is to reset multiple editing sliders to their default values. This functionality works in almost all the panels including the Basic Panel.
By holding the Alt/Option key down, the new options (Reset Tone and Reset Presence) appear. By clicking the “reset options,” you will reset all the editing sliders to zero.
Show Highlight Clipping
By holding down the Alt/Option key while dragging the Exposure, Highlights, or Whites sliders, you can see if any areas of the photo have clipped highlights.
The white area of the preview indicates that all three color channels (red, green, blue) are blown.
The red, green, and blue areas show that only one channel is clipped.
The cyan, magenta, and yellow areas indicate that two out of three channels are clipped.
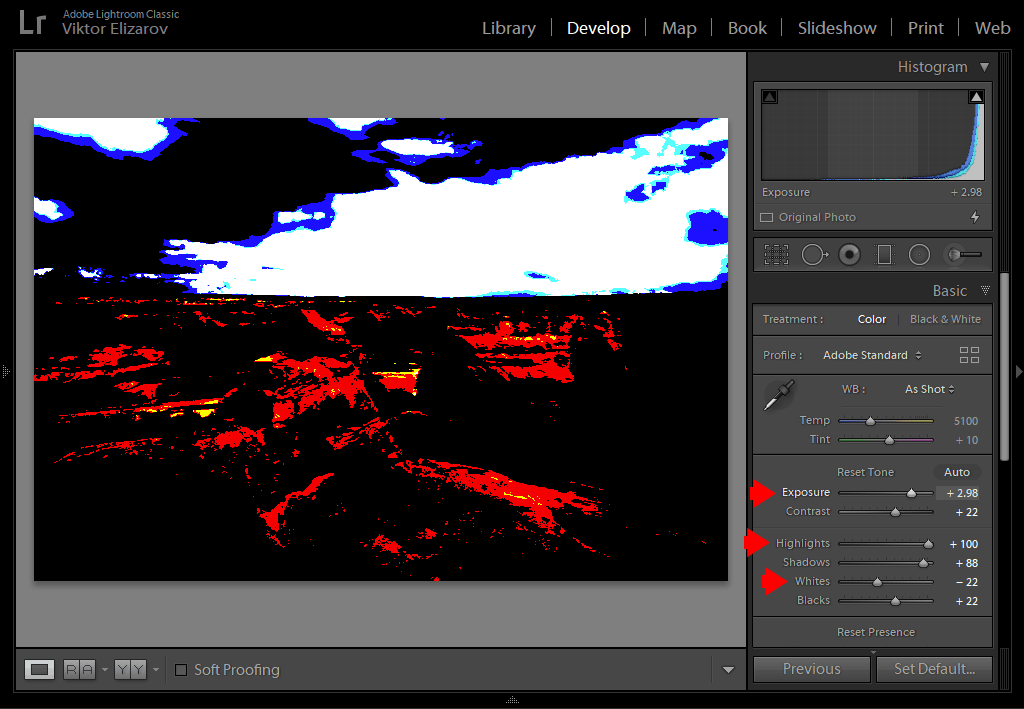
This functionality is extremely useful when evaluating if the overexposed areas of the image can be recovered. As a general rule, if only one channel is clipped, there is a good chance of recovering it. But when two or three channels are clipped or blown, you are most likely out of luck.
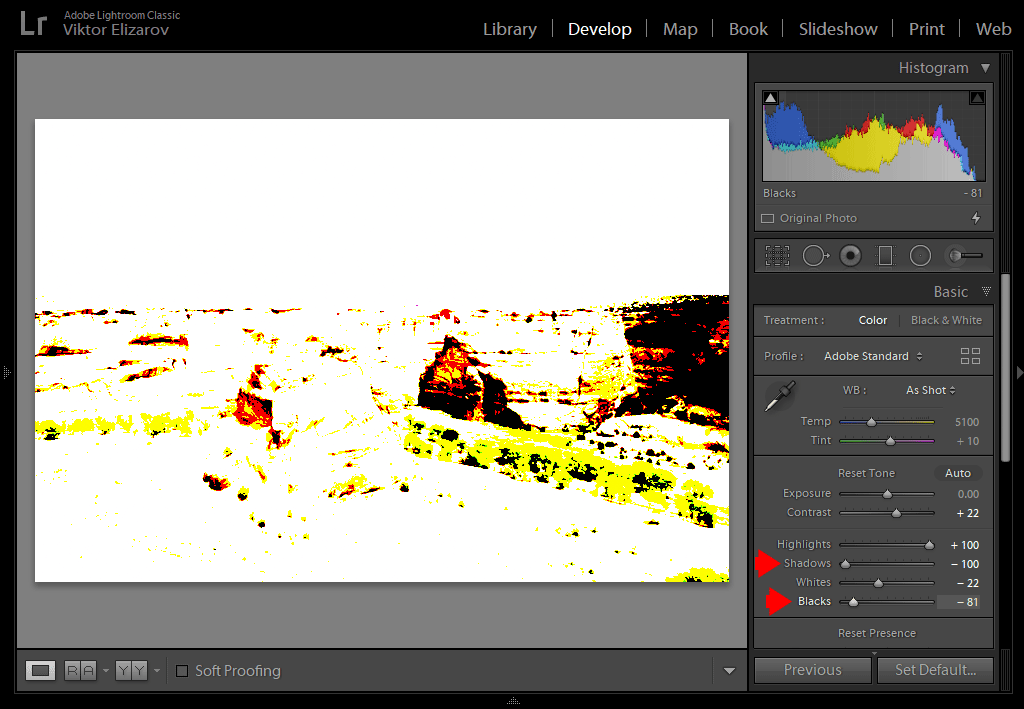
Show Shadow Clipping
By pressing the Alt/Option key while dragging the Shadows or Blacks sliders, you can see the areas of the photo with clipped shadows.
The black areas of the image indicate that all three color channels have clipped shadows.
The red, green, and blue areas indicate that only one channel is clipped.
The cyan, magenta, and yellow areas indicate that two out of three channels have clipped shadows.
The Tone Curve Panel
In the Tone Curve Panel, you can adjust the tone curve by using the Region Sliders. If you need greater precision, you can edit the tone curve directly by changing the shape of the curve for the individual color channels (red, green, blue) or the combined channel.
Reset Region Sliders
By pressing the Alt/Option key when using the Region Sliders, you can access the option to reset all four Region Sliders to the default values (zero).
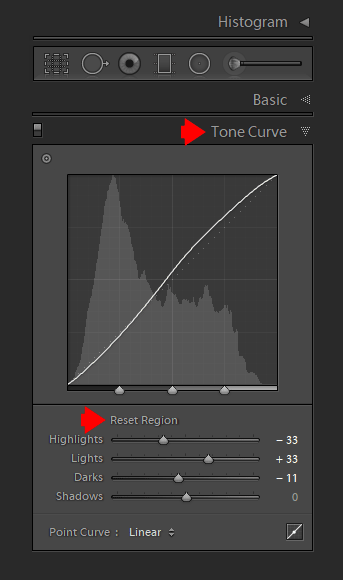
Access Fine Tune Adjustments
When editing the tone curve directly, the Alt/Option modifier works differently. The Alt/Option key changes the sensitivity of the mouse movement and allows you to make more refined adjustments. This works extremely well when combined with the Shift key, which constrains the mouse movement to only the Y-axis.
HSL/Color Panel
In the HSL/Color Panel, the Alt/Option modifier has only one function—it resets the editing sliders to zero. The panel has 24 total editing sliders. It would be a chore to reset them one by one.
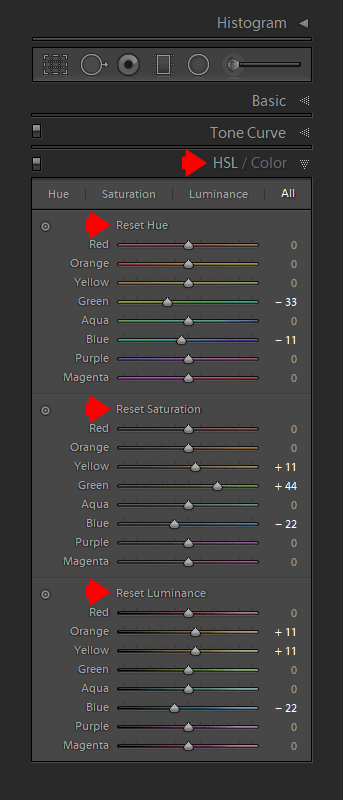
This is the panel where I use the reset options the most often.
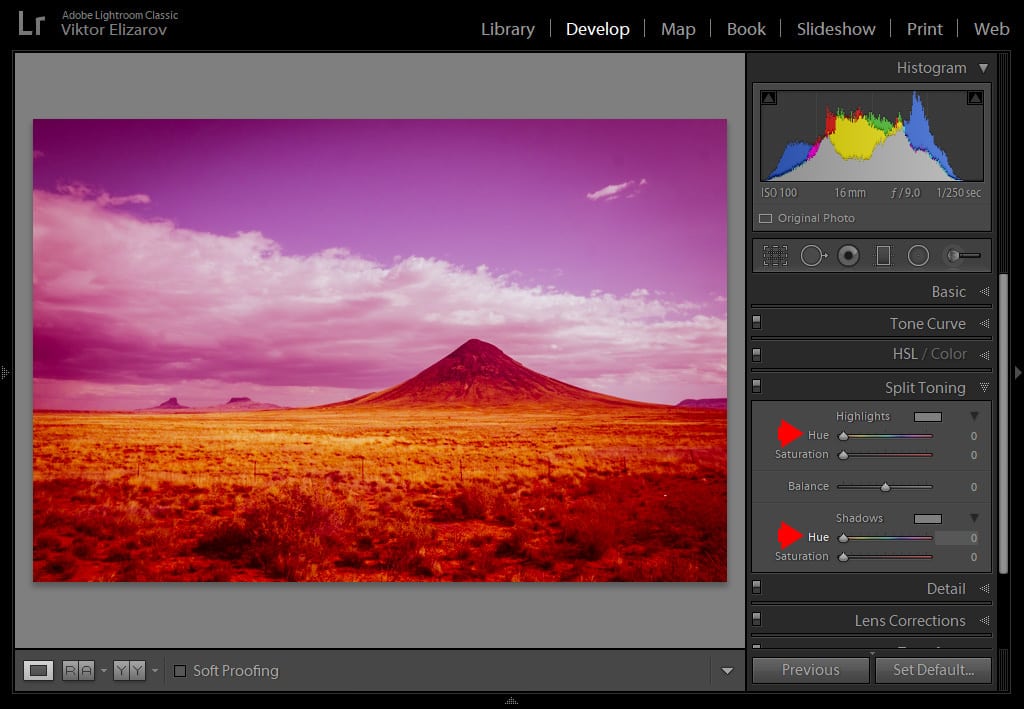
Split Toning Panel
You can reset the Highlights and Shadows while holding down the Alt/Option key.
Visualizing the Split Toning Effect
Hold down the Alt/Option key while moving the Highlight Hue or Shadow Hue sliders to see the color you selected at 100% saturation before you dial it up. Once again, this is a very useful visualization tool that I use quite often.
Detail Panel
The editing sliders in the Detail Panel help you take control of sharpening the image and reducing any digital noise.
By holding down the Alt/Option key, you have access to the Reset Sharpening and Reset Noise Reduction options.

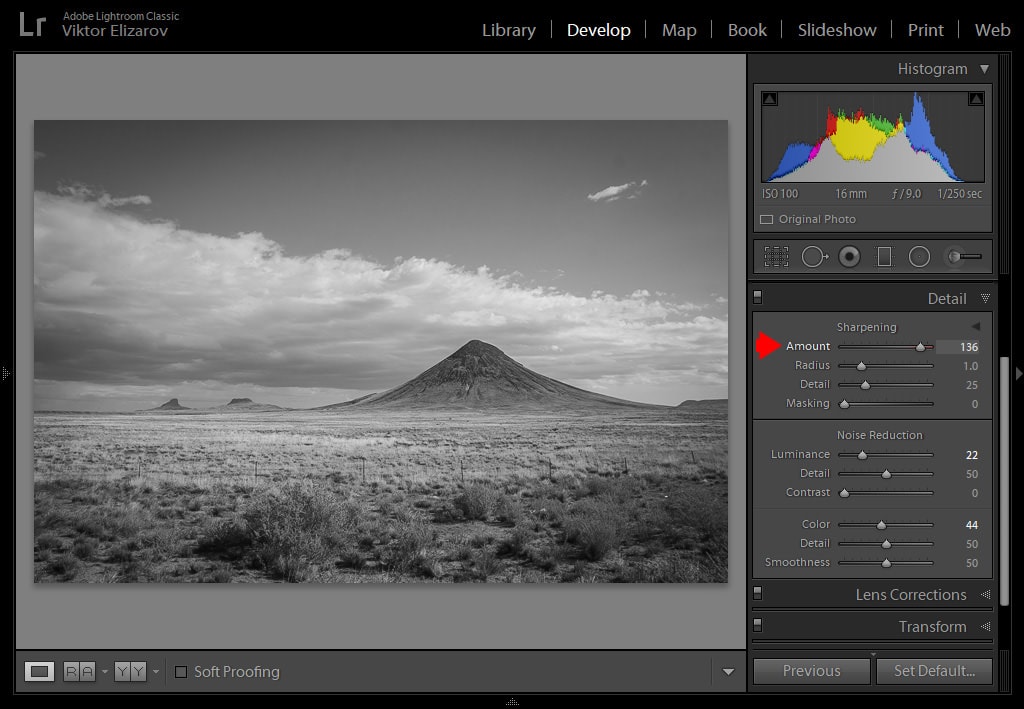
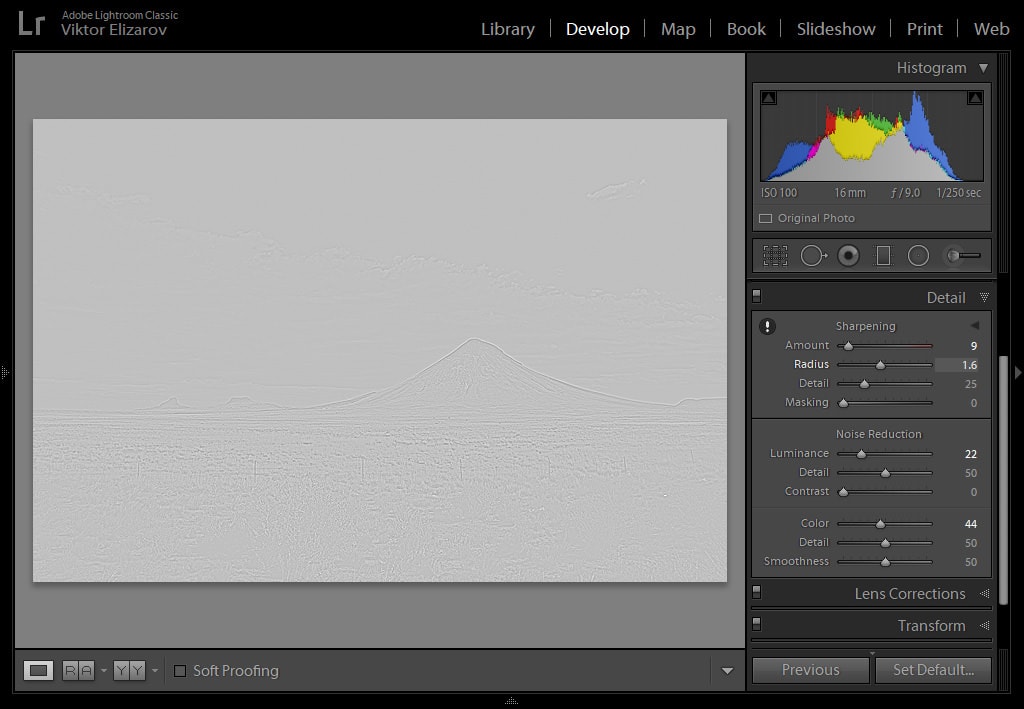
Visualizing Sharpening Effect
By holding down the Alt/Option key and moving the Amount slider, the photo turns into a black and white preview that allows you to better assess the sharpening effects.
When you press the Alt/Option key and drag the Radius or Detail slider, the image preview turns to a neutral gray and only the areas affected by the sharpening are shown in white. This is priceless.
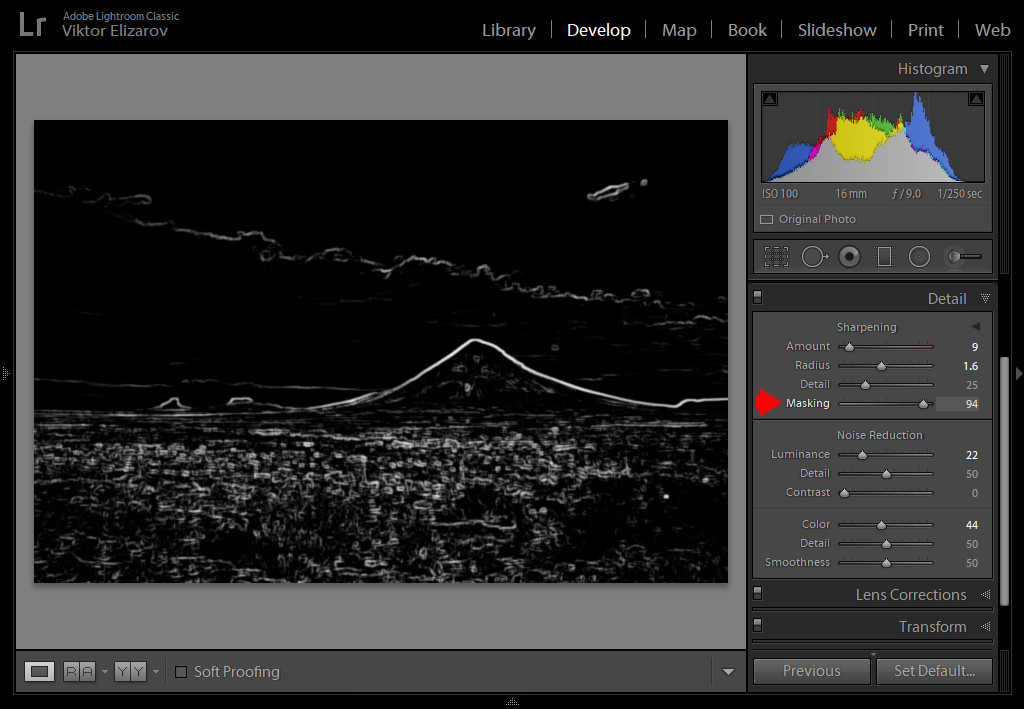
The Masking editing slider helps you minimize the effect of sharpening by narrowing the affected area. The combination of the Masking editing slider and the Alt/Option key is the most useful visual helper in the entire Detail Panel. It shows the area affected by sharpening in white and keeps the unaffected areas in black. This is the best way to limit the sharpening effect to the edges and leave the flat areas like the sky or water unaffected.
Visualizing Noise Reduction Effect
Hold down the Alt/Option key while dragging the Luminance, Detail, or Contrast sliders. This shows the image in black and white so that you can better evaluate the noise reduction effect.

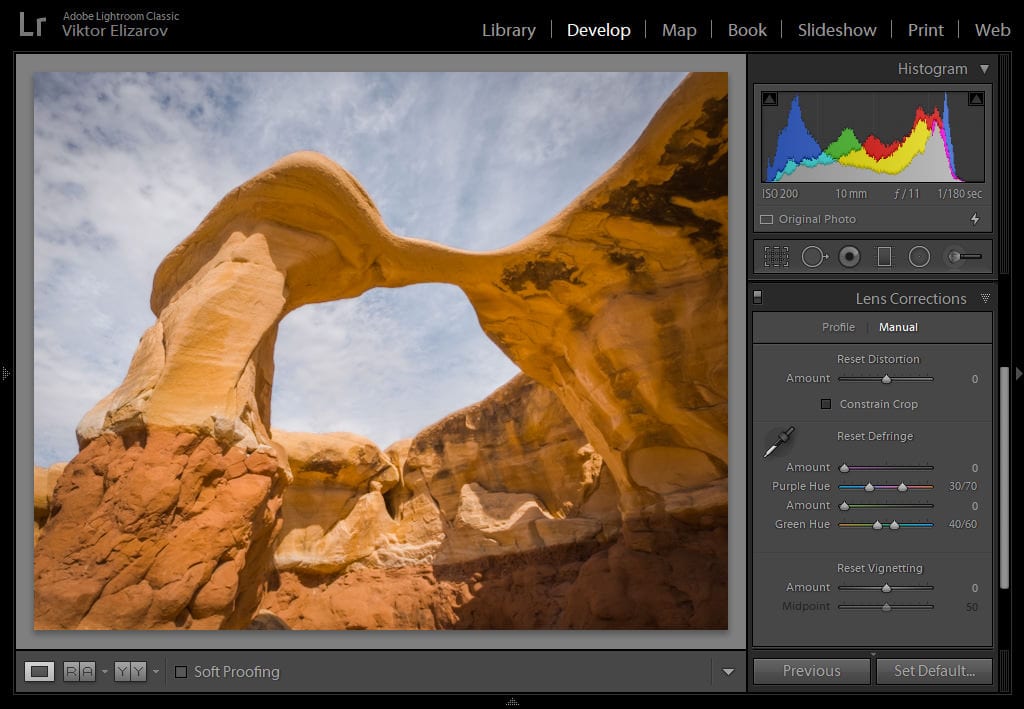
Lens Correction Panel
By using the Alt/Option keyboard modifier, you have access to the following reset options: Reset Amount, Reset Distortion, Reset Defringe, Reset Vignetting.

Visualizing Defringing
Once again, the main power of the Alt/Option key in the Defringe section of the Lens Correction Panel is the ability to visualize the affected areas. As a rule, the chromatic aberration affects small areas of the photo around the edges. It is easy to overcook defringing and alter the colors of the adjacent areas.
Hold the Alt/Option key down while moving the purple or green Amount sliders to see the areas affected by the editing sliders from light grey to pure black. The unaffected areas of the image are shown in white.
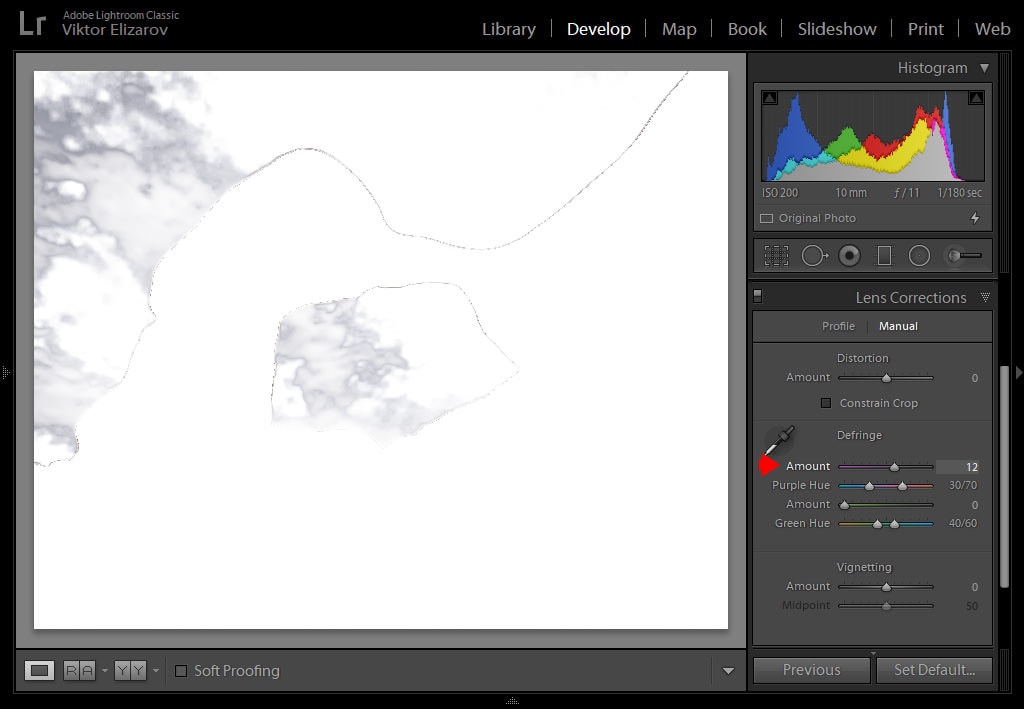
Hold the Alt/Option down while dragging the purple or green Hue sliders to visualize the range of tones affected by the editing sliders.

Transform Panel
With the Alt/Option keyboard modifier, you have the ability to reset the editing sliders in the following areas: Reset Upright and Reset Transform.

Effects Panel
The Reset Post-Crop Vignetting and Reset Grain appear when you hold down the Alt/Option key.
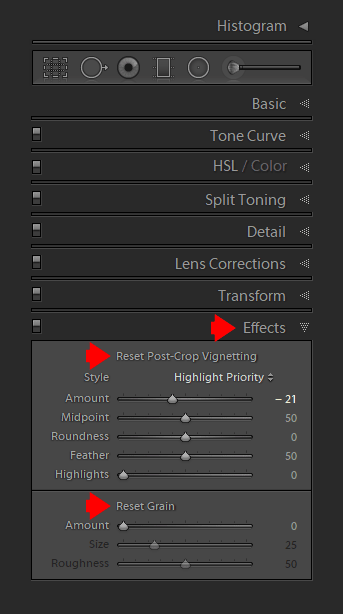
Visualizing Vignetting
Hold down the Alt/Option key while moving the Midpoint, Roundness, Feather, or Highlights slider to see the effect of vignetting if the Amount value was set to +100 or to -100. This is a very useful visualization tool to properly estimate the amount and shape of vignetting that is required for any given photo.

Calibration Panel
Hold down the Alt/Option key to access the reset options.

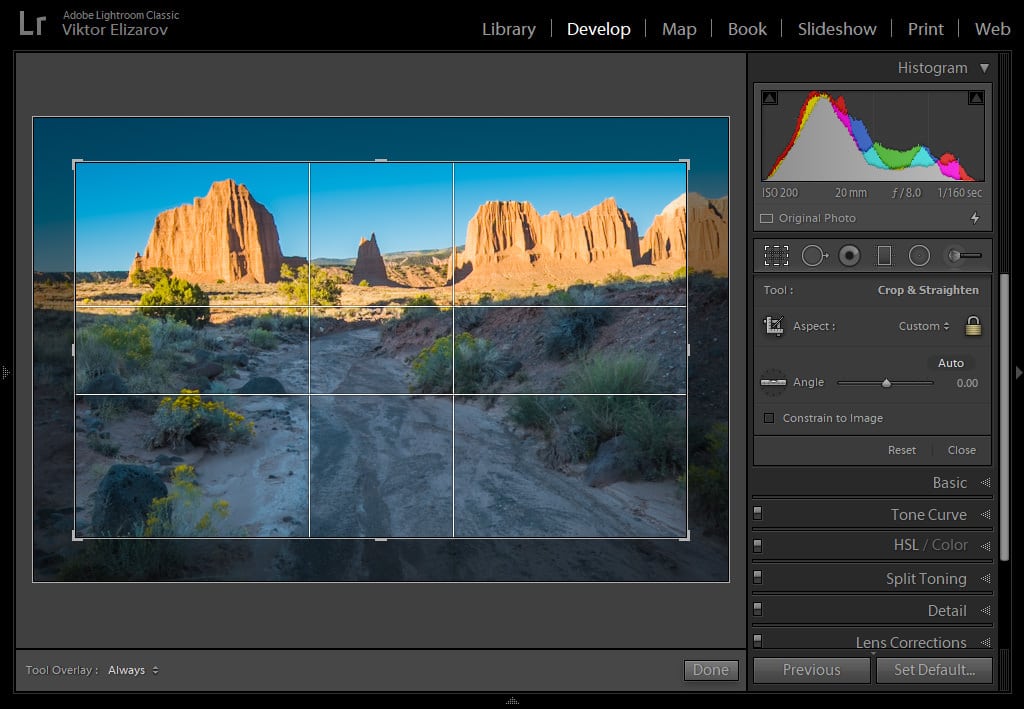
Crop Overlay
The Alt/Option key does not invoke the reset options in the Crop Overlay Panel because the panel has a dedicated reset button.
Crop to the Center
The Alt/Option key in the Crop Overlay Panel allows you to crop an image to the center rather than to the edge. This modifier migrated to Lightroom from Photoshop and Illustrator.
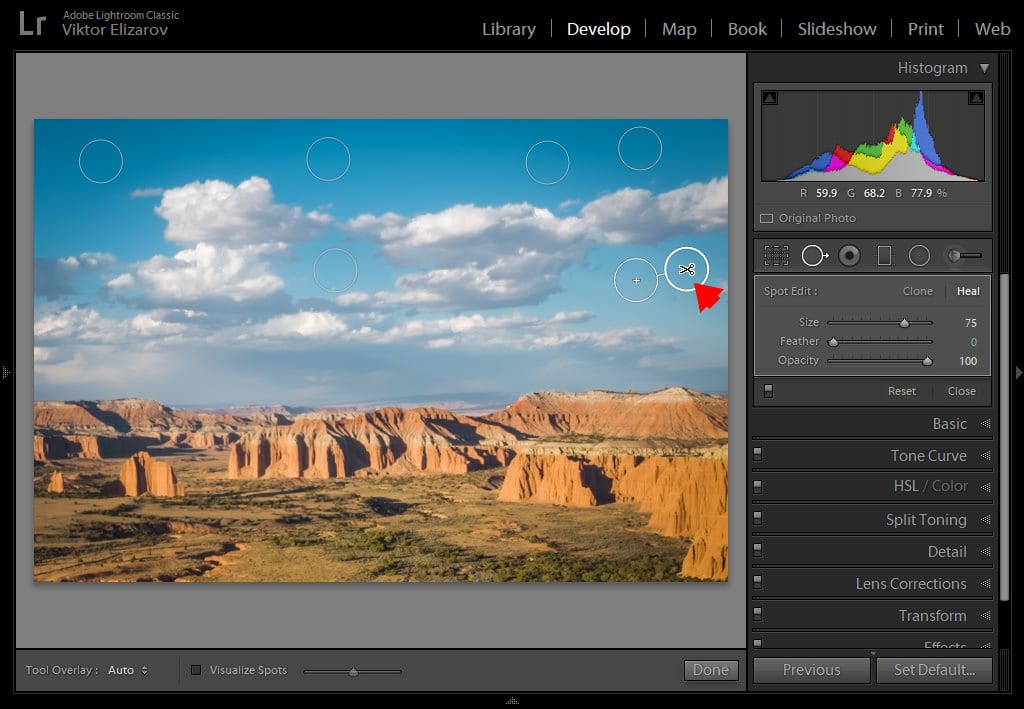
Spot Removal
In the Spot Removal Panel, the Alt/Option performs only one function—it changes the cursor from a rounded brush to a scissor icon. This allows you to delete any unnecessary spots by clicking on them with the scissors.
Graduated Filter
In the Graduated Filter Panel, the Alt/Option performs two very useful functions beyond the common reset functions.

Changing the Direction of the Gradient
First, you can hold down the Alt/Option key and drag the edge of the selected graduated filter toward the center to invert its effect to the other side of the image. This is extremely useful.
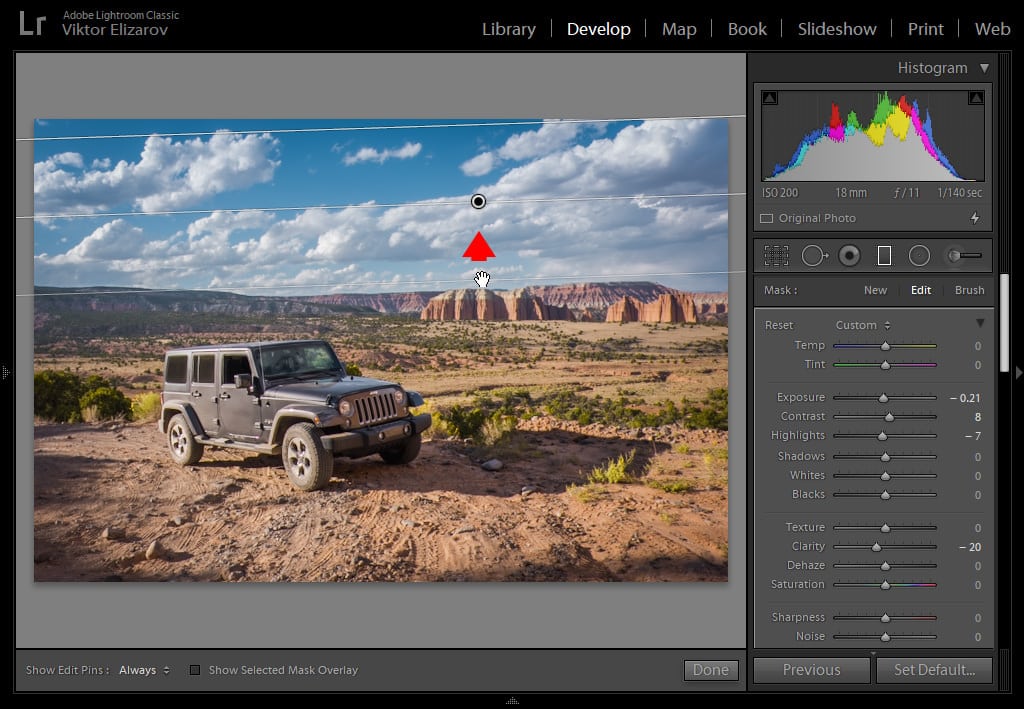
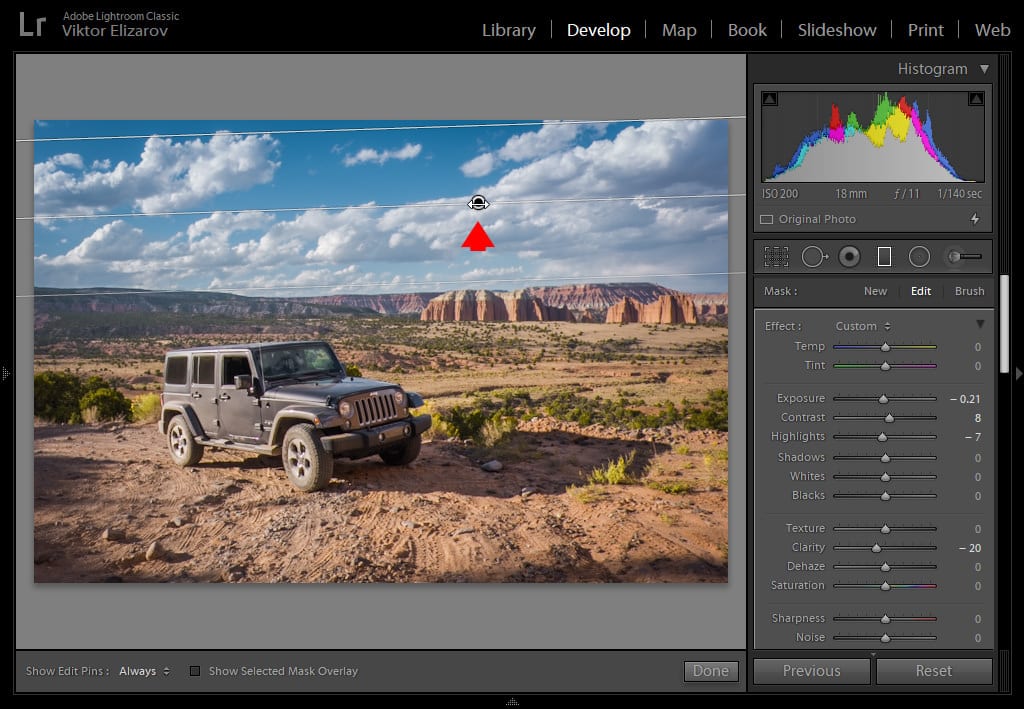
Adjusting Exposure
Second, you can hold down the Alt/Option key and move the mouse to the center of the selected graduated filter to change the cursor to a two-headed arrow. You can now drag the mouse to the left or right to increase or reduce the exposure value. I use this function quite often.
Radial Filter
In the Radial Filter, the Alt/Option modifier works similar to the Graduated Filter. You can use it to reset the 17 editing sliders to the default value of zero in one click.

Changing Exposure
You can also change the Exposure value of the selected Radial Filter by dragging the mouse to the left or to the right. Do not forget that you must press the Alt/Option key and move the mouse over the center of the filter before you can affect the Exposure change.

Filter Brush
By holding down the Alt/Option key when the Filter Brush tool is active, it alters its functionality in two ways.
First, it changes the Effect label to a clickable Reset button for a quick way to reset all the editing sliders to zero.
Switching from Brush to Eraser
Second, it changes the filter from the Brush Mode to the Eraser Mode. This is incredibly useful when retouching portraits. You can erase unwanted edits by simply pressing the Alt/Option key. Plus, you can change the size of the Brush and the Eraser independently using the ] and [ shortcuts.

Setting the Default Develop Setting
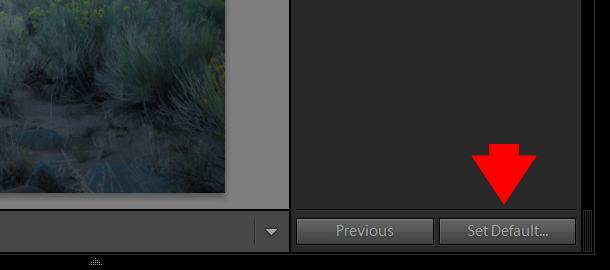
When you are in the Develop Module and press the Alt/Option key, the Reset button at the bottom right corner of the UI changes to the “Set Default…” button.
By clicking this, you are presented with the following dialog box:
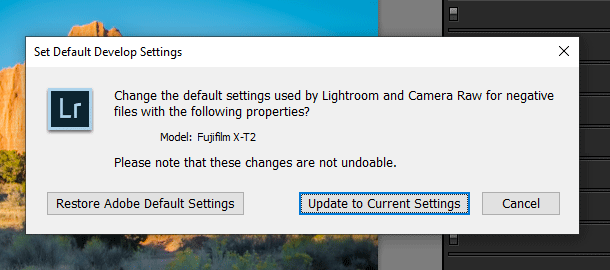
If you click the “Update to Current Settings” option, Lightroom will use the current settings as a default for any photos taken with that particular camera model. In my case, the Fujifilm XT2.
Let’s see when this feature might be useful.
Lightroom does not handle the Fujifilm RAW files very well when applying Sharpening. It produces unnatural, wormlike artifacts. I could set the Sharpening value to zero and hit the “Update to Current Settings” option. From that moment, all my Fujifilm XT2 files will have a Sharpening value set to zero during import. All my Sony images will have the Adobe default value of 40.
I do not use this feature at all.
Library Module
In the Library Module, the Alt/Option key does not produce as many new options or functions compared to the Develop Module.
Solo Mode
Hold down the Alt/Option key and click on the header of any panel (left or right) to set the entire panel to Solo Mode.
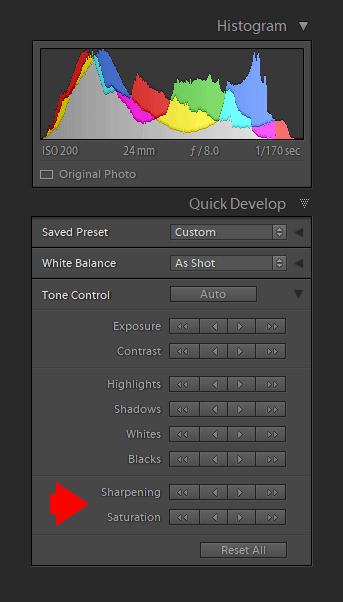
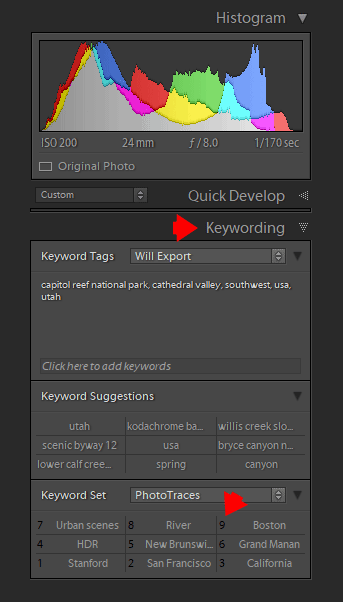
Quick Edit
In the Quick Develop Panel, press the Alt/Option key to access the Sharpening and Saturation controls, which are hidden by default.
Keywording
Hold down the Alt/Option key to add keywords to a selected photo by hitting the numbers on the keyboard.
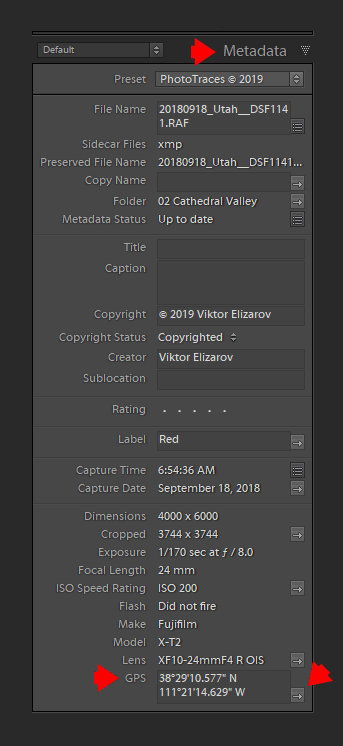
Metadata
Hold down the Alt/Option key and click the arrow next to the GPS field to trigger Google Maps to open in your default browser with the selected location where the photo was taken. Please note that this will not work if the GPS field is empty.
Export Module
The only thing the Alt/Option key does in the Export Module is to enable or disable the Solo Mode.

Conclusion
I consider the Alt/Option Keyboard Modifiers to be some of the most useful and lesser known functions of Lightroom. I do not believe that you have to learn and memorize all of them. Simply adopt the modifiers that are the most useful and impactful to your workflow and stick with them.
Here is a list of my favorites and the ones I use the most often:
- Reset – It is easy to remember and works almost everywhere
- Adjustment Brush – Switches from Brush to Eraser
- Basic Panes – Shows Highlight clippings
- Spot Removal – Deletes unwanted spots