If you are still looking for a Lightroom alternative, then my Luminar 4 Review article is a must-read!

I am not sure about you, but I always get excited about new releases from Skylum, the company behind the Luminar 4 RAW editing program. Skylum has a reputation for creating the most innovative features and editing tools that rely heavily on artificial intelligence (AI) and machine learning.
What is Luminar?
Luminar is a photo editing program that was originally created by Skylum (formally known as MacPhun) as a Mac-only RAW editor. The program caught the attention of many photographers because it did not follow in the steps of industry leaders Lightroom and Capture One. Instead, Sklyum created a completely different experience that relied heavily on filter effects and AI-powered tools.
When Skylum released the Windows version of Luminar in 2018, it immediately became the darling of newcomers in the world of photography because of the simplicity and intuitiveness of the program compared to Lightroom and Capture One.
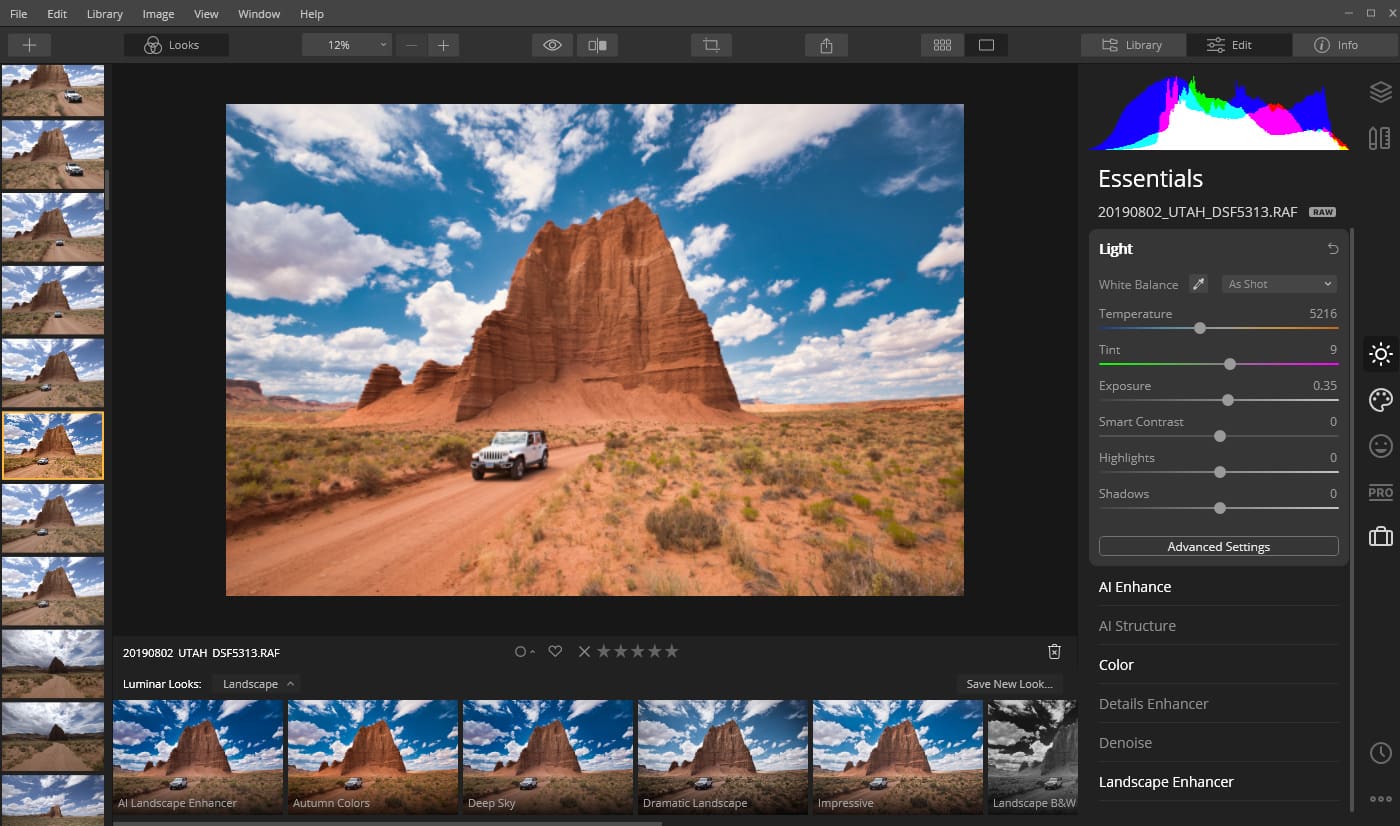
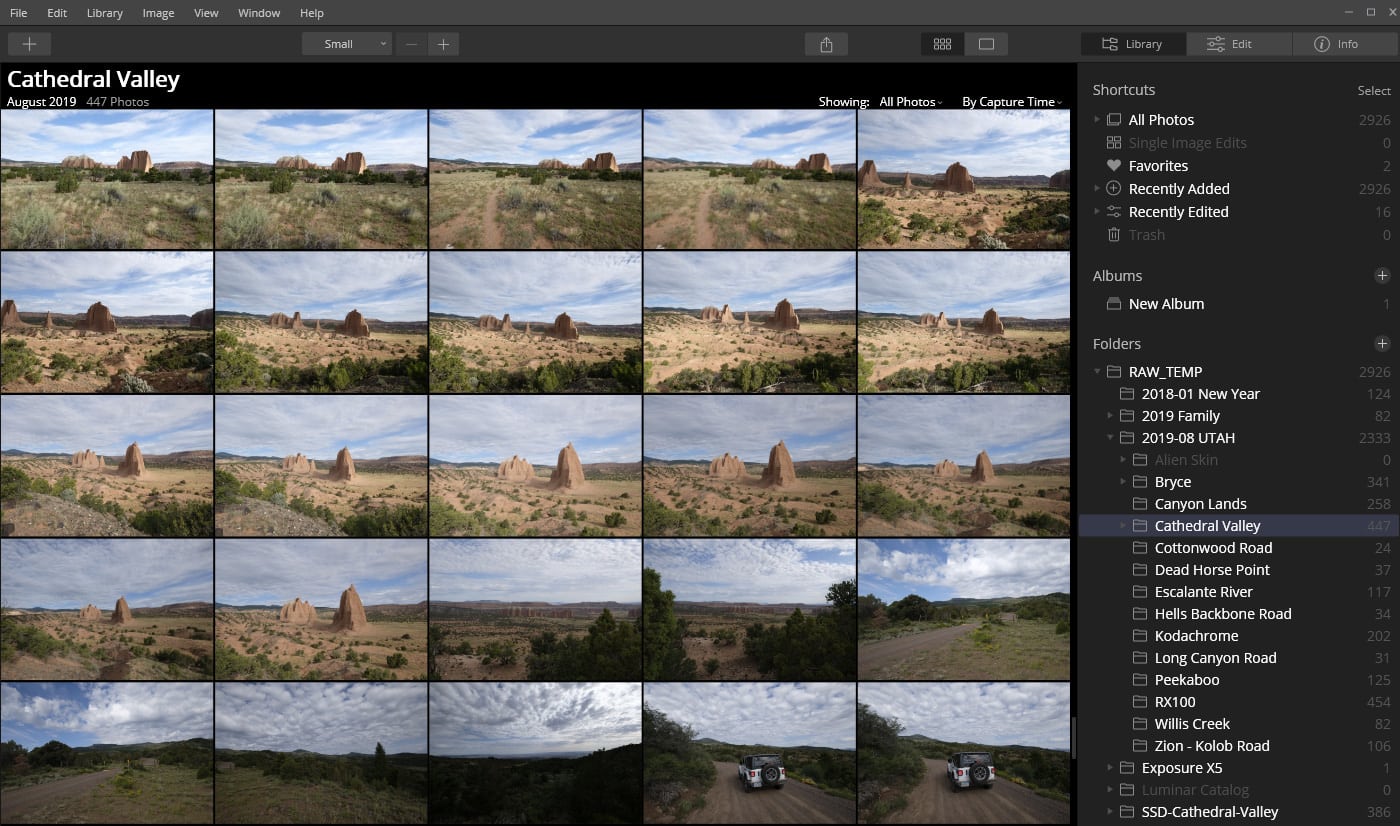
The popularity of Luminar exploded even further when they introduced the Library module to the program, which made it a viable option not only for editing photos but also for managing and organizing large photo libraries.
Luminar 4 Review
Luminar 4 is the second generation of the program since the introduction of the digital asset management (DAM).
It is not an upgrade to Luminar 3 but is a new application. When you install Luminar 4, it does not replace the Luminar 3 installation. Luminar 4 acts as a stand-alone program. You can run both versions of Luminar simultaneously.
My understanding is that since Skylum completely rebuilt the editing module of the program and introduced a myriad of new tools, the upgrade was not possible due to compatibility issues.
If you are a Windows user, I am happy to inform you that, for the first time in Luminar history, both versions of the program (Mac and Windows) are identical in terms of features. For years, the Windows version was behind the Mac version.
What I Like About Luminar 4
Today, I am offering my feedback on running Luminar 4 on my Windows desktop computer for one month. Since the features for both the Mac and Windows versions of Luminar is identical, I do not expect the Mac version to be any different.
AI Editing Tools
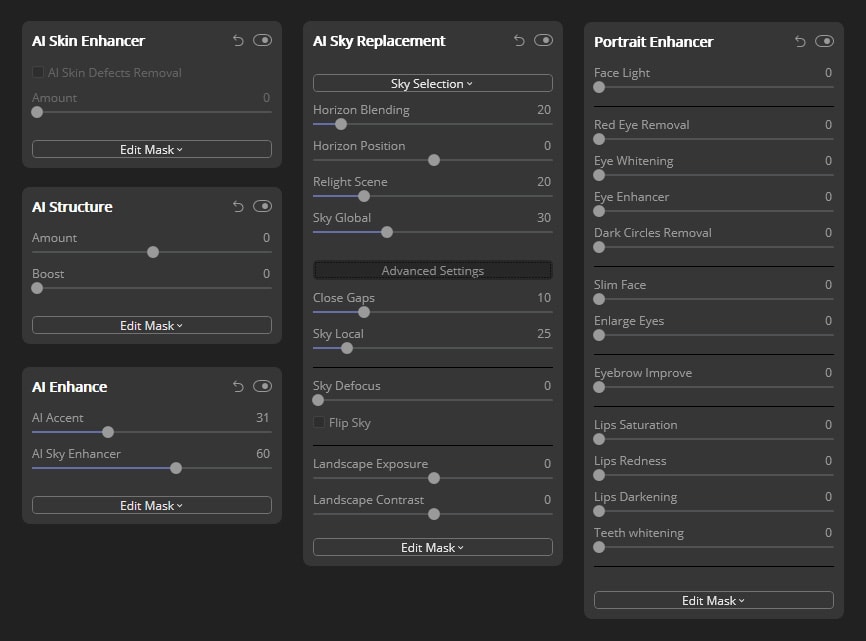
The biggest buzz about Luminar 4 is the addition of a slew of artificial intelligence (AI) tools.
These days, I roll my eyes when I hear AI abbreviations used in marketing campaigns. AI is such an overused word that it seems like even the cereal sold in grocery stores is powered by AI.
So, when I first heard the announcement about Luminar 4 and its heavy use of AI, I rolled my eyes and did not pay much attention.
But I was wrong. The AI tools in Luminar 4 are very useful, useable, and effective.
Every editing program, including Lightroom and Photoshop, use some of kind of tools powered by AI and machine learning. The effectiveness of these tools is questionable and progressing slowly. But that looks to be changing with the latest release of Luminar 4, which has taken a commanding lead in regard to AI advancements.
The effectiveness of AI is both exciting and scary because it shows us a glimpse of the near future.
Sky Replacement
The Sky Replacement tool generated the most excitement among the photo community. Since I know firsthand that the process of replacing the sky in a landscape photo can be a tricky and time-consuming process, I was curious about its effectiveness.
To my surprise, the tool works extremely well and the percentage of photos where additional manual tinkering is unnecessary is extremely high.
Normally, sky replacement is performed in photo editing programs like Photoshop. Before you can proceed with the sky replacement, you have to rasterize the image. In Luminar 4, you can replace the sky in your photo and continue editing in the RAW environment.
The most impressive functionality of the AI-powered tool is how well it detects the area of the sky. Even when you have a photo where the sky is obstructed by a tree, the tool manages to pinpoint the disjointed areas of the sky. I was impressed.
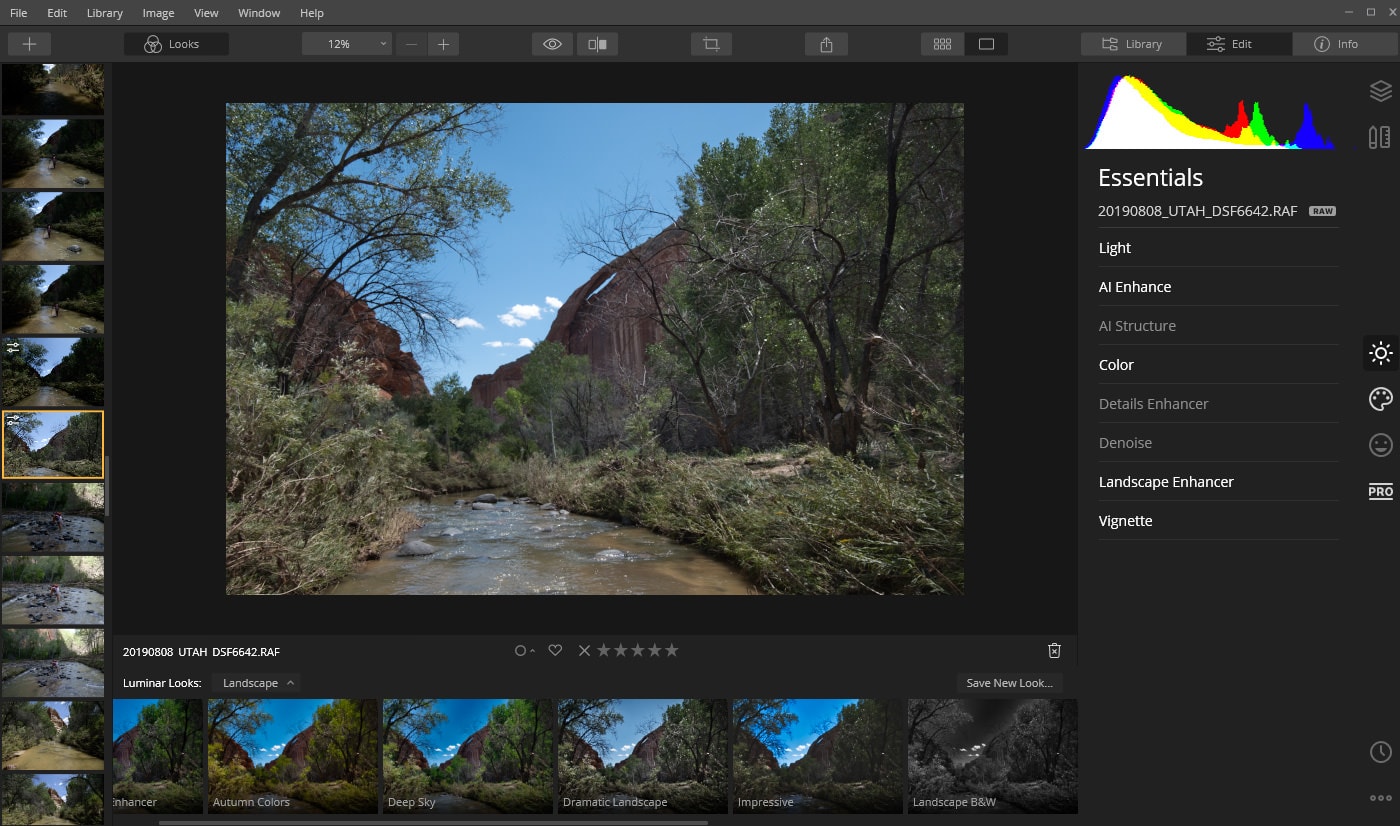
The Sky Replacement tool also comes with a library of sky images ready for use, but you can also use your own photos. This is when the sky library that I have been collecting for years comes in handy.

On top of the AI-powered functionality, you also have an array of tools to manually finetune the images.
Even though the Sky Replacement tool is very effective, I do not find that it is critical for my workflow. If I count how many times I had to perform sky replacement in the last 12 months, that number would only be two or three. It is fun to play with, but this is a tool I will only use occasionally.
AI Accent + AI Sky Enhancer
The AI Accent and AI Sky Enhancer tools are located under the AI Enhance editing panel. I found the combination of these two sliders to be the most useful tools in the entire application.
The tools have the ability to distinguish landscapes from photos with people and apply different editing algorithms. I assume the feature migrated to Luminar from the fully automated photo editor, Lemur, which is also offered by Skylum.
I was most impressed by how effective AI tools are when editing landscape photos. AI Accent is probably using the same algorithm as the Sky Replacement tool because it perfectly distinguishes the area of the sky from the rest of the image and applies different edits to both areas. What is most important from my perspective is that it does not oversaturate or over-sharpen the area of the sky.
If you feel that the sky in your landscape photo needs more punch, simply jump to the AI Sky Enhancer.
You can edit most of your landscapes with only these two sliders and finish by adding some vignetting at the end.

This is mind-blowing.
I can see how this simple editing workflow is popular among beginners and those photographers who do not want to invest a lot of time in learning photo editing.
AI Structure
This tool detects areas of the sky and areas of human skin and protects them from over-sharpening. I assume that the AI Structure tool uses the same algorithms as the rest of the AI-powered tools.
AI Skin Enhancer
The AI Skin Enhancer is another tool where, with the help of a single slider, you can drastically improve portrait photos. Once again, the tool accurately detects and smooths areas of the skin. It even has a Skin Defect Removal option that automatically removes skin imperfections like pimples.
To edit the portrait above, I used only AI-powered portrait tools. It took me probably 30 seconds.
I found the AI Skin Enhancer to be very effective, but the Skin Defect Removal tool products hit-or-miss results.
I can see how easy it would be to edit a bunch of family vacation photos in just a few minutes.
Layers
Layers became a standard feature for almost all RAW editors, except Lightroom of course. Layers make life easier for people like me who perform extensive editing on most photos.
What is unique about the Luminar Layer functionality is that you can create an Adjustment Layer as well as an Image Layer. This means that you can overlay the original photo with another image and blend them together using the masking tools and opacity functionality.
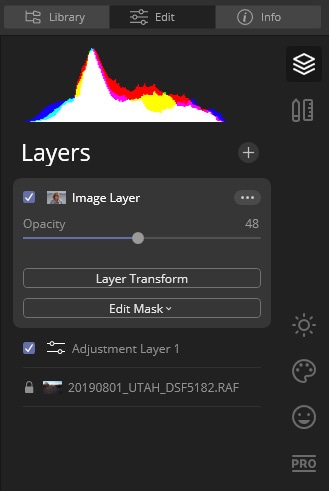
This is where Luminar enters the Photoshop realm by blurring the line between photo RAW editors and photo composting programs. I absolutely welcome such versatility.
Masks Everywhere
It is hard to impress anyone with a masking functionality in modern RAW editors, but Luminar managed to do just that when they implemented masks with a twist.
In Luminar, you can add transparency masks individually to any editing panel. For example, if you apply sharpening by using the Detail Enhancer to the entire image, you can add a mask to only the Detail Enhancer panel. This masks the area where sharpening is not needed, like the area of the sky in landscapes.
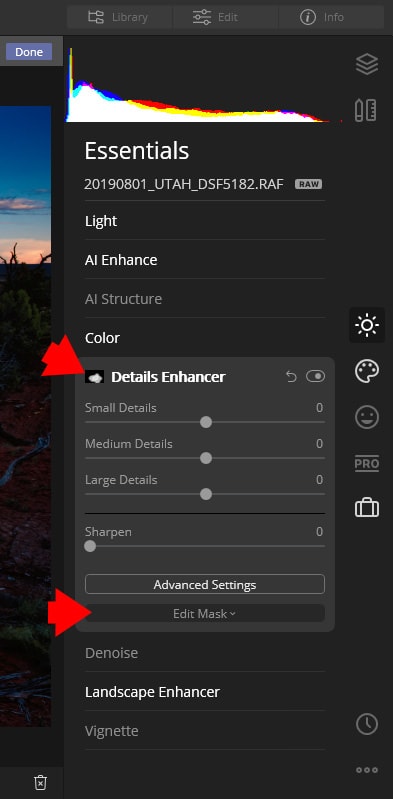
Once again, this is Photoshop-like selective editing performed in a non-destructive RAW editing environment.
Of course, you can also add a transparency mask to the entire layer in the Layer panel.
Dedicated Portrait Module and Tools
This is a new trend that I see in a number of RAW editors to create a set of tools dedicated exclusively to portrait retouching. I think it absolutely makes sense because the way you retouch portraits and edit landscapes requires a completely different set of tools.
The center of the Portrait Module is the AI Skin Enhancer. But, besides the AI-powered tool, you have plenty of options for manual editing.
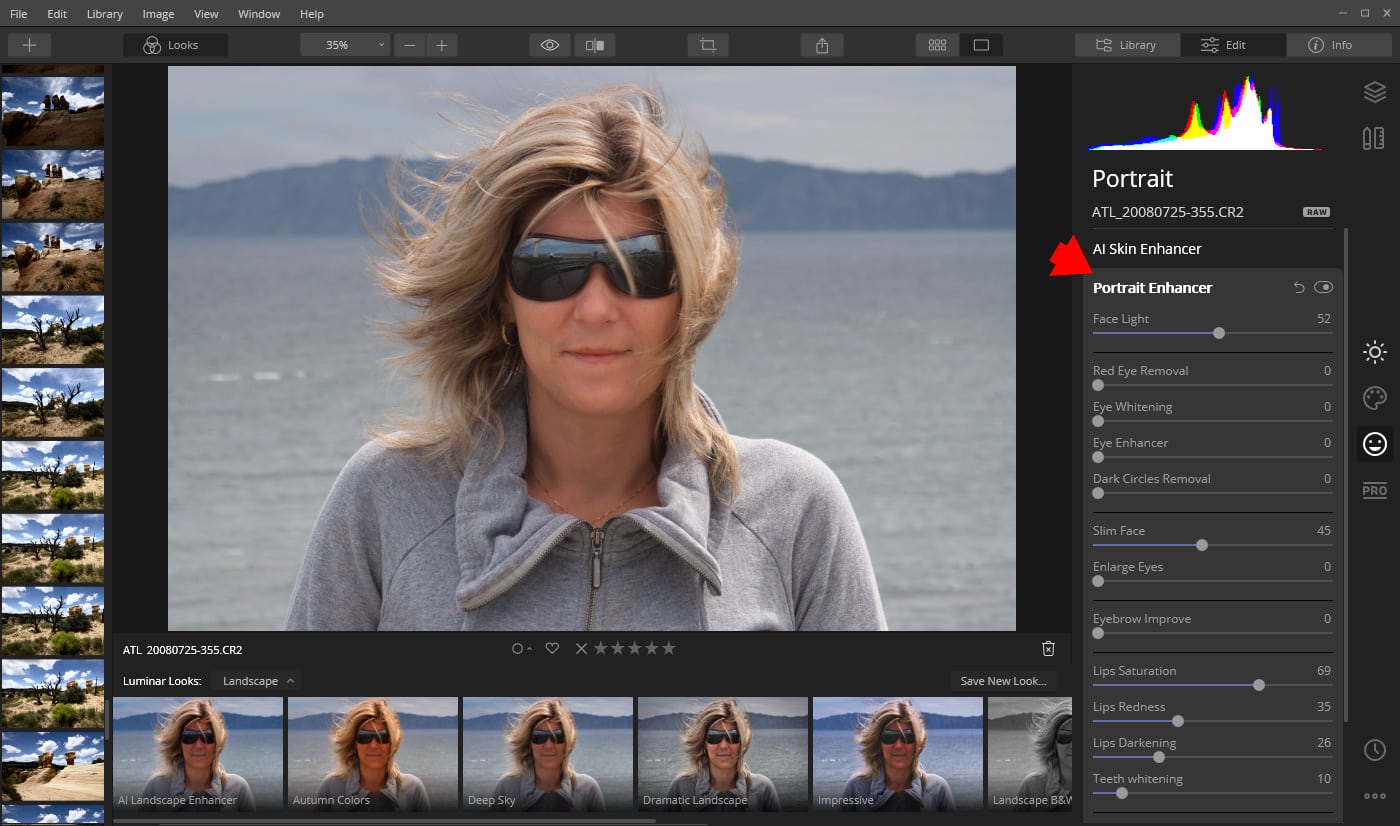
Even the manual options are AI-driven. You have a dedicated slider for lips, eyebrows, eyes, and dark circles. The program identifies those areas pretty accurately.
The High Key and the Orton Effect panels complete the portrait set of tools.
Creative Filters
To better explain Creative Filters is to say that they work similar to Nik Effects. The beauty of Luminar’s Creative Filters is that you can apply them on RAW images without leaving the program and without the need to rasterize the RAW images.
One of the most popular filters that caught the attention of many photographers in the original Luminar release is the Sunrays. You have plenty of controls to simulate and customize the effect of sunrays. This can be very useful when you want to enhance a boring area of the sky.
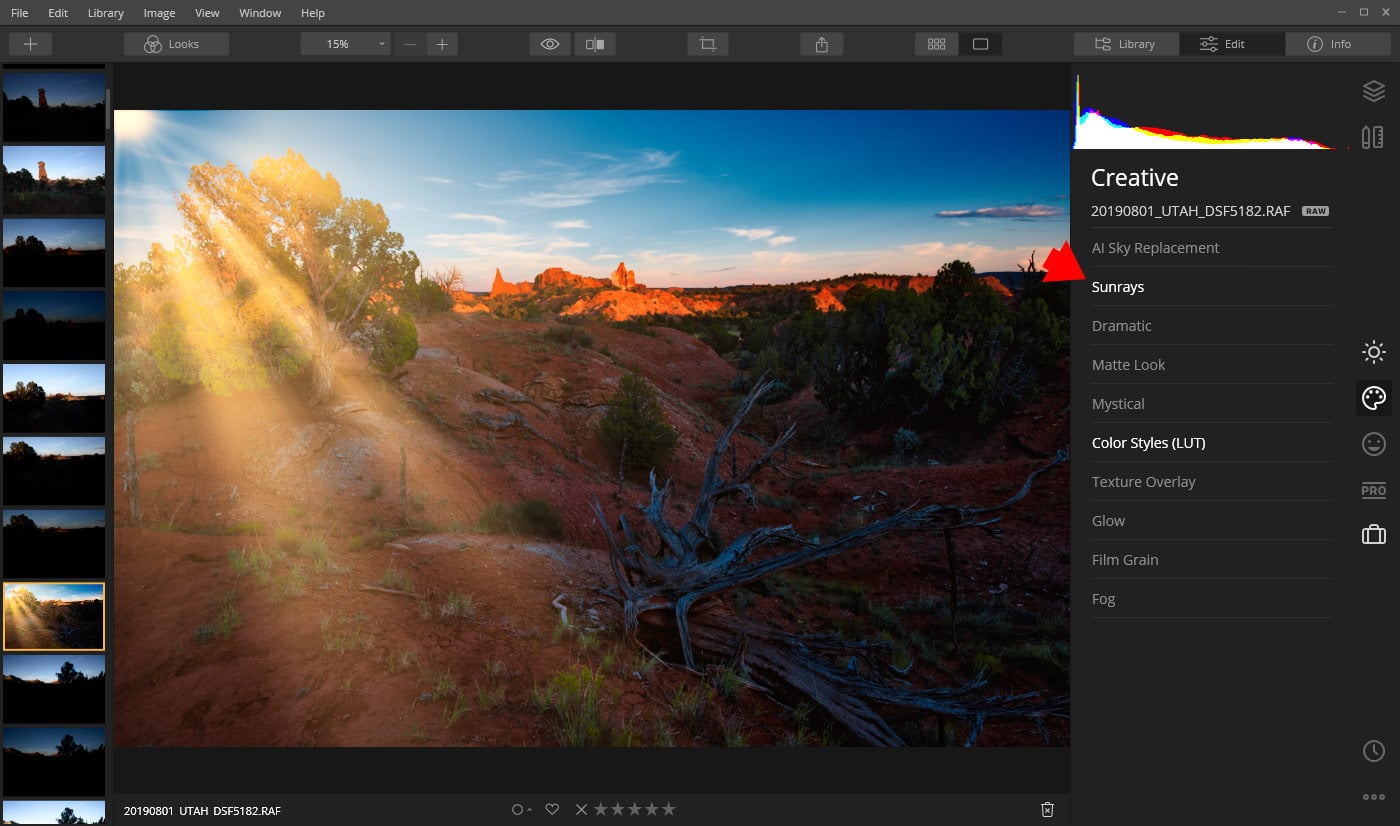
In the Creative Module, you will find a dedicated panel for LUTs, Texture Overlay, Film Grain, and so on.
SmugMug Integration
You can now publish photos from Luminar directly to your SmugMug account.
If you are not sure what SmugMug is, read my review here: The Way I Use SmugMug in My Photography Business
What I Do Not Like About Luminar 4
Performance
When Luminar was a single image editing program, it was lightning fast and responsive. Since the addition of the Library, the program’s performance has suffered. I think Skylum underestimated the complexity behind integrating the Library and Editing modules.
The performance of Luminar 4 is much improved compared to Luminar 3. The Library module navigation is fast; switching from the Library to the Editing module is quick and the Editing module tools are extremely responsible. The only area that is lagging is when you have to switch from one RAW image to another. This takes a few seconds. The process of culling images when you jump from one RAW photo to another in quick succession becomes problematic.
I am fairly certain the performance issues will be improved in the upcoming updates.
I can only give you feedback as a Windows user. Mac users seem to have fewer issues with performance.
Lack of Features in Library Module
The Library Module is the latest addition to the program and it shows. It lacks some fundamental features like a search functionality based on image metadata, keywording, watermarking, etc. The file name is not shown when you are in grid view. This makes it almost impossible to locate the right image.
According to the Skylum roadmap, the metadata search and keywording features are coming in the beginning of 2020.
Limited Export Functionality
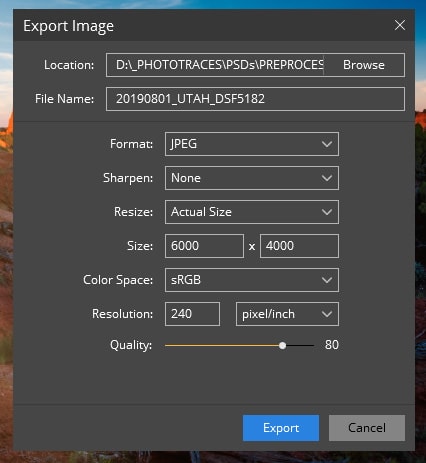
There is no way to create export presets. You have to specify export settings for every export.
Presets (Looks)
The Preset Module (recently presets were renamed as Looks) is primitive. The Looks panel is permanently located at the bottom of the screen and is displayed in only one size: large thumbnails. There is no way to change the size of the thumbnails or opt for a list view.
You can create your own presets but, after creating a preset, you cannot update it. There is no functionality to create preset sets on your own. You have to contact Skylum and ask them to compile a collection.
Using Luminar as a Plugin to Lightroom
Luminar 4 comes with plugins you can install to Lightroom. The logic is that you can use Lightroom as your primary editing software and use Luminar as a plugin. When you finish your Luminar edits, you can bring the image back to Lightroom.

From my perspective, this does not make any sense.
Let me explain.
There are two main reasons why people want to replace Lightroom:
- First, the recurring subscription model.
- Second, the complexity.
Using Luminar as a plugin to Lightroom does not solve anything. You have to keep a subscription to Lightroom and buy Luminar. You also have to deal with the complexity of Lightroom and learn another editing software that is not very similar to Lightroom.
As I said, it does not make any sense.
Who is Luminar for?
I can see the following groups of photographers who would benefit from using Luminar 4:
- People who want to organize their photos but only occasionally need editing capabilities. By occasionally, let’s say three to four times a year—after a family vacation, the Christmas holiday, or a birthday celebration. Instead of paying a monthly subscription for a program that’s rarely used, Luminar is a perfect solution.
- Luminar is also the ideal solution for newcomers who want to learn photo editing but are intimidated by Lightroom’s complexity. Without the complexity of the catalog and with the power of semi-automatic AI tools, the learning curve is easy in Luminar.
- Photographers who are using Lightroom and Photoshop as primary editing tools, like myself, but what to have access to the innovative AI-powered tools of Luminar 4.
- Updated. When you cancel Lightroom subscription, you lose access to the Develop Module but still have a fully functional Library Module to manage your photo collection. You can easily replace the Development Module with Luminar and keep using Lightroom as digital asset management (DAM).
Luminar 4 Price
- New customers pay $79
- The upgrade from Luminar 3 is $69

