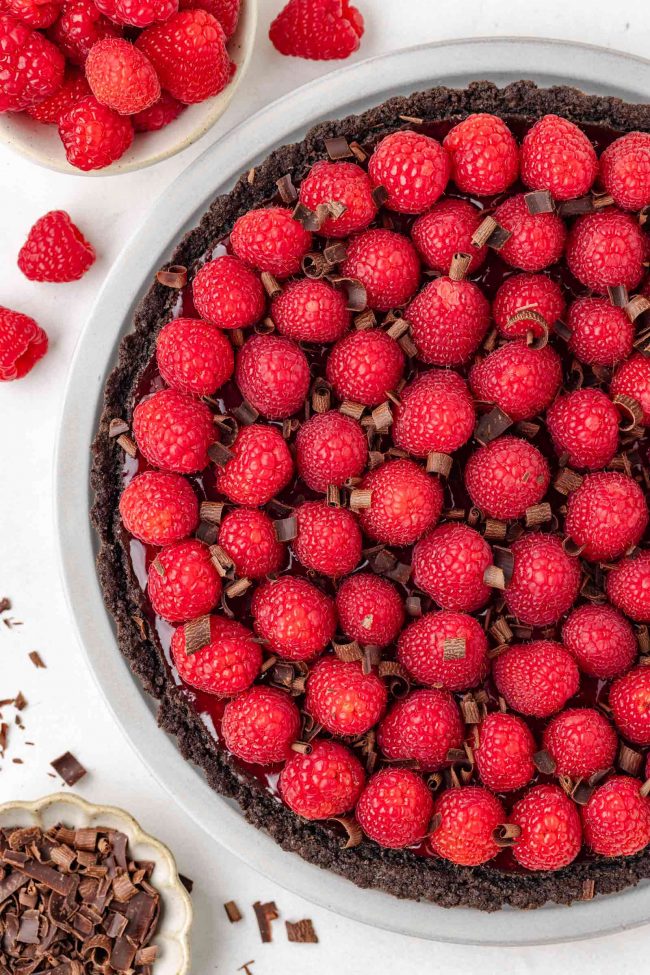
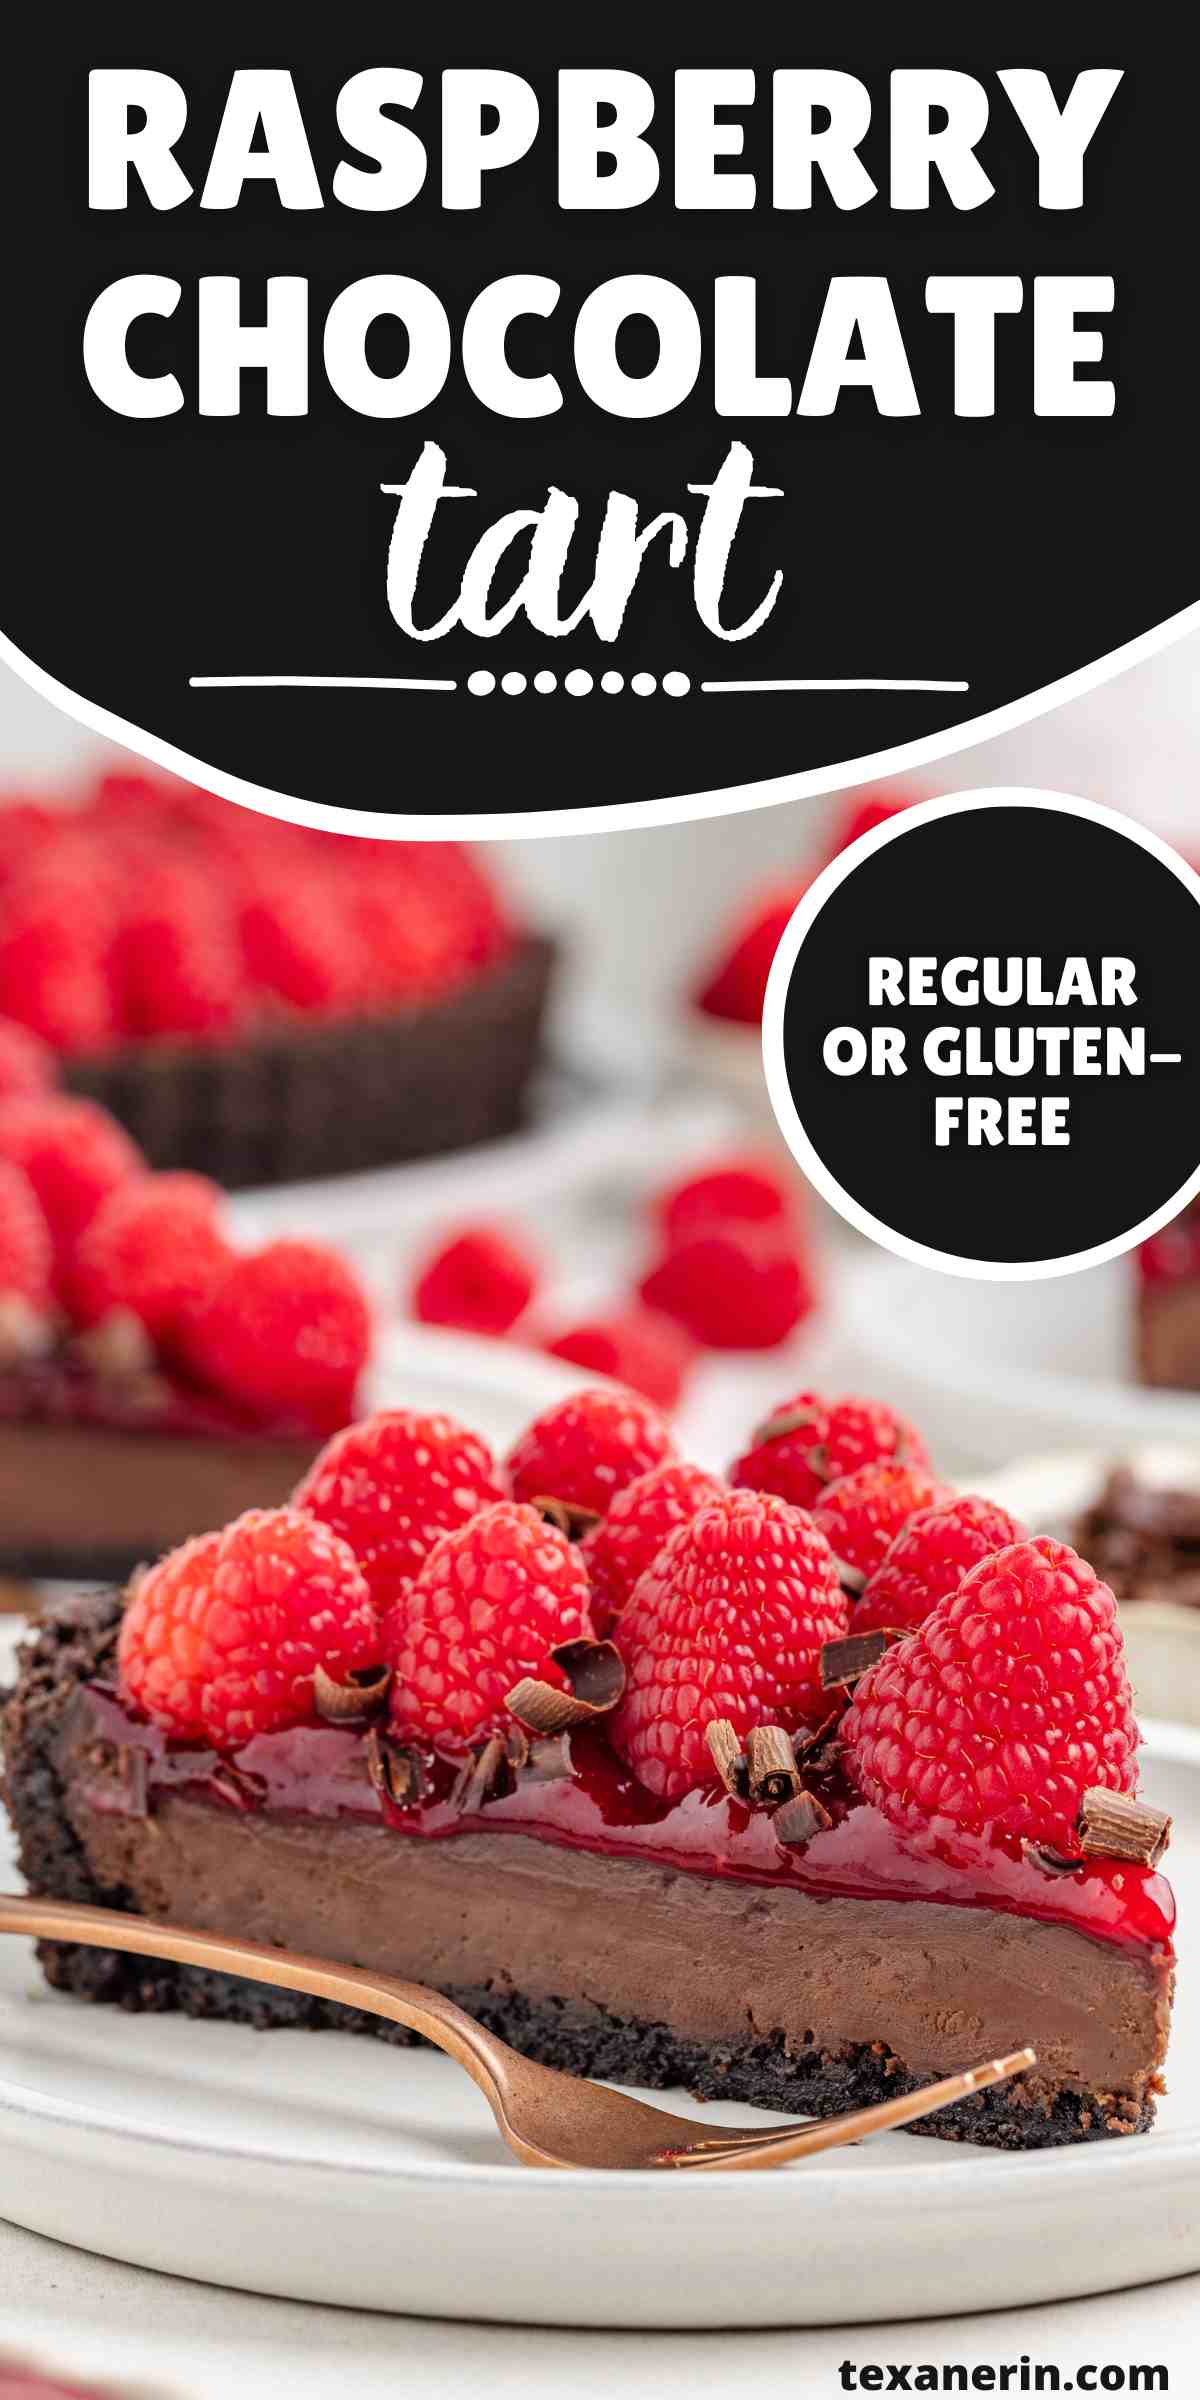
This raspberry chocolate tart is an indulgent dessert that combines a velvety chocolate filling, an easy Oreo crust, and raspberry sauce. It’s perfect for Christmas, Valentine’s Day or whenever you have an abundance of fresh raspberries that you’d like to use up! It can be made regular or gluten-free, and there’s also an option for a totally homemade chocolate cookie crust in case you don’t want to use Oreos.
The Raspberry Tart I posted recently has a graham cracker crust, vanilla cheesecake filling and the same raspberry sauce recipe as today’s tart. That recipe is no-bake, except for the raspberry sauce, which is made on the stovetop.
I wanted to make something similar but with chocolate filling and a chocolate crust. I thought it’d be simple. I thought I could just make this Chocolate Mousse Pie and top it with raspberry sauce and raspberries.
I was really surprised when I tasted it. It was terrible! All you could really taste was cocoa powder and the tanginess of the raspberries.
It could be that topping the mousse pie with just raspberries would work out well, and I’m pretty sure it would, but the contrast between the sauce and mousse filling was definitely not a good thing.
This chocolate raspberry tart is baked, but I can’t really say it’s any more effort than the no-bake mousse filling of the mousse pie. The prep time is actually less, and it’s less fussy as well.
I prefer the richer, fudgier filling in today’s tart. So, if you’ve been searching for a chocolate tart that’s both easy and impressive, this is it.

Ingredients
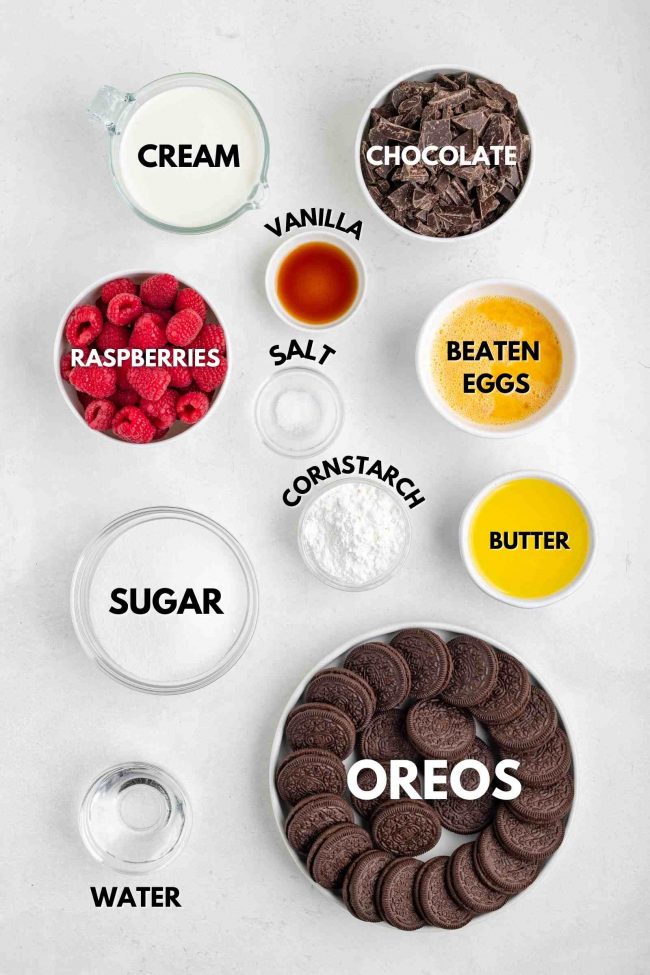
Here’s an overview of what you’ll need.
Just like with the Triple Chocolate Cheesecake I posted recently, you have two options for the crust. A quick homemade chocolate cookie crust or an even quicker Oreo crust.
If making the homemade crust, you’ll need flour and cocoa powder in addition to what you see in the photo. And you won’t need the Oreos.
Homemade crust option
If you don’t want to use Oreos for the crust, I have a great alternative!
I used the same crust in my Mint Chocolate Tart, Baileys Cheesecakes and Strawberry White Chocolate Cheesecake Bars. It’s super easy, and it’s only a few ingredients.
There’s no need to make a batch of cookies and crush them up. All you do is mix everything together in the bowl, pat into the pan and bake.
Chopped chocolate vs. chips
You can use either for the filling, but chopped chocolate melts more evenly than chocolate chips. This is because it has a larger surface area and doesn’t contain the stabilizers that help chocolate chips hold their shape during baking.
Additionally, chopped chocolate offers better texture and consistency. Chocolate chips often include additives like lecithin, which can result in a thicker, less smooth coating when melted. In contrast, high-quality chopped chocolate typically produces a smoother and more luxurious coating.
Finally, chopped chocolate, especially from a high-quality chocolate bar, usually boasts a purer and richer flavor compared to most chocolate chips.
Can I omit the raspberry sauce?
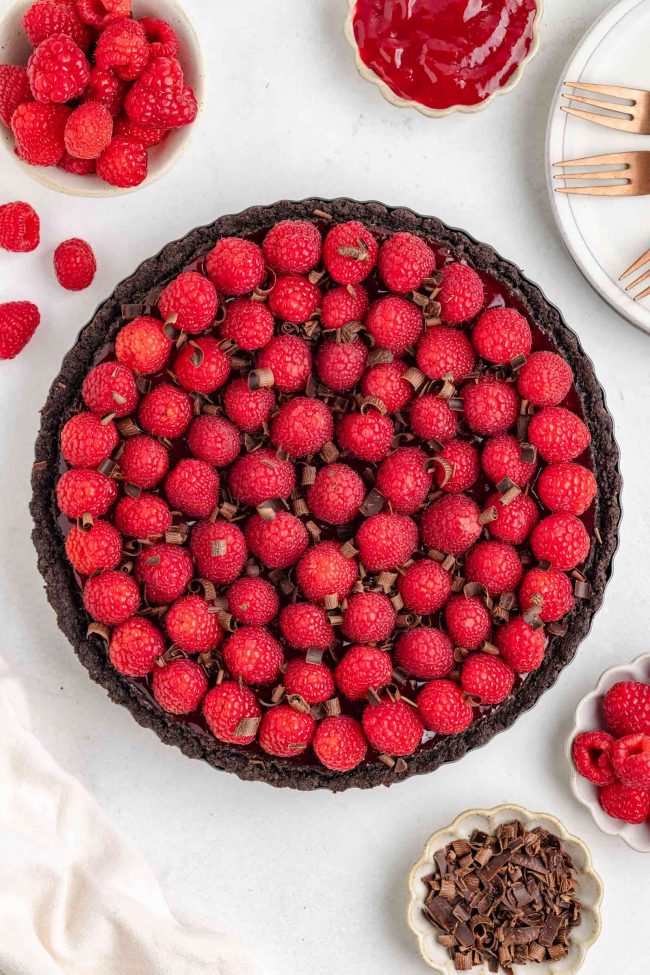
Yes, you can omit the sauce if you’d like. I felt that calling this a raspberry tart just because of a few raspberries on top felt a bit underwhelming.
That’s why I added the sauce, and I’m so glad I did. It’s an incredible addition that really elevates the tart.
Can I use a different fruit for the sauce?
Different types of fruit require a different amount of sugar and cornstarch. I suggest using a recipe specifically designed for the fruit you have in mind to get the best results.
If you’d like a cherry option, I think these Cherry Preserves would be great on top!
If you have access to frozen tart cherries, the topping on this Tart Cherry Pie would be great. At least I think so.
I was very wrong about the chocolate mousse pie and the raspberry sauce in this recipe, but I think that was a problem of the mousse in combination with a fruit sauce. I think the filling of today’s recipe just goes much better with fruity toppings.
How to make
The full recipe can be found below. I’m adding the text that’s on the collages for the people using a text reader.
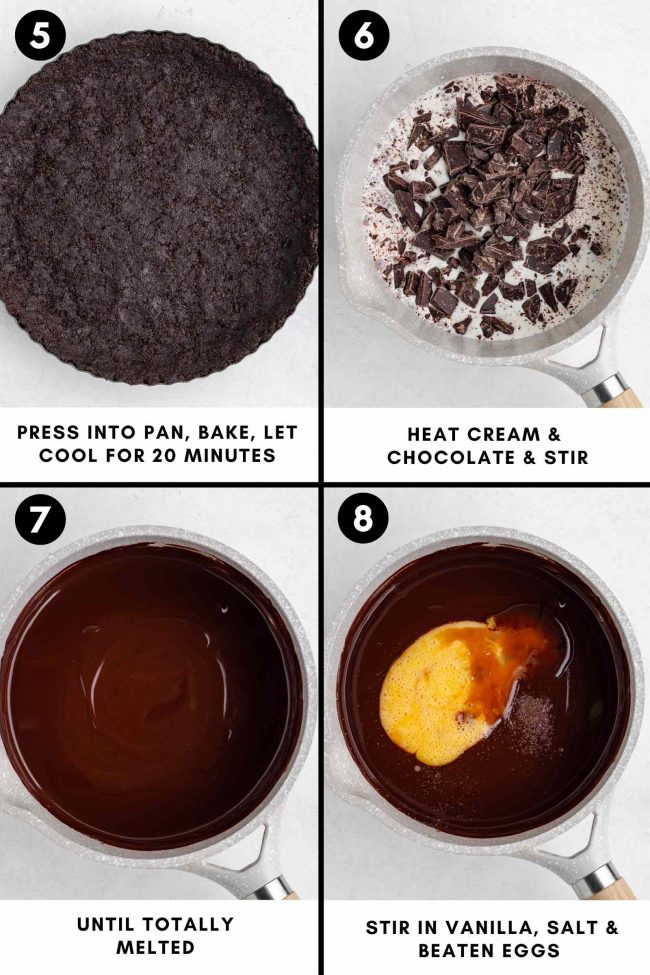
Pulse Oreos in food processor until you have fine crumbs.
Transfer to bowl and stir in the butter until well combined.
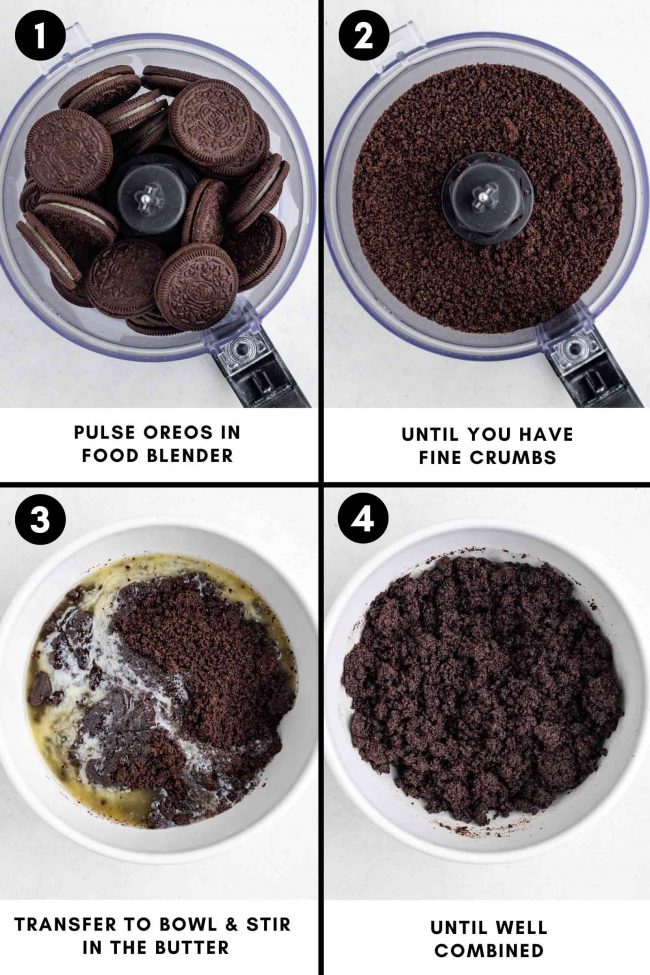
Press into pan, bake, let cool for 20 minutes.
Heat cream and chocolate and stir until totally melted.
Stir in vanilla, salt and beaten eggs.
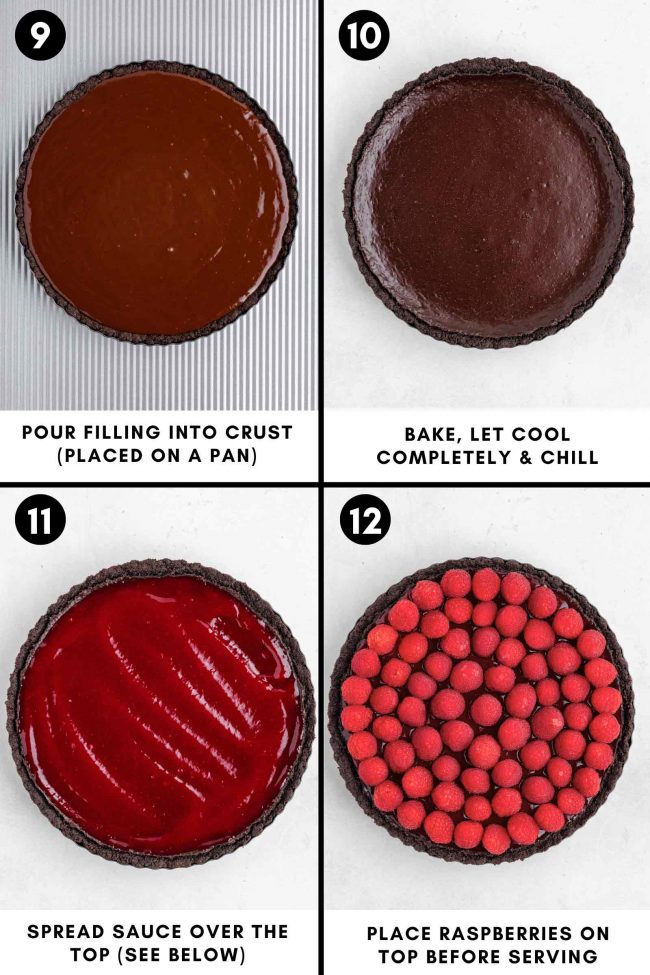
Pour filling into crust (placed on a pan).
Bake, let cool completely and chill.
Spread sauce over the top (see below).
Place raspberries on top before serving.
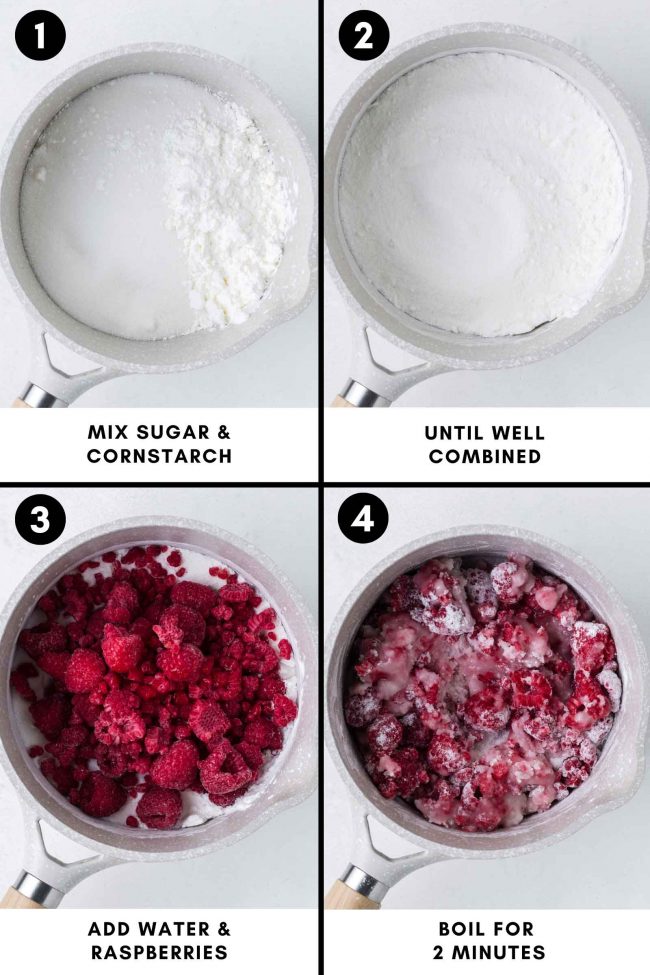
To make the raspberry sauce
Mix sugar and cornstarch until well combined.
Add water and raspberries, and boil for 2 minutes until thickened nicely.
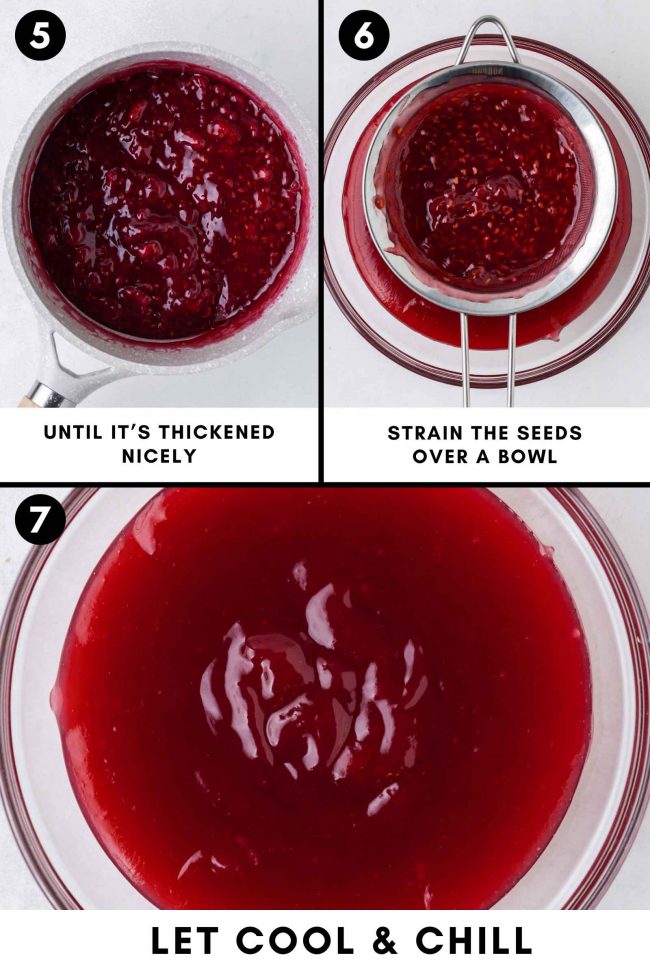
Strain the seeds over a bowl.
Let cool and chill.
Why put the tart pan on a baking sheet?
Placing your tart pan on a baking sheet offers several benefits. It’s such a simple step that enhances both the baking process and the final result!
- Easier handling – the baking sheet provides a stable surface, making it easier to move the tart in and out of the oven without worrying about accidentally tilting or spilling or getting your oven mitt in the filling.
- Protects the oven – if your tart pan leaks butter or filling during baking, the baking sheet catches it, preventing a messy oven and potential burning.
- Even heat distribution – a baking sheet helps distribute heat more evenly, ensuring the tart crust bakes consistently.
- Cooling convenience – after baking, the sheet simplifies the process of transferring the tart to a cooling rack, reducing the risk of burns or accidents.
How to make chocolate curls
The tart certainly doesn’t need even more chocolate, but I think they’re a nice touch.
- Soften the chocolate – if the chocolate is too firm, it may break instead of curling. Microwave the chocolate bar for 5-10 seconds to slightly warm it. Don’t let it melt.
- Create the curls – hold the chocolate bar firmly against the cutting board. Using a vegetable peeler, run the blade along the edge of the chocolate to shave off curls. For larger curls, use the wide side of the bar; for smaller curls, use a narrow edge.
- Adjust texture as needed – if the curls aren’t forming well, the chocolate might be too cold. Warm it slightly again. If the chocolate is too soft and smearing, chill it briefly in the fridge. These curls can be made weeks in advance! Just keep them in an airtight container.
- Store the curls – place the curls on a plate or tray and refrigerate them for 10-15 minutes to firm up before handling.
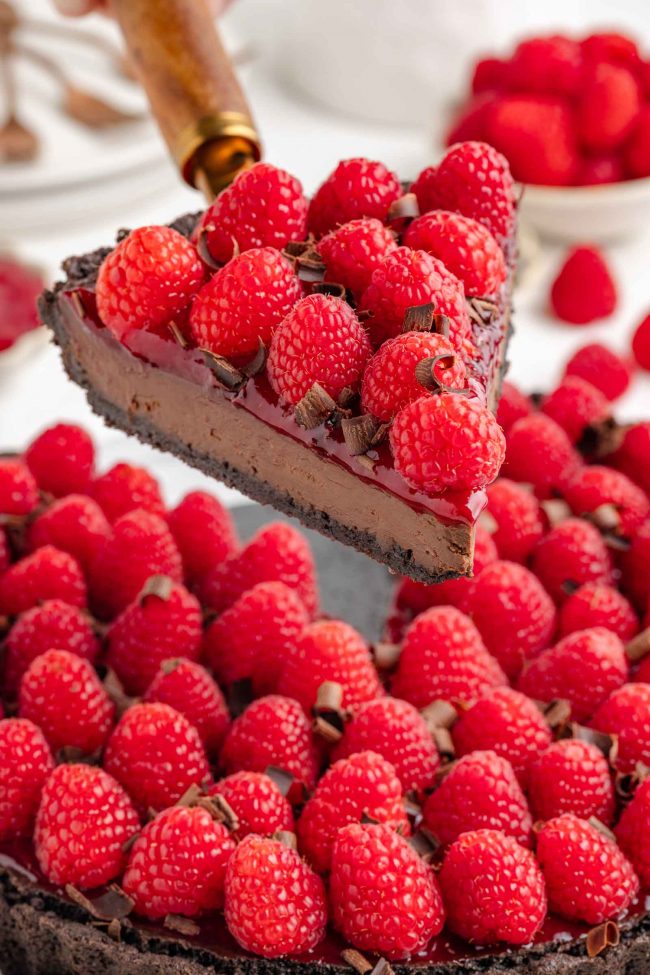
- Decorate the tart – scatter the curls over the tart right before serving for a stunning finish.
Make ahead
This dessert is ideal for preparing in advance, making it a great choice for parties.
No last minute fussing around with this recipe. 🙂
- Raspberry sauce – this can be made up to 4 days in advance. Simply reheat the sauce gently until it’s spreadable. It can be frozen for up to 3 months.
- The baked tart without sauce – can be made 5 days in advance. I happen to know that it only goes moldy after 3 weeks in the fridge. 😄 But I’m going with 5 days to be on the safe side!
- The baked tart with the sauce – you can add the sauce to the tart 1 day ahead of time. You can also freeze it (with or without the sauce) for up to 3 months. Allow the tart to cool fully and set in the refrigerator before wrapping up and freezing. Wrap the tart in plastic wrap and then in aluminum foil. Thaw overnight in the refrigerator before serving.
- The baked tart with the sauce and raspberries – add the raspberries on the day of serving.
Tips
Here are some tips to ensure your tart turns out perfectly every time.
- Use room temperature ingredients – for smoother mixing and better consistency. If you use cold eggs, they won’t combine as well.
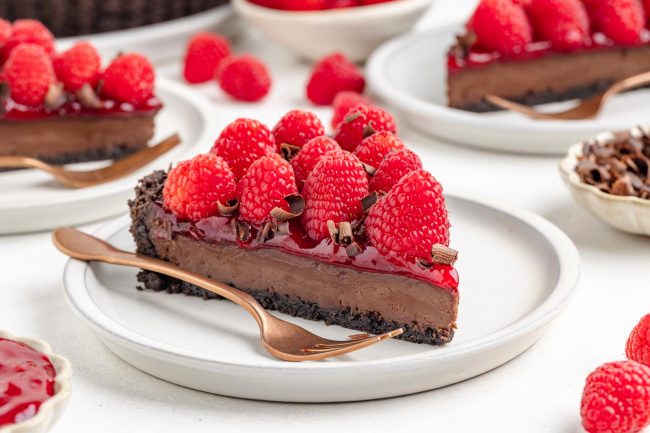
- Chill before serving – allow the tart to chill completely for the best texture and flavor. I know it’s tempting to dig in right away, but it won’t have the right texture until it’s been chilled.
- Use fresh raspberries – for a vibrant, beautiful presentation. Frozen raspberries would look bad and make the tart soggy.
Troubleshooting
You really shouldn’t run into any issues, as long as you follow the recipe. If you encounter any issues while making this tart, here are some solutions.
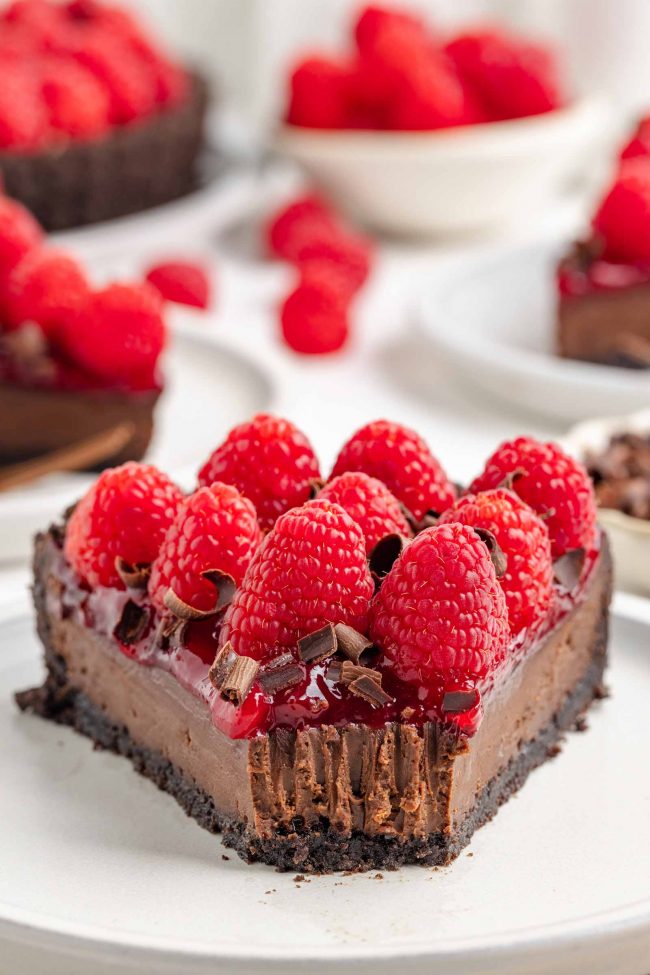
- Crust is crumbly – ensure the Oreo crumbs are finely ground and well combined with the butter. Also, be sure not to overbake it!
- Filling is lumpy – make sure the chocolate mixture has cooled slightly before adding the eggs.
- Sauce is too thick/thin – reheat gently and stir in a small amount of water to thin it out. But I really doubt it’ll be too thick. If it’s too thin, just cook it a bit longer.
As an Amazon Associate, I earn from qualifying purchases. For more info, see my disclosure.
Gluten-free version
If you’re using the Oreo crust option, substitute with gluten-free chocolate cream sandwich cookies. Here are a few great choices.
The rest of the recipe is naturally gluten-free.
If making the totally homemade chocolate cookie crust, you can use oat flour, buckwheat flour or Bob’s Red Mill 1-to-1 Gluten-Free Baking Flour. I can’t say how the crust would turn out with other brands.
If you don’t have Bob’s on hand, I recommend using either of the other two options. Just be sure your oat or buckwheat flour is labeled as gluten-free!
Both oats and buckwheat are naturally gluten-free but may become contaminated during manufacturing. Always look for “gluten-free” on the packaging to ensure safety.
For more details, visit Is Buckwheat Gluten-Free? and Are Oats Gluten-Free?
I hope you’ll enjoy this raspberry chocolate tart! If you try it out, I’d love to hear your thoughts below in the comments. Thanks! 🙂
❀

- Prep Time:
- Cook Time:
- Ready in:
- Yield: 8-12
Ingredients
- 24 (275 grams) regular or gluten-free Oreo cookies
- 1/4 cup (56 grams) unsalted butter, melted
- 1/2 cup (62 grams) flour
- 3/4 cup (150 grams) granulated sugar or (125 grams) coconut sugar
- 1/2 cup + 1 tablespoon (65 grams) Dutch-process cocoa powder
- 1/8 teaspoon salt
- 5 tablespoons (70 grams) unsalted butter, melted
- 1 3/4 cups (298 grams) semi-sweet chocolate chips or chopped chocolate
- 1 1/2 cups (355 milliliters) heavy cream
- 1 teaspoon vanilla extract
- 1/8 teaspoon salt
- 2 large eggs (50 grams each, out of shell), beaten
- 1 cup (200 grams) granulated sugar
- 3 tablespoons (30 grams) cornstarch
- 3 tablespoons water
- 1 1/2 cups (177 grams) frozen raspberries
- 1/2 teaspoon vanilla extract
- 3 cups (about 14oz / 400 grams) fresh raspberries
- chocolate curls, optional
Oreo crust option:
Homemade cookie crust option:
Filling:
For the sauce:
For topping:
Directions
- Get out a 9″ non-stick tart pan with a removable bottom. Preheat the oven to 350 °F (175 °C). Place a baking sheet that’s large enough for your tart pan on the lower-third section of your oven. This will help you more easily remove the baked tart crust from the oven.
- In a food processor fitted with an S-blade, pulse the Oreos (including the filling) until you have fine crumbs.
- Transfer to a medium mixing bowl and stir in the melted butter.
- Mix with a fork until thoroughly combined.
- Spread the crumbs evenly over the bottom of the ungreased tart pan and up the sides. Use the bottom of a measuring cup, a glass or your hands to firmly press the mixture into the pan.
- Bake for 6-8 minutes (carefully place it on the hot baking sheet) or until fragrant and firm to touch.
- Let cool for at least 15 minutes while preparing the filling.
- In a large mixing bowl, mix together all the crust ingredients except for the butter until well combined.
- Stir in the butter until combined.
- Pat onto the bottom and up the sides of the ungreased tart pan. Use the bottom of a measuring cup, a glass or your hands to firmly press the mixture down.
- Bake for 9-12 minutes (carefully place it on the hot baking sheet) or until it no longer appears wet. It’s still going to be soft but shouldn’t be wet. If it already has holes in it and looks like it’s bubbling, remove it immediately. If it happens, it’s fine, but ideally, you want to remove it before that happens. Let cool for at least 15 minutes while preparing the filling.
- Transfer the tart pan, along with the baking sheet it’s on, to a wire rack to cool for 20 minutes while preparing the filling. After about 5-10 minutes, the tart pan should be cooled enough for you to use your hands to remove the pan from the baking sheet. Place the tart pan back on the cooling rack to finish cooling.
- While the crust is cooling, prepare the filling.
- In a medium saucepan over medium-low heat, mix together the chocolate and heavy cream and stir frequently until the chocolate is melted. Remove from the heat. It shouldn’t be extremely hot (mine was 140 °F (60 °C)), which is well under the coagulation temp of 180 °F (83 °C). If yours is closer to coagulation temp, let it cool for about 5-10 minutes, while stirring occasionally so that the eggs don’t scramble when added.
- Stir in the vanilla extract, salt and beaten eggs.
- Place the tart pan back on the baking sheet.
- Pour the filling over the partially cooled crust, making sure not to pour the filling over the sides of the crust. I had about 1 tablespoon left over.
- Bake for 22-27 minutes or until the center is set. I did 25.5 minutes. At 22 minutes, the center was still very jiggly and had a different appearance than the rest of the tart. When you tap the pan, there shouldn’t be any ripples, but it won’t be totally firm. I see that chocolate tarts should have an internal temp of 60 °F to 180 °F (71 °C to 82 °C), but when I took mine out, it was 199 °F (93 °C). It might be a little puffed up when you take it out of the oven, but it will soon “deflate.”
- Remove the baking sheet along with the tart and place on a cooling rack for about 15-20 minutes or until you can remove the pan from the baking sheet without burning yourself. Place the tart pan back on the cooling rack and cool for another 45 minutes or until cool enough to place in the fridge. Chill for another 3 hours or overnight before adding the sauce.
- In a small saucepan over medium heat, mix the sugar and cornstarch. Add the water and the frozen raspberries, stirring to combine. Bring the mixture to a boil, then cook, stirring continuously, for about 2 minutes or until it thickens. Stir in the vanilla.
- Strain the seeds using a food mill or fine-mesh sieve set over a bowl. Let it cool for about 10 minutes, stirring occasionally, and then place the bowl in the fridge and let chill for 20-30 minutes before spreading it evenly over the chilled chocolate layer. You can add the sauce to the tart 1 day ahead of time. This can be made up to 4 days in advance. Simply reheat the sauce gently until it’s spreadable. It can be frozen for up to 3 months.
- On the day of serving, top with fresh raspberries and chocolate curls, if using.
- You can freeze the tart (with or without the sauce) for up to 3 months. Allow the tart to cool fully and set in the refrigerator before wrapping up and freezing. Wrap the tart in plastic wrap and then in aluminum foil. Thaw overnight in the refrigerator before serving.
Prepare the crust:
Oreo crust option:
Homemade crust option:
For either version:
Prepare the filling:
Make the sauce:
Notes
- If making the homemade cookie crust, for the flour, you can use 1/2 cup (62 grams) all-purpose flour, whole wheat flour or white whole wheat flour. For gluten-free, you can use 1/2 cup + 1 tablespoon (70 grams) buckwheat flour or 1/2 cup (68 grams) Bob’s Red Mill 1-to-1 Gluten-free Baking Flour or 62 grams gluten-free oat flour.

