These turtle cookies are a decadent treat that combines chocolate, caramel and pecans in every bite. The recipe includes a totally homemade caramel recipe, but store-bought caramels can also be used, and the cookies can be made traditionally, whole wheat, or gluten-free.
If you’re a fan of turtle candies, these cookies will quickly become a favorite. Perfectly portioned and bursting with flavor, they’re a fantastic addition to your dessert spread or a thoughtful gift for the holiday season.
Here I am with yet another rather involved cookie recipe. I normally opt for simpler recipes like these Molasses Cookies or Air Fryer Chocolate Chip Cookies, but if I’m baking for a really special occasion, these turtle cookies are one of my first choices!
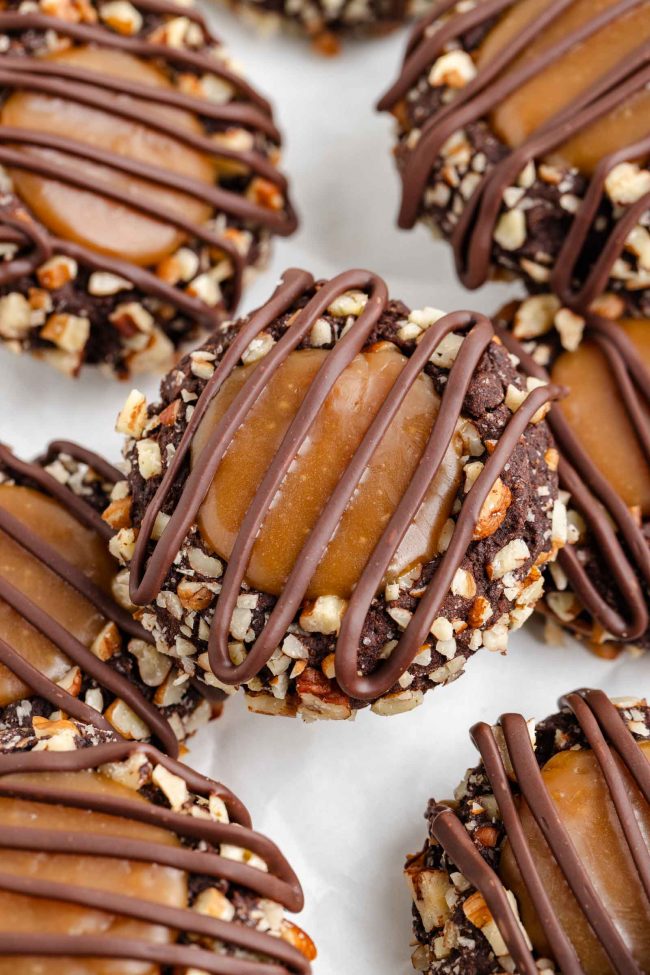
Turtle cookies draw their inspiration from the classic turtle candies, beloved for their irresistible combination of chocolate, caramel and pecans. Over the summer, I shared my recipe for Chocolate Turtles, and now I’m excited to bring you this cookie version, which is perfect for the holiday season or any special occasion.
These cookies take the same classic flavors and transform them into a chewy, chocolaty base topped with a luscious caramel center and a drizzle of melted chocolate. Rolled in chopped pecans for added crunch and flavor, these cookies bring a gourmet touch to classic holiday baking that will impress everyone at the table.
Ingredients
Here’s what you’ll need to make these cookies.
If you want to use store-bought caramels to make your caramel filling, it’s listed as an option in the recipe. You’ll need a 10.8 Share-size bag of Werther’s Soft Caramels or a combination of their smaller bags. Do not use hard candies!
Then you’ll need a bit of milk, cream or half-and-half to melt together with the caramels.
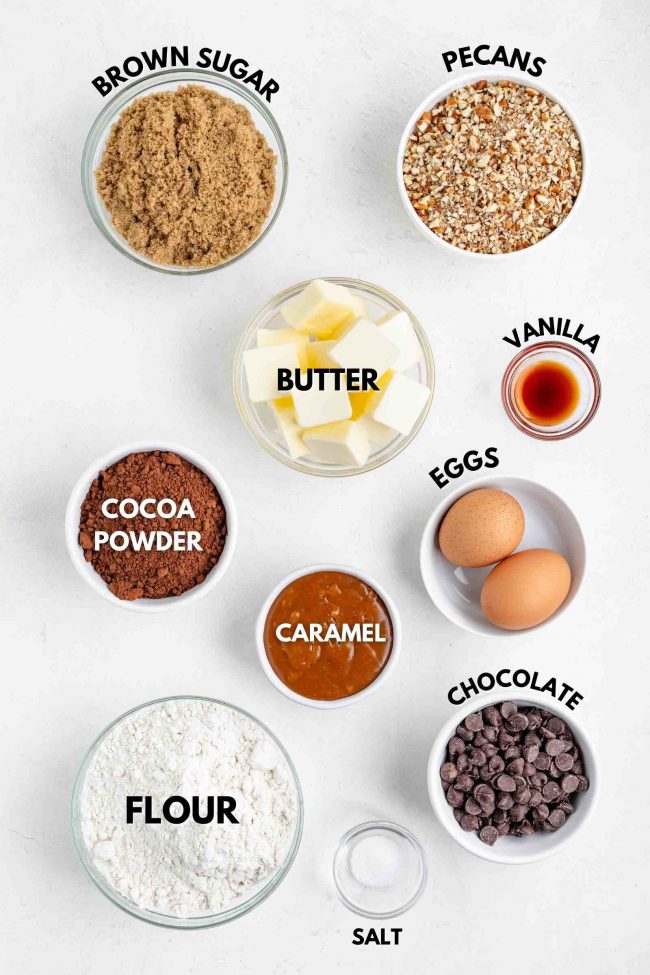
To make the totally homemade caramel option, the only additional ingredient you’ll need is heavy cream. And potentially cream of tartar.
You don’t have to use it, but it is helpful!
Cream of tartar in caramel sauce recipes serves an important role in preventing the sugar from crystallizing during cooking. Here’s how it works.
- Breaks down sugar molecules – cream of tartar is an acid (potassium bitartrate) that helps invert some of the sucrose (table sugar) into glucose and fructose. This process, known as inversion, reduces the likelihood of sugar crystals forming because a mix of sugars is less likely to crystallize than pure sucrose.
- Creates a smooth texture – by minimizing crystallization, the cream of tartar ensures the caramel sauce stays smooth and silky, rather than grainy or gritty.
While cream of tartar isn’t strictly necessary in all caramel recipes, it’s a helpful addition for those who want to ensure a foolproof result. If you don’t have cream of tartar, a small amount of lemon juice or white vinegar can serve the same purpose, as they are also acids. 1/2 teaspoon should be enough to do the trick!
Totally homemade caramel option
I tried a ridiculous number of caramel recipes before I found one with the perfect flavor and that I didn’t manage to ruin. I’m not a gifted caramel maker!
I’ve been using King Arthur Flour’s caramel recipe for most of my caramel needs recently, and I haven’t messed it up yet. 💪
If you’ve never made caramel before, read the instructions several times and have all the ingredients ready to go before beginning.
I only made one change. They instruct you to cook the sugar and water and then add the butter and cream. Then you’re done.
But I have you put it back on the heat and continue cooking until the caramel reaches 235 °F (113 °C). If you take it off the heat when the original recipes tells you to, the caramel doesn’t really firm up.
Can I use store-bought caramel sauce?
If you have a thick store-bought caramel sauce that you like and want to keep these cookies refrigerated, that would work.
You don’t want to use runny caramel sauce in these, as it’d make eating the cookies a bit too messy.
Can I use any chocolate cookie base?
I would imagine that other chocolate thumbprint recipes would work here. But I can’t say for sure without trying.
You can’t just use any chocolate cookie recipe, though. They’d almost certainly spread too flat.
These Almond Flour Cocoa Cookies, for example, spread a bit, but not a ton. I think those would be fine. Same with these Chocolate Coconut Flour Cookies.
Can I skip the nuts?
Sure! You’d have some delicious chocolate caramel thumbprints. They won’t be nearly as nice-looking, though.
Can I use something other than caramel?
You could use ganache to fill them. I’d make 1.5x the ganache recipe in this Spider Cookies recipe.
These Strawberry Preserves would also be a great choice. I haven’t tried it, but I’d bake them for about 6 minutes, add the preserves, and then continue baking.
It’s the same method that I used for my Raspberry Thumbprint Cookies. Baking them a bit before filling ensures that they’re not soggy under the preserves or jam.
How to make them
The full recipe can be found at the bottom of this page.
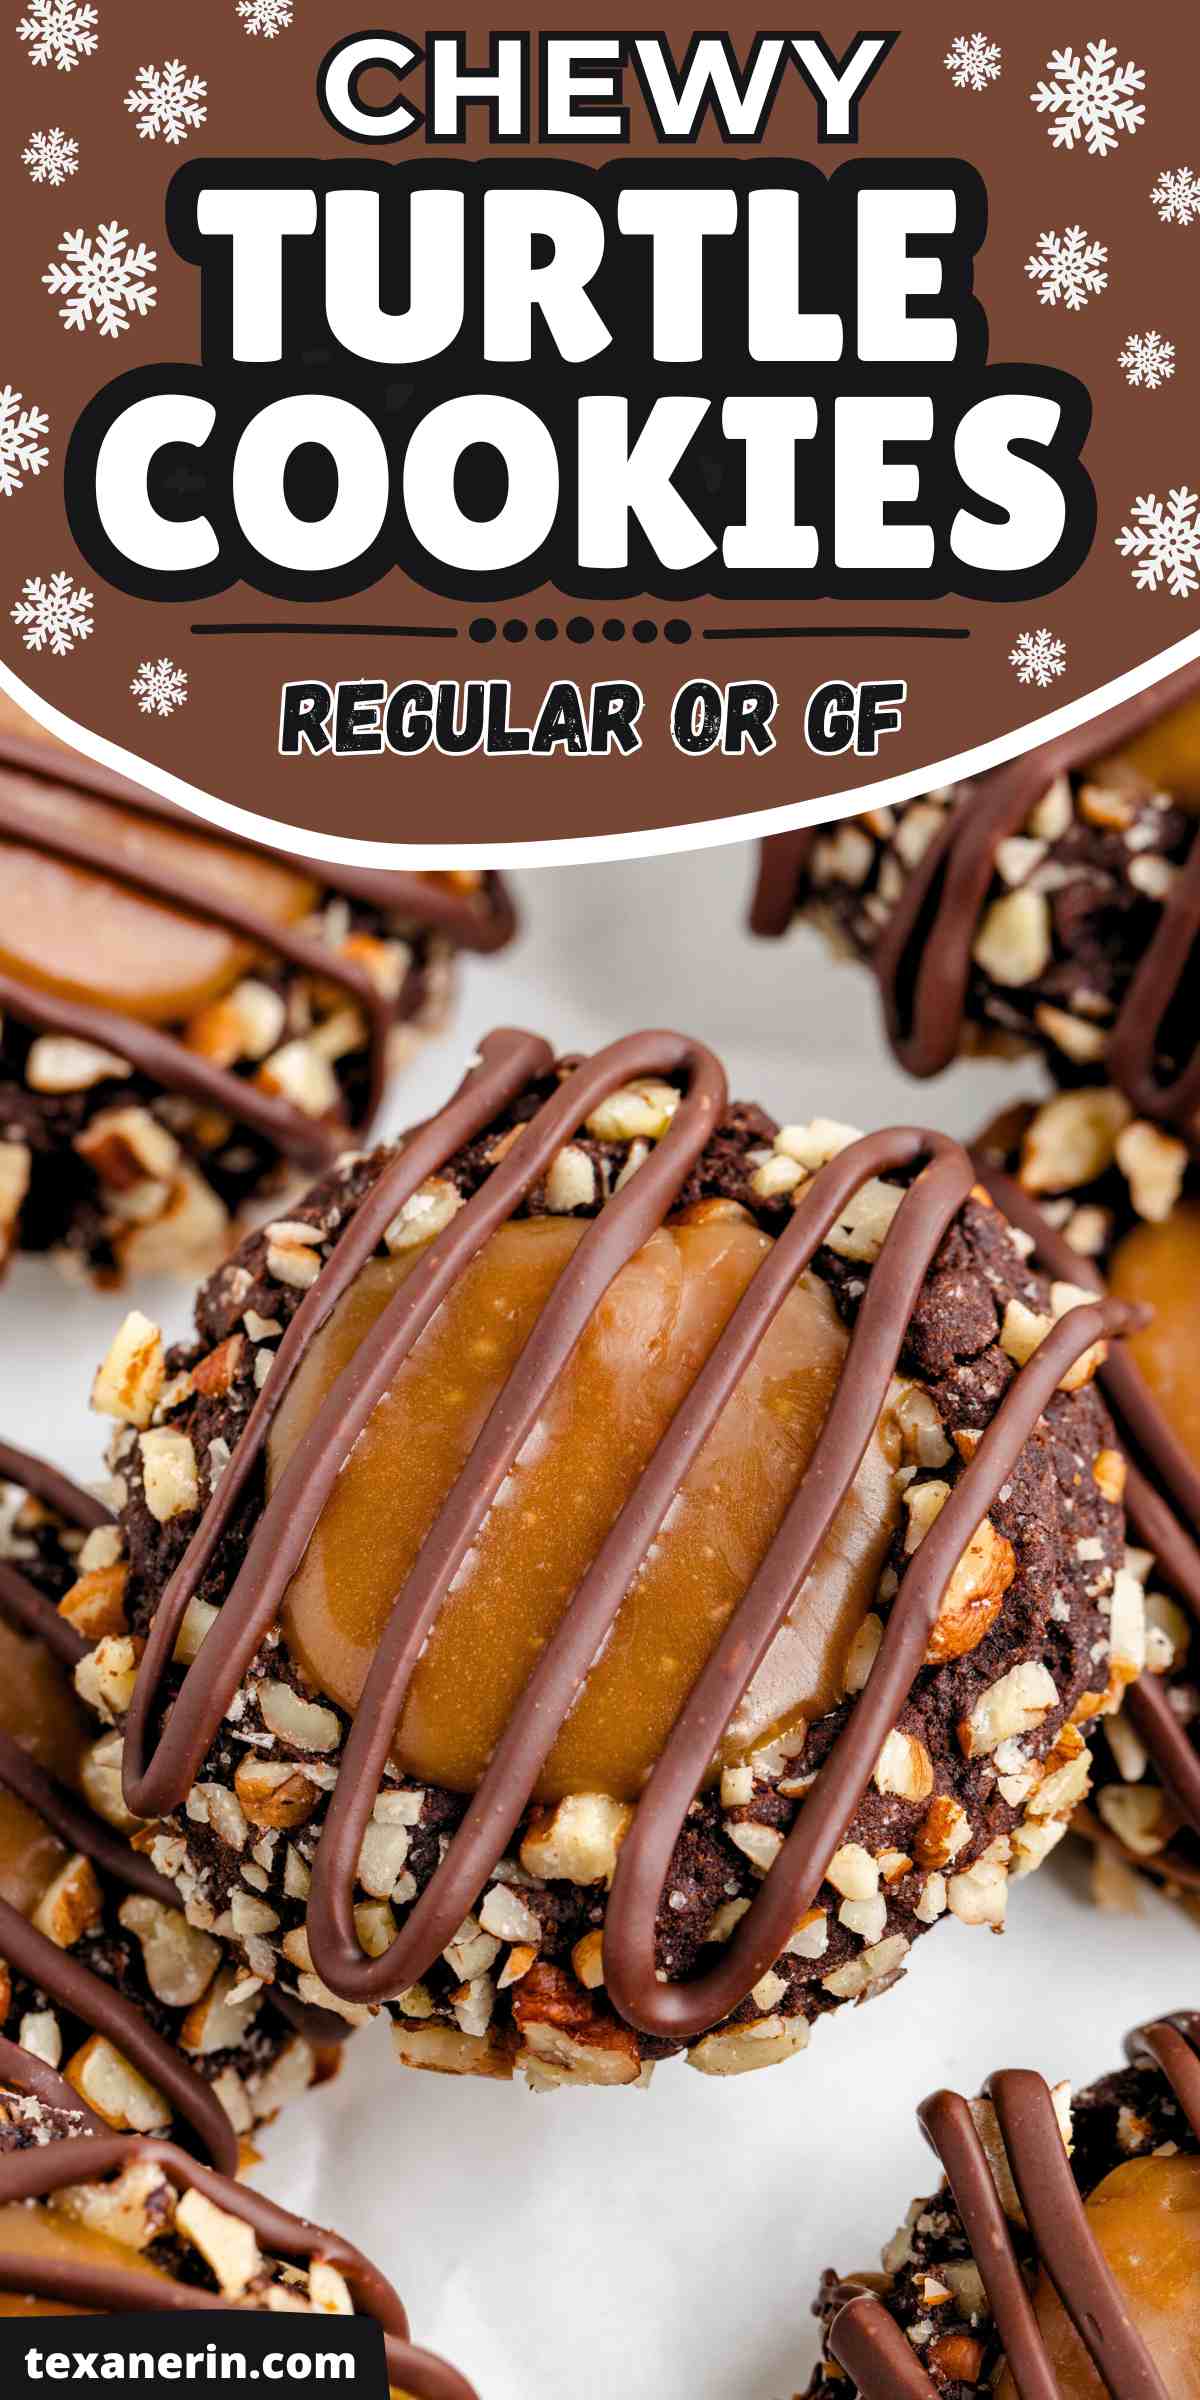
I’m adding the text on the photos as text in the post for people who use text to speech readers.
Mix together the dry ingredients until well combined.
Beat butter & sugar until combined.
Beat in eggs & vanilla.
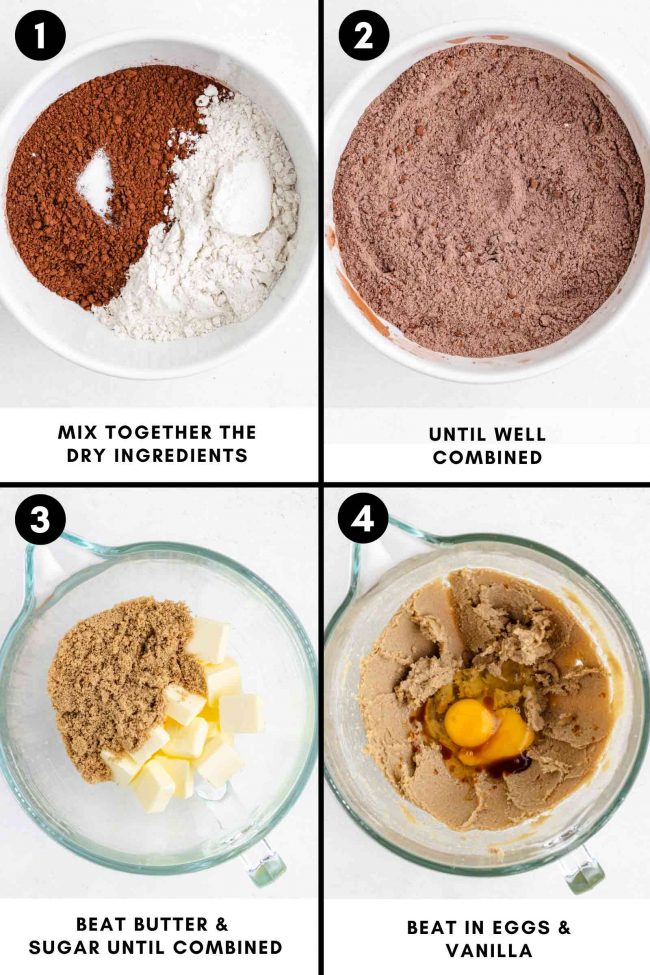
It’ll look weird and curdled.
Beat in the dry mixture until well combined.
Roll into balls and roll in pecans until covered all over.
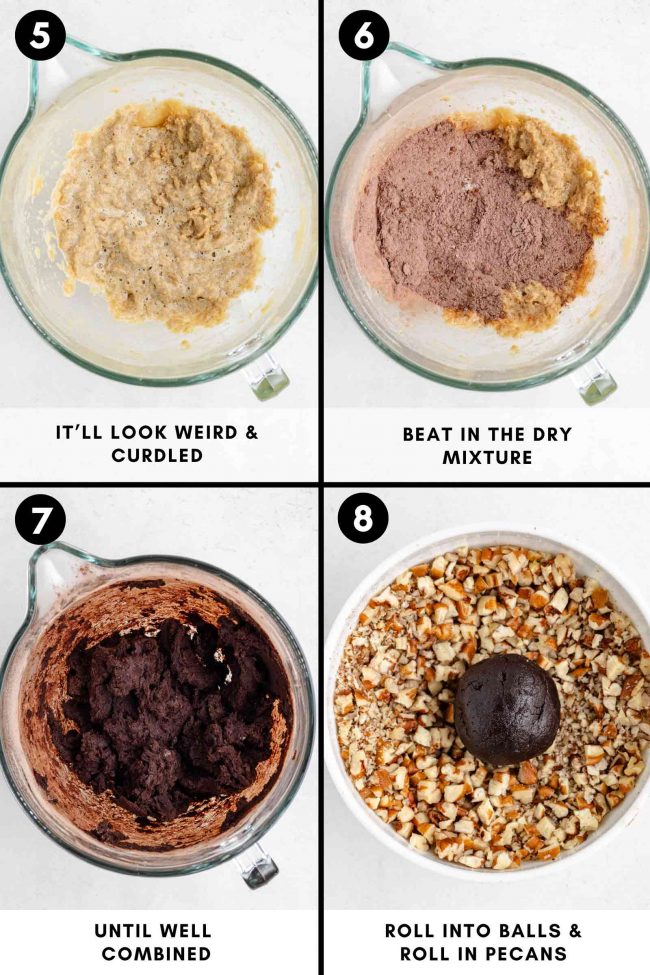
Place on prepared pan.
Create an indentation.
Bake until the pecans have browned.
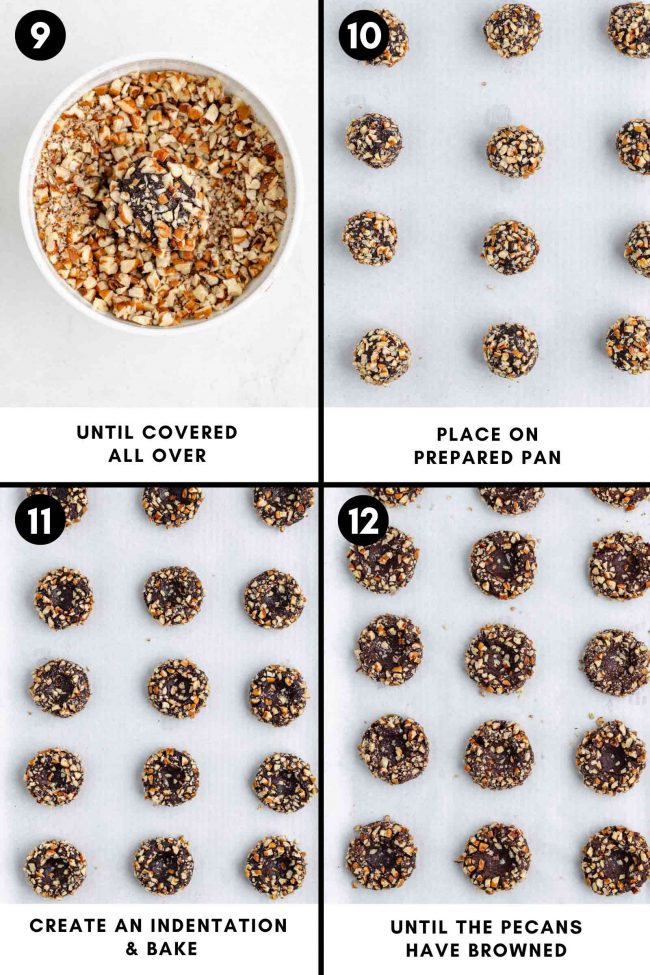
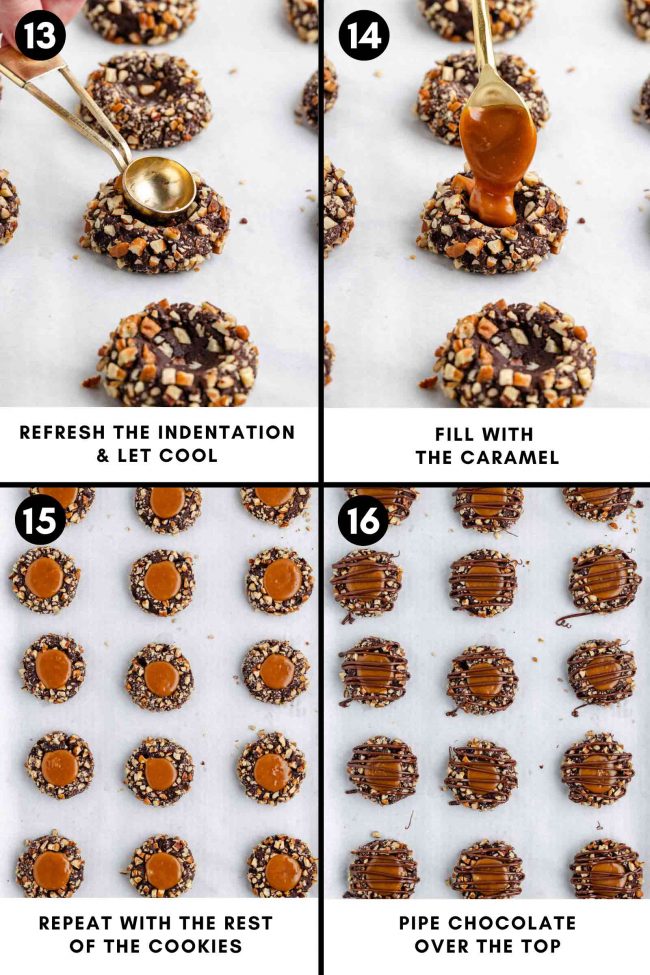
Refresh the indentation and let cool.
Fill with the caramel.
Repeat with the rest of the cookies.
Pipe chocolate over the top.
Tips
To make the best cookies possible, keep these tips in mind.
- Ensure your butter is softened for even mixing but not melted, which could affect the dough’s texture.
- Chill the dough briefly if it becomes too soft to handle while rolling in pecans.
- Use a teaspoon measuring spoon (and not your thumb!) to create consistent indentations in the cookies for the caramel filling.
- Allow the cookies to cool completely before filling them with caramel to avoid melting or spreading.
Troubleshooting
Here are solutions for some possible issues you might run into when making these turtle cookies.
- If the dough is too dry and crumbly, ensure you’ve measured your ingredients correctly and that your butter is at room temperature.
- If the cookies spread too much, your butter may have been too warm. Chill the dough slightly before baking.
- If the caramel filling is too runny, let it cool further before spooning it into the cookies. It should be thick but pourable.
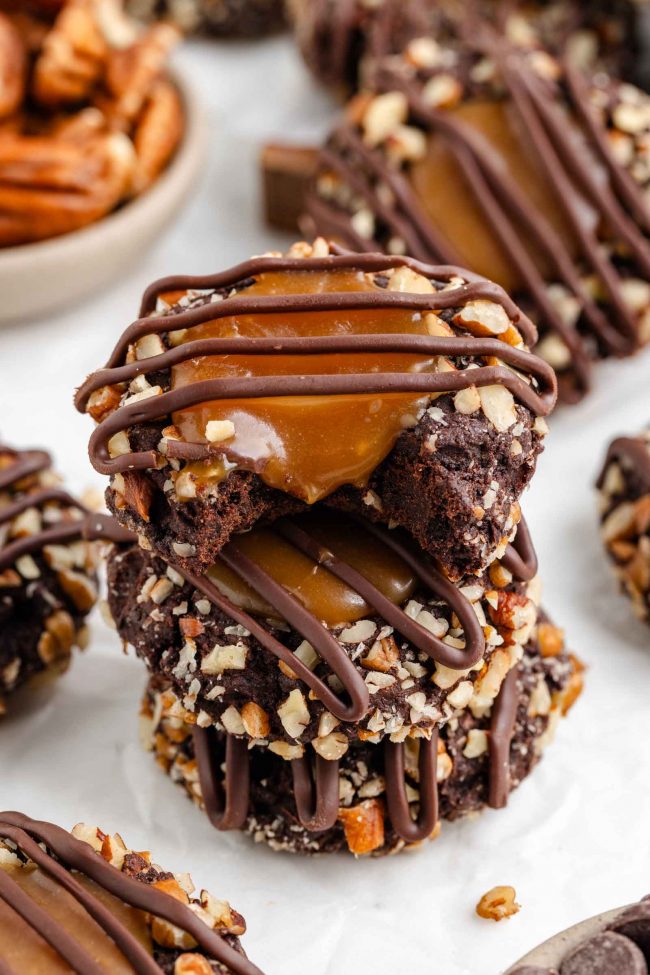
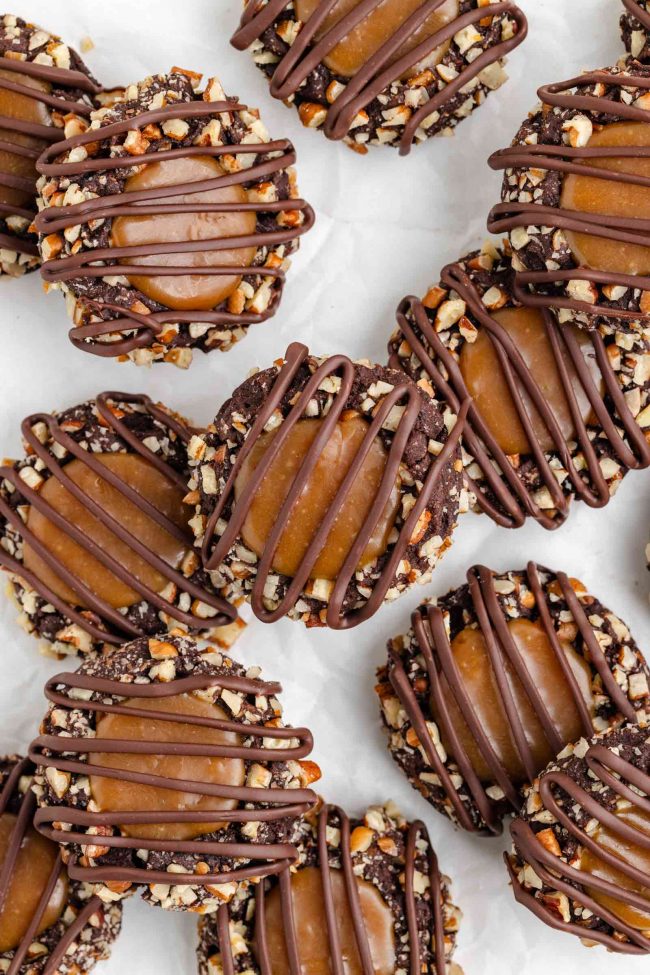
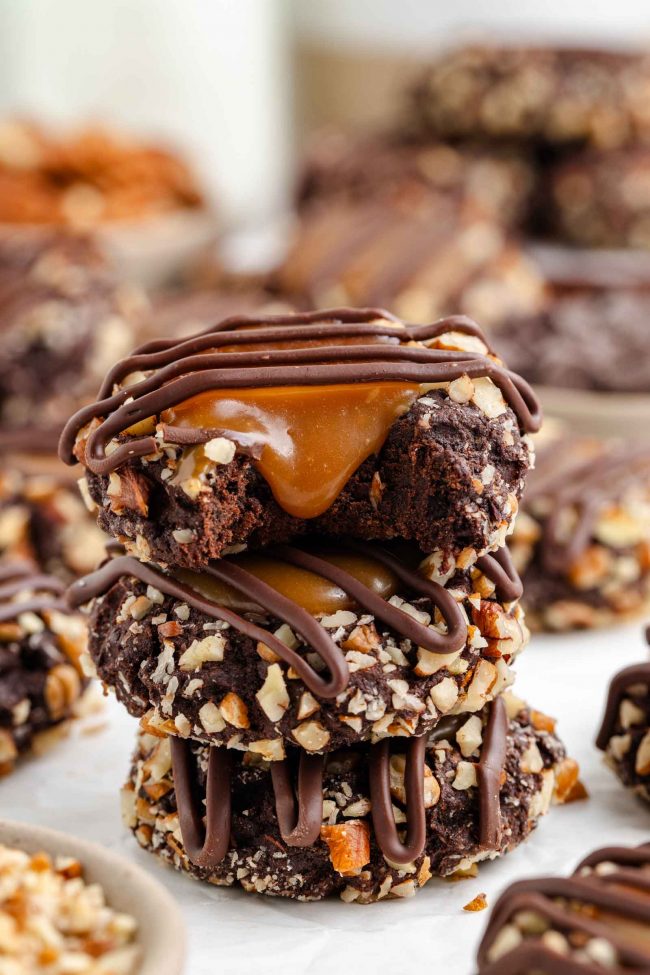
The photo below is a of a cookie that’s just been decorated. The caramel is much firmer once it’s been refrigerated for a few hours.
How to make ahead, store and freeze
- Dough – wrap the discs tightly in plastic wrap, place in a Ziploc and refrigerate for up to 3 days or freeze for up to 3 months.
- Baked unassembled cookies – store in an airtight container for up to 4 days. Assemble them with caramel closer to serving to ensure freshness. For longer storage, freeze the unassembled cookies. Place parchment paper between layers to prevent sticking, and store them in an airtight container for up to 3 months. Defrost at room temperature before filling with caramel.
- Assembled cookies – store in an airtight container in the refrigerator for up to 4 days or freeze for up to 3 months. They freeze great, even with the chocolate drizzle, as long as they’re not stacked.
Homemade caramel can soften at room temperature, especially in warmer environments.
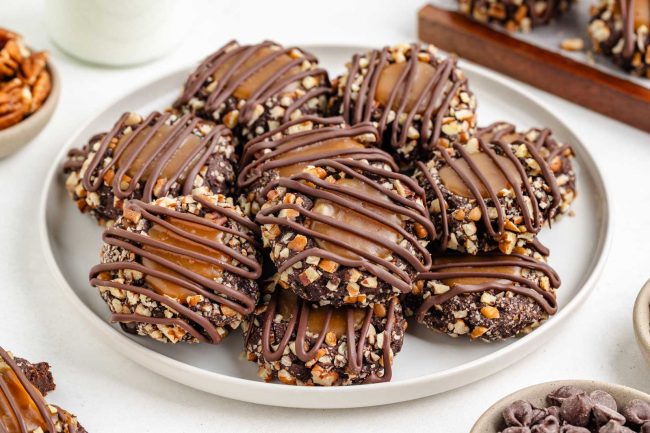
Chilling the cookies ensures the caramel stays firm and prevents it from becoming sticky or runny. It also helps the chocolate drizzle remain intact, making the cookies neater and easier to serve. If you’re bringing them to a party, they’ll stay fine at room temperature for several hours, but chilling beforehand is highly recommended for the best results.
As an Amazon Associate, I earn from qualifying purchases. For more info, see my disclosure.
Gluten-free version
I’ve only tested these with King Arthur Flour Gluten-free Measure for Measure Flour, but I’m pretty sure Bob’s Red Mill 1-to-1 Gluten-free Baking Flour would also give you great results.
Other brands might result in cookies that are sandy, crumbly, or prone to spreading too much. If you’re feeling adventurous and want to try a different flour, make sure to use a blend designed to be a direct substitute for all-purpose flour.
Don’t use almond, coconut, oat, or similar flours, as they won’t work for this recipe. Those flours are not meant as direct subs for all-purpose flour.
I hope you’ll enjoy these turtle cookies! If you try them out, I’d love to hear your thoughts below in the comments. Thanks! 🙂
❀

- Prep Time:
- Cook Time:
- Ready in:
- Yield: 32
Ingredients
- 1 1/2 cups (165 grams) pecans, finely chopped
- 2 1/4 cups (281 grams) flour
- 3/4 cup (86 grams) Dutch-process cocoa powder
- 1/2 teaspoon salt
- 1 cup (225 grams) unsalted butter, softened
- 1 cup (200 grams) dark brown sugar
- 2 large (50 grams each, out of shell) eggs, room temp
- 1 teaspoon vanilla extract
- 1/2 cup (100 grams) granulated sugar
- 1/4 teaspoon sea salt
- 1/16 teaspoon cream of tartar, optional
- 1 tablespoon water
- 3 tablespoons (42 grams) unsalted butter, room temp
- 1/4 cup (60 ml) heavy cream
- 1 teaspoon vanilla extract
- 40 Werther’s Soft Caramels (8.9 oz / 253 grams)
- 2 teaspoons milk, cream or half-and-half
- 3/4 cup (128 grams) semi-sweet chocolate chips or chopped chocolate, melted
For the cookies:
Caramel option 1:
Caramel option 2:
Decoration:
Directions
- Preheat the oven to 350 °F (175 °C) and line a cookie sheet with a piece of parchment paper.
- Place the chopped pecans in a small bowl.
- In a medium mixing bowl, stir together the flour, cocoa powder and salt. Set aside.
- In a large mixing bowl with a stand mixer or electric hand mixer, beat together the butter and sugar at medium speed until well combined.
- Add the eggs and vanilla. It’ll look slightly curdled and odd at this point.
- Gradually beat in the flour mixture.
- The dough will be quite thick. Roll into thirty-two 27-gram balls.
- Roll in the chopped pecans.
- Place on the prepared cookie sheet, about 2” (5 cm) apart, and make an indentation into the top of every cookie with the back of a 1-teaspoon measuring spoon.
- Bake for 10-13 minutes or until the pecans have browned and the top of the middle of the cookies appears dry and not wet. Wash the teaspoon and use it again to refresh the indentation.
- Let cool completely. While they’re cooling, prepare the caramel.
- Place the sugar, salt, cream of tartar, and water in a deep, heavy-bottomed saucepan that holds at least 1 1/2 quarts (the syrup will bubble up as it cooks). Stir briefly to combine, then set the pan over medium-high heat. From this point on, swirl the pan instead of stirring to help prevent crystals from forming.
- When the mixture comes to a boil, reduce the heat to medium and watch it carefully. No walking away! The syrup will start turning golden at the edges. Gently swirl the pan without lifting it off the heat to even out the color.
- As the syrup darkens to light amber, remove the pan from the heat as soon as you notice darker streaks. Avoid letting the sugar syrup become too dark, as it will continue to cook slightly after being removed from the heat. Darker syrup has a richer flavor, but letting it go past medium amber can result in bitter or smoky notes.
- Immediately after removing the caramel from the heat, stir in the butter, one tablespoon at a time. Gradually add the heavy cream, stirring until fully incorporated. Return the pan to the heat and continue cooking until the mixture reaches 235 °F (113 °C). Remove from the heat again, stir in the vanilla, and mix until smooth.
- Let the caramel cool in the pan on a cooling rack for 30–40 minutes. If you want it to cool faster, transfer it to a wide, shallow, heatproof container. The caramel should still be pourable but not too runny.
- This caramel can be made up to 3 days in advance and stored in the refrigerator. It will firm up in the fridge, so reheat gently to make it pourable again.
- In a small microwave-safe bowl, melt the caramels and milk, cream or half-and-half together in the microwave for about 30 seconds. Stir until smooth and fully combined.
- Once the caramel has cooled, spoon caramel into the cookies (about 1 teaspoon if using caramel option 1 or 3/4 teaspoon if using option 2). If your caramel is still kind of liquidy, then refrigerate the cookies until it’s firmed up (about 1 hour in the fridge or 15 minutes in the freezer). You want it to be able to hold up the chocolate.
- Pipe the melted chocolate over the cookies.
- Refrigerate in an airtight container for up to 3 days. They can also be frozen for up to 3 months.
Make the cookies:
Caramel option 1:
Caramel option 2:
Fill and decorate:
Notes
- You can use all-purpose or whole wheat flour, or for gluten-free, use King Arthur Flour Gluten-free Measure for Measure Flour.
- If using Werther’s, buy the 10.8 oz “Share Size” bag. Do not use hard caramels. I haven’t tried them with the Chewy variety.
Caramel option 1 adapted from King Arthur Flour

